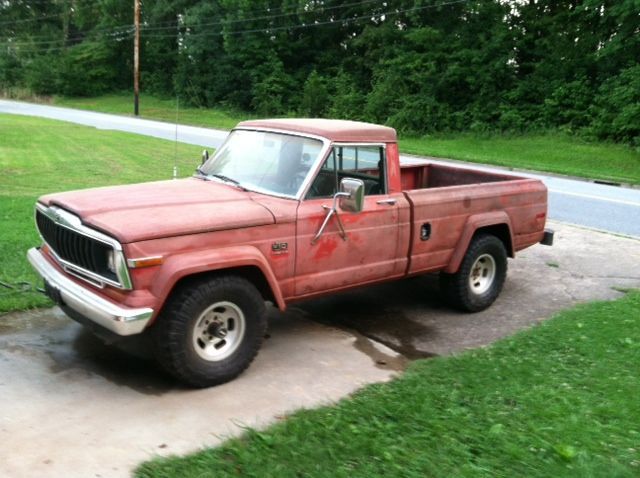
'83 J-10 Daily Driver Build

Area to show off your Custom Build threads.
User avatar

Topic author
Atla
Posts: 303
Joined: Tue Jul 31, 2012 6:47 am
Location: North Carolina

'83 J-10 Daily Driver Build

Post by Atla »

Last summer I picked this running 1983 J10 up for a nice $800.

Image

The rundown.
-238 engine
-T177 transmission(Same as T176 except longer shaft)
-D44 Front/AMC 20 rear 3.15 gears
-NP208 Transfer case
-Motorcraft 2150 carb

The good.
-130k original miles, engine was rebuilt less than 20k miles ago.
-New NP208 Transfer Case
-New Fuel Pump
-New Water Pump
-New Distributor/Caps
-New Shocks
-New adapted Ford Carb(MC2150)
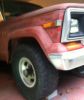
-Minimal body rust, slight bondo on the bed before and after the fenders.
-Good tailgate(Except for that -one- dent...)
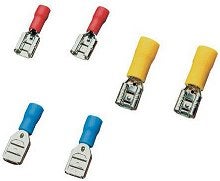
-All wiring/functions are good and functional and original...except Back up lights and Fuel Gauge
-Inside is in fantastic shape, except seats are stained, and slight tears on driver side seat.
-Some old original jeep hub caps.

The bad.
-Transmission is shot, First and Reverse works. Second and Third is gone, needs rebuild or swap.
-Rear Drum brakes are locked up, they rotate, but drag.
-Slight rust damage underneath. (I shouldn't even mention that cause it's pretty awesome how little there is compared to most of your rigs :P)
-Bald/dry rotted 29 inch tires.

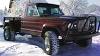
Got it loaded up on a flatbed, and brought home.

Image

Fantastic shape isn't it?

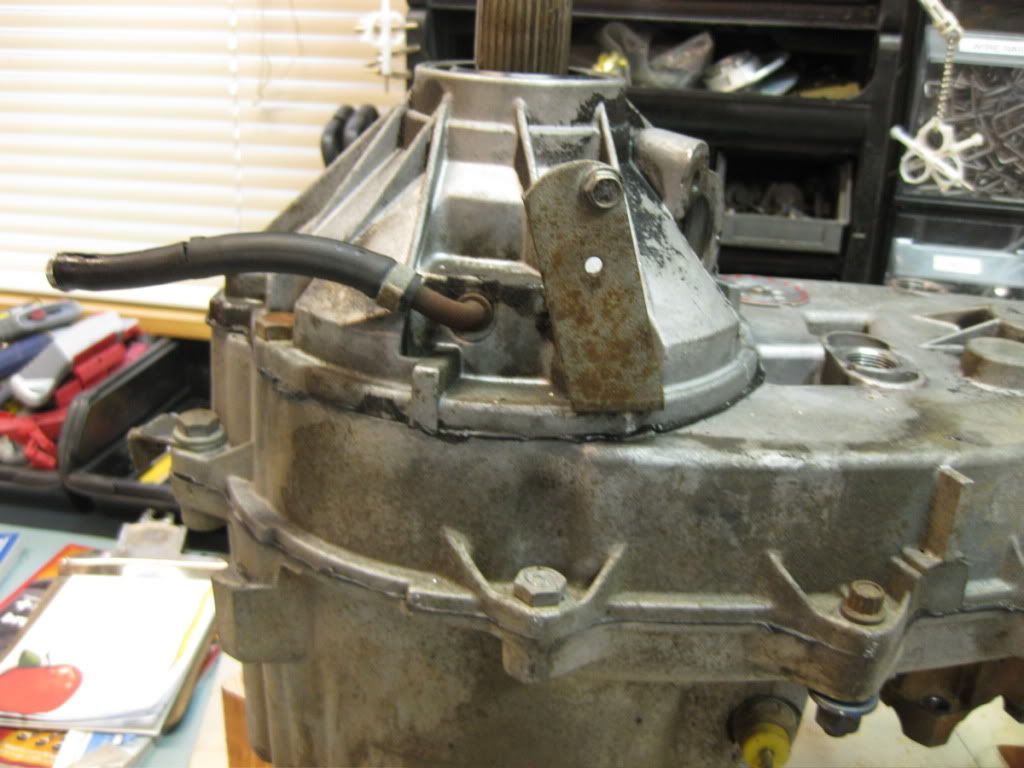
Pulled the transfer case and transmission to see about a rebuild or a swap...turns out the 'blown transmission that sounds like a bucket of bolts in 2nd and 3rd just needed a new input bearing as the old ones cage had broken into pieces) :D

Image

Fixed the bearing(From Morris4x4!) and attached the backup light wire(it was dangling) and took it for a spin and..... it wouldn't go over 25 mph. On a flat road.

So!

Started working on it off and on, dropped the fuel tank - checked the fuel sender unit and it was rusted to junk.

Image

Bought a BJ's Offroad and replaced it.

Image

Than began replacing all the fuel lines, as they had dry rotted out and I believed that it was sucking in a lot of air with the fuel.

Picked up some used new shoes and rims. (33's on five slot rims - worn down to about 31.5")

Image
Image

At the same time as replacing the sender unit, I had some new straps fabbed up for my skid plate as one had rusted off.

Image

These things are -still- a PITA. The metal fab shop measured the originals, cut to the proper lengths - then folded the flanges for the bolts... so they ended up to short by almost an inch and a half. Then they threw away the original.

Now I'm on my second set, which needs the holes redrilled because it bows out under the tank when trying to install them. Ugh.

Cleaned the seats up as good as possible.

Image

Pulled the carpet and saw the holes in the floor pans.

Image

Not so bad, the driver side is worse. I can't find a pic, but they replaced half the driver side with a piece of tin roofing. :banghead:

The floor pans will be done after I make it driveable again. As I don't have a welder yet.

Opened up the front D44 pumpkin and replaced the fluid.

Image

A little gross. Probably the original fluid.

And this is where I am.

I've a lot of small things to do, and a few big things.

-I've a slightly used HEI Distributor to install. http://www.summitracing.com/parts/sum-850047
-The Rear axle needs a new pinion seal, as well as getting the diff cover off to check and refill - those torx bolts have stumped my repeated attempts.
-Got to get those fuel tank straps finished.
-Haven't fired it up since I replaced fuel sender and lines. (Hasn't been fired in almost a year now)
-Possible Carb rebuild.
-Need lift.
-Fix transmission leak where it bolts up against the transfer case.
-Reattach E-Brake.
-Completely go over front and rear brakes.
-Get that stinking mud daubber nest off it.... :banghead:
-Need new fuel filter that I can hook the return line up to. (Current one doesn't have return hookup)
-New U-joints all around.

And well, lots and lots more. Lots of minor stuff and lots of major 'wishful stuff'... like new seats.


I've a 2001 Jeep TJ that is my current daily driver, that gets a wonderful 12.5 mpg. The plan is to turn this truck in my DD and the TJ into my designated 'toy'.

The goal is by winter to have this sucker up and running without problems. It needs to survive a 50 mile round trip to work on the interstate.

:-bd
~Atla. (I'm just here for the pictures)
1983 J-10
2001 TJ

My Build Thread - http://fsjnetwork.com/forum/viewtopic.php?f=12&t=2722

Road Trip
Posts: 313
Joined: Mon Jun 11, 2012 8:46 am
Location: Bryan, Texas

Re: '83 J-10 Daily Driver Build

Post by Road Trip »

Welcome to the restoration world! As a wise man told me, enjoy the journey, it's not a race. Keep posting pictures as you work on it.
Robert
User avatar

66stepside
Posts: 3792
Joined: Sat Oct 13, 2012 9:59 pm
Location: Spokane Valley, WA.

Re: '83 J-10 Daily Driver Build

Post by 66stepside »

Road Trip wrote:Welcome to the restoration world! As a wise man told me, enjoy the journey, it's not a race. Keep posting pictures as you work on it.
X2 on everything.

It's looking good!
User avatar

Topic author
Atla
Posts: 303
Joined: Tue Jul 31, 2012 6:47 am
Location: North Carolina

Re: '83 J-10 Daily Driver Build

Post by Atla »

I just switched from Second to Third shift this week, so my schedule is pretty out of whack. But I was able to crawl under today.

After constant leak problems from my Transmission(where it mates to the Xfer Case), I finally removed it for the third...or fourth... time and took off the new gasket and used some Hi Temp RTV sealant. Now I'm actually concerned I used to much and it may have squished into the bearing.... I guess after I get it running I'll flush it out and check for pieces of red sealant.

The bottom bolt had stripped out(Gotta love Aluminum..pay attention to the torque numbers!). I picked up an identical size with a different thread rate, and it worked perfectly and tightened up.

After an hour now, no leaks still. Thank goodness.

I had never pulled a transmission/transfer case before this - and now I've done the same one several times I think I can do it in my sleep. Gotta love a learning curve like that. :)

Got optomistic and started hooking up sensors and wires. The back up light connection doesn't feel very secure, I'll have to keep an eye on that.

Dumb wiring question, if I use these to connect a wire - is wrapping electrical tape around it legit? Or do I need to use something else?

Image
~Atla. (I'm just here for the pictures)
1983 J-10
2001 TJ

My Build Thread - http://fsjnetwork.com/forum/viewtopic.php?f=12&t=2722

suttonlive
Posts: 79
Joined: Sun Dec 09, 2012 7:28 pm
Location: Texarkana, TX

Re: '83 J-10 Daily Driver Build

Post by suttonlive »

Dumb wiring question, if I use these to connect a wire - is wrapping electrical tape around it legit? Or do I need to use something else?
The basic need is to make the proper electrical connection and insulate the connection. If a spade connector is the correct connection then the question is mainly professionalism or craftsmanship. A couple of wraps of good electrical tape will certainly do the job for most 12VDC applications, but you could use heat shrink, or purchase insulated spade connectors. (a sleeve goes over the connection)

my .02 :)
Suttonlive
'90 Grand Wagoneer - Nice mostly stock DD
'78 Cherokee Chief - 35" 6" Lift 401, TF727, d300 (Not original Drive train)
'76 Wagoneer Stock 360, t400 (Motor pulled. Will rise again)
'76 J-20 Stock LS Swap L92 6.2L, 6l80e, Atlas II
'68 Gladiator 327, 4-speed, survivor
'64 J-200 "FlatTop"Next project. Resto-Mod that me and my daughter work on. "on pause"
'79 Cherokee - Donor '64 j-200 Donor
User avatar

66stepside
Posts: 3792
Joined: Sat Oct 13, 2012 9:59 pm
Location: Spokane Valley, WA.

Re: '83 J-10 Daily Driver Build

Post by 66stepside »

I use electrical tape as added insurance, but heat shrink wrap when I want it to look nicer.
User avatar

Topic author
Atla
Posts: 303
Joined: Tue Jul 31, 2012 6:47 am
Location: North Carolina

Re: '83 J-10 Daily Driver Build

Post by Atla »

The RTV High Temp was the way to go it seems, still no leak issues.

Re-attached the 4WD shifter, and the front driveshaft.

Picked up a U Joint to replace the one I dropped and lost needle bearings out of for the rear driveshaft. Can't break the U Joint Snap Rings loose, put some Kroil on it and it's penetrating now. They are pretty gnarly looking. Crusty as all get out.

If anyone has a good idea for how to keep the vent hose for the Transfer Case attached, I'm all ears.

This is where it 'attaches'.
Image

This is one 'attached'.
Image

The fitting just slips down into the hole, but there is nothing keeping it there. The only option I can think of so far is a liberal amount of RTV sealent. :roll:
~Atla. (I'm just here for the pictures)
1983 J-10
2001 TJ

My Build Thread - http://fsjnetwork.com/forum/viewtopic.php?f=12&t=2722
User avatar

Topic author
Atla
Posts: 303
Joined: Tue Jul 31, 2012 6:47 am
Location: North Carolina

Re: '83 J-10 Daily Driver Build

Post by Atla »

Figured out how to get those pesky rusted up snap rings off the UJoint.

Image

Worked great.

Wire brushed the yoke, slapped some Osphos on it, and picked up some Rustoleum to spray it before I install the new UJoint and reinstall the rear driveshaft. That is on tomorrows agenda.

Decided it had been sitting and waiting long enough, and I really wanted to clean up the garage and wash the truck, I was getting pretty tired of sweeping out the tons of cobwebs that would appear every time I wanted to crawl under it.

So, I topped off the Transfer Case, lowered it off it's jackstands, and put some fuel in the tank. Poured a little gas into the carb, and it fired up pretty quickly.

This is what the fuel filter looked like originally, you can see how little fuel was actually going through the lines. It's what prompted me to drop the fuel tank and check the fuel sender.

Image

A new BJ's fuel sender, replaced soft lines, and.....

Image

Hard to tell with the lighting, but its full with a small tiny air bubble in the top. Starts up well, idles smoothly.

Since I didn't have the rear driveshaft, I put it in 4WD and backed it out of the garage.

Image

Took a picture before I washed it, but it got pretty dark before I was finished. I just gave it a decent wipe down with a wash rag. The worn out 33's look a lot better than the original 29's that was on it.

Image

Still a lot to do. Need to figure out what fuel filter to get with a return line, and than I have to check into the return line. I'll have to trace it from the fuel tank to the engine compartment, cause it disappears somewhere along the way.

Have yet to take it for a 'real test drive', once I get the rear driveshaft installed and can run it in 2WD I want to take it for a midnight spin(since it has no plates and I live in town) and see if my power problem has been solved with the fuel flow.
~Atla. (I'm just here for the pictures)
1983 J-10
2001 TJ

My Build Thread - http://fsjnetwork.com/forum/viewtopic.php?f=12&t=2722

rocklaurence
Vendor
Posts: 2564
Joined: Sat Mar 30, 2013 6:53 am

Re: '83 J-10 Daily Driver Build

Post by rocklaurence »

So cool! My shop project is a '83 Loredo and I've been DD it for a couple months now. Good luck
User avatar

jaber
Vendor
Posts: 3066
Joined: Sat Aug 27, 2011 5:24 pm
Location: Chino Valley, Az.

Re: '83 J-10 Daily Driver Build

Post by jaber »

Looks like you are making great progress. :-bd

The return line for the fuel should be right next to the supply line. They run parallel up to the steering box area of the frame. Any McParts store will have the right filter. :-bd
Jeff

'46 cj3a
'51 Willys p/u
'51 Willys Parkway Conversion
'74 CJ5
'75 J-20 Wrecker
'75 J-20 Cummins service truck
'77 J-10 p/u
'79 Cherokee
'88 Grand Wagoneer
http://s252.photobucket.com/albums/hh14/jeffaber/
User avatar

Topic author
Atla
Posts: 303
Joined: Tue Jul 31, 2012 6:47 am
Location: North Carolina

Re: '83 J-10 Daily Driver Build

Post by Atla »

Whats the purpose of the return line? Relieve fuel pressure from an over zealous fuel pump?

I need to get a tachometer installed. I plan on putting a new dash panel in, but that's on the back burner for now. I've seen some pictures of tachs mounted around the steering wheel column, it didn't look real pretty but I may go that route for now.

Sounds like I'm getting some noise from my clutch, I replaced the throw-out bearing when I had the Transmission off. I regretted not putting a new clutch in at the time but I didn't have the money. Looks like I'll be regretting it more.
~Atla. (I'm just here for the pictures)
1983 J-10
2001 TJ

My Build Thread - http://fsjnetwork.com/forum/viewtopic.php?f=12&t=2722
User avatar

Strode182
Posts: 374
Joined: Sat Jun 09, 2012 8:38 am
Location: Littleton, Co

Re: '83 J-10 Daily Driver Build

Post by Strode182 »

Atla wrote:Image[/url]
That truck looks just right. I much approve of the tires and wheels.

On the vent pipe, I'd use epoxy to keep it in.

Keep working at it, it's coming along.

rocklaurence
Vendor
Posts: 2564
Joined: Sat Mar 30, 2013 6:53 am

Re: '83 J-10 Daily Driver Build

Post by rocklaurence »

Return line helps prevent vapor-lock by allowing vapor and gas to return to the tank. I think..
User avatar

Topic author
Atla
Posts: 303
Joined: Tue Jul 31, 2012 6:47 am
Location: North Carolina

Re: '83 J-10 Daily Driver Build

Post by Atla »

You are correct. Wikipedia helped set me straight. :)

Super simplified, Vapor Lock is when your hot temp carb meets normal temp fuel and causes gas to go into your lines. Which ain't good. ;)

Anyone know what this thing is for?

Image
~Atla. (I'm just here for the pictures)
1983 J-10
2001 TJ

My Build Thread - http://fsjnetwork.com/forum/viewtopic.php?f=12&t=2722
User avatar

jaber
Vendor
Posts: 3066
Joined: Sat Aug 27, 2011 5:24 pm
Location: Chino Valley, Az.

Re: '83 J-10 Daily Driver Build

Post by jaber »

It looks like the emissions computer I pulled out of my Eagle...
Jeff

'46 cj3a
'51 Willys p/u
'51 Willys Parkway Conversion
'74 CJ5
'75 J-20 Wrecker
'75 J-20 Cummins service truck
'77 J-10 p/u
'79 Cherokee
'88 Grand Wagoneer
http://s252.photobucket.com/albums/hh14/jeffaber/
User avatar

Topic author
Atla
Posts: 303
Joined: Tue Jul 31, 2012 6:47 am
Location: North Carolina

Re: '83 J-10 Daily Driver Build

Post by Atla »

And...here we are.

Things have been at a snails pace through the fall and pretty much dead in the winter.

Anyone else notice this winter has been kinda cold?

I've been reading/researching/learning/etc over the past few months, staying active on the J10 build as much as I can without actually touching it. (I don't have a garage - just an open ended carport)

And this past week, it paid off.

Two major developments, the first is that through a subcontractor for the company I work for - I was told I can have free shipping and very cheap(ie mostly free) powder coating done.

The second development, is that through a stroke of major luck. I hit a FSJ gold mine.

After calling over 12 junk yards with only 2 hits for any FSJs(both being two hours away and Grand Wagoneers), later that day a friend of mine told me that he thought he saw a Jeep Truck at a scrap yard about five minutes from where I work. (I'm new to the area).

We rode out there the next day on my lunch break. I was worried because he thinks the Jeep Comanchee trucks are the same thing as mine. But he was right. And we actually found TWO J10 pickups. (I've only covered one small area of the yard - so there may be more)

The first -
Image

The second -
Image

The first one, pretty rough.

The second one...Gold Mine.

Image
:shock:
Image
Image
Image

So I grabbed some tools, next day on lunch break ran out to grab a few goodies.

Image
$25.

:-bd

Also grabbed the hood release bar(has a handle in the center so you can reach through the Rhino to open the hood). Going to go back and get the hood since it matches the Rhino Grill. There are a few more things I want off it. Three piece bumper, interior parts, etc. Gotta figure out how to get the badges out without breaking them as well. I don't need 'em - but someone here probably does.

I was really searching for a decent frame - because mine needs some patching. I just got lucky.

Gotta do some cleaning, and we will see how it turns out.
~Atla. (I'm just here for the pictures)
1983 J-10
2001 TJ

My Build Thread - http://fsjnetwork.com/forum/viewtopic.php?f=12&t=2722

nc wagoneer
Posts: 590
Joined: Wed Aug 22, 2012 7:59 pm
Location: Madison Co. NC

Re: '83 J-10 Daily Driver Build

Post by nc wagoneer »

You sir, are the luckiest man alive!!! I'll give ya a small profit on that grill and pie pans if ya want it.

Sent from my Motorola Moto X
77 J20 flatbed FOR SALE
"old blue" 79 waggy-sitting in Jake's full size jeep junkyard, traded for j20 parts
Also:
1986 Isuzu Trooper Factory Diesel/5 Speed
1999 Arctic Cat 400 4x4 (weekend toy)
1984 GMC Suburban K10 6.2 Diesel/700r4/np208
Originally Posted by fulsizjeep
"Truth is FSJs are crack on wheels. One taste and you are addicted. Then you just want more. Anyone who does not see this is in denial"

SJTD
Posts: 1923
Joined: Tue May 21, 2013 12:02 pm
Location: Lompoc, Sunland or somewhere between

Re: '83 J-10 Daily Driver Build

Post by SJTD »

Now you should go back and get the hood that fits that grill.
Sic friatur crustulum

'84 GW with Nissan SD33T, early Chev NV4500, 300, narrowed Ford reverse 44, narrowed Ford 60, SOA/reversed shackle in fornt, lowered mount/flipped shackle in rear.
User avatar

BigJ200
Posts: 228
Joined: Tue Jan 17, 2012 1:36 pm
Location: Kuna, Idaho
Contact:

Re: '83 J-10 Daily Driver Build

Post by BigJ200 »

You scored!! It all looks to be in great shape too.

You have a very cool truck project going on. I'm waiting patiently for more.

MB
American Vintage 4x4
"Where four wheel drives are a way of life"
www.AV4x4.com
User avatar

Topic author
Atla
Posts: 303
Joined: Tue Jul 31, 2012 6:47 am
Location: North Carolina

Re: '83 J-10 Daily Driver Build

Post by Atla »

I'll be grabbing the grill and the front clip I'm thinking. That will save me from having to modify tabs and such for lights, or having to cut out for the Rhino Hood Release Latch to go through.

I've got a few small things in the mix now, rebending/drilling the fuel straps so I can be done with the fuel tank.

I have a few parts out being powdercoated.

Should be swapping the pinion seal/nut on the AMC 20 this weekend. If anyone knows what size the pinion nut is - please let me know. Everything I've found has said 33mm or 1 5/16, which is to large to fit inside the pinion yoke. These things ain't cheap... Be nice to have the driveshaft installed... that ought to keep me out from under it for a while - brakes should be all that is left underneath it then.

(Until I pull the bed and have the frame worked on... -shudder-)

Finally getting around to replacing/rerunning the soft return fuel lines. Got the correct fuel filter with a return hookup. I'm going to put the other one before the fuel pump. Just for redundancy. Plastic fuel tanks are nice btw.

Oh, and I have a summitracing 'blueprinted' HEI.

I have to learn how to install that sucker. And get some 8mm Spark plug wires...
~Atla. (I'm just here for the pictures)
1983 J-10
2001 TJ

My Build Thread - http://fsjnetwork.com/forum/viewtopic.php?f=12&t=2722
Post Reply