ChrisHager's 79 J-10 Build Thread
-
 44bz
44bz
- Posts: 1081
- Joined: Fri Jun 08, 2012 6:17 pm
- Location: Oregon City, OR
Re: ChrisHager's 79 J-10 Build Thread
I have a T18/D20 in my 68 J2000 and replaced the original TC shifter with a twin stick from JBFab last year. I'm no expert, but the process should be the same even though yours is ten years newer than mine. To remove - pull the two pins on the shift rails and remove the set screws holding the shifter to the support arm. Then slide the shifter off. I did this out of the truck because the drivetrain was already out and I was in the process of replacing the gaskets and seals in the D20. I had to beat the shifter off with a hammer because the support bar was a bit rusty. The twin stick attaches to the shift rails with new pins, slide it onto the support bar, and reuse the old set screws. The FSJ Dana 20 doesn't need to be opened up at all in order to accept the twin stick and I didn't have any clearance issues with the transmission.
1968 J2000 - AMC 327/T18/D20 (twin stick), stock D44s, 3" body lift, 35x12.50 Goodyear MTRs w/ Kevlar
-
ChrisHager
Topic author - Posts: 182
- Joined: Wed Sep 11, 2013 12:03 pm
Re: ChrisHager's 79 J-10 Build Thread
Awesome! I hope it works out that well for me!
ChrisHager's 79 J-10 Build Thread: http://fsjnetwork.com/forum/viewtopic.php?f=12&t=3585
-
 jaber
jaber
- Vendor
- Posts: 3067
- Joined: Sat Aug 27, 2011 5:24 pm
- Location: Chino Valley, Az.
Re: ChrisHager's 79 J-10 Build Thread
http://www.fsjnetwork.com/forum/viewtop ... f=15&t=224
Towards the end of the page I have pics of my home made twin setup. I used a set of Willys shifters I had laying around.
Towards the end of the page I have pics of my home made twin setup. I used a set of Willys shifters I had laying around.
Jeff
'46 cj3a
'51 Willys p/u
'51 Willys Parkway Conversion
'74 CJ5
'75 J-20 Wrecker
'75 J-20 Cummins service truck
'77 J-10 p/u
'79 Cherokee
'88 Grand Wagoneer
http://s252.photobucket.com/albums/hh14/jeffaber/
'46 cj3a
'51 Willys p/u
'51 Willys Parkway Conversion
'74 CJ5
'75 J-20 Wrecker
'75 J-20 Cummins service truck
'77 J-10 p/u
'79 Cherokee
'88 Grand Wagoneer
http://s252.photobucket.com/albums/hh14/jeffaber/
-
ChrisHager
Topic author - Posts: 182
- Joined: Wed Sep 11, 2013 12:03 pm
Re: ChrisHager's 79 J-10 Build Thread
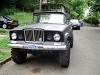
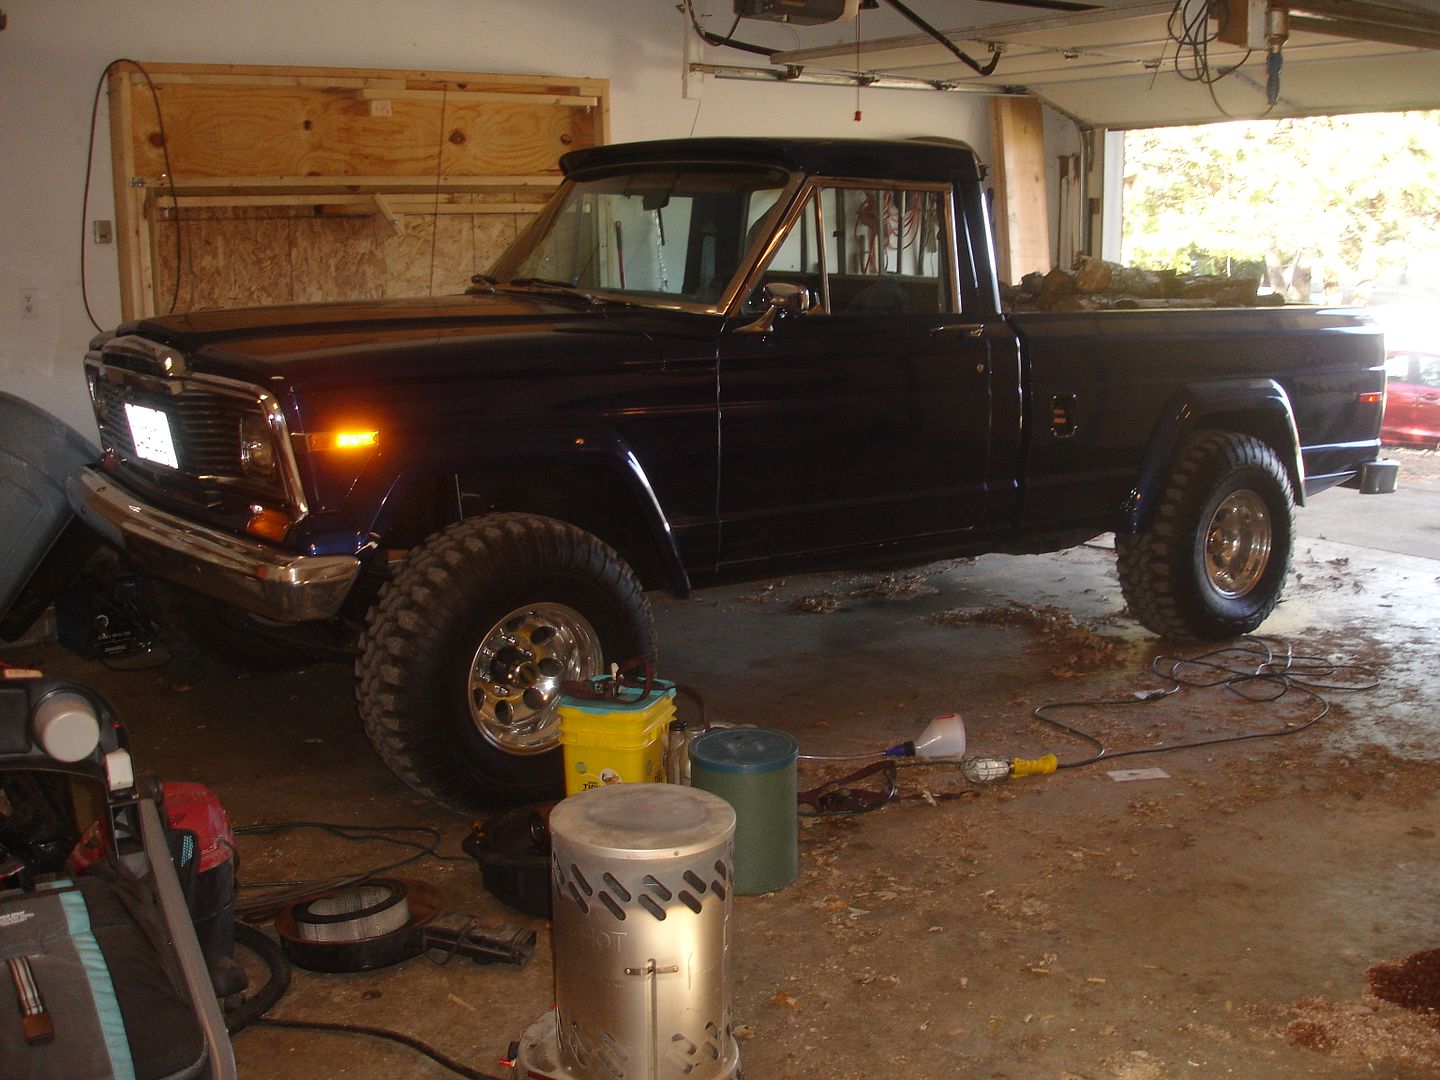
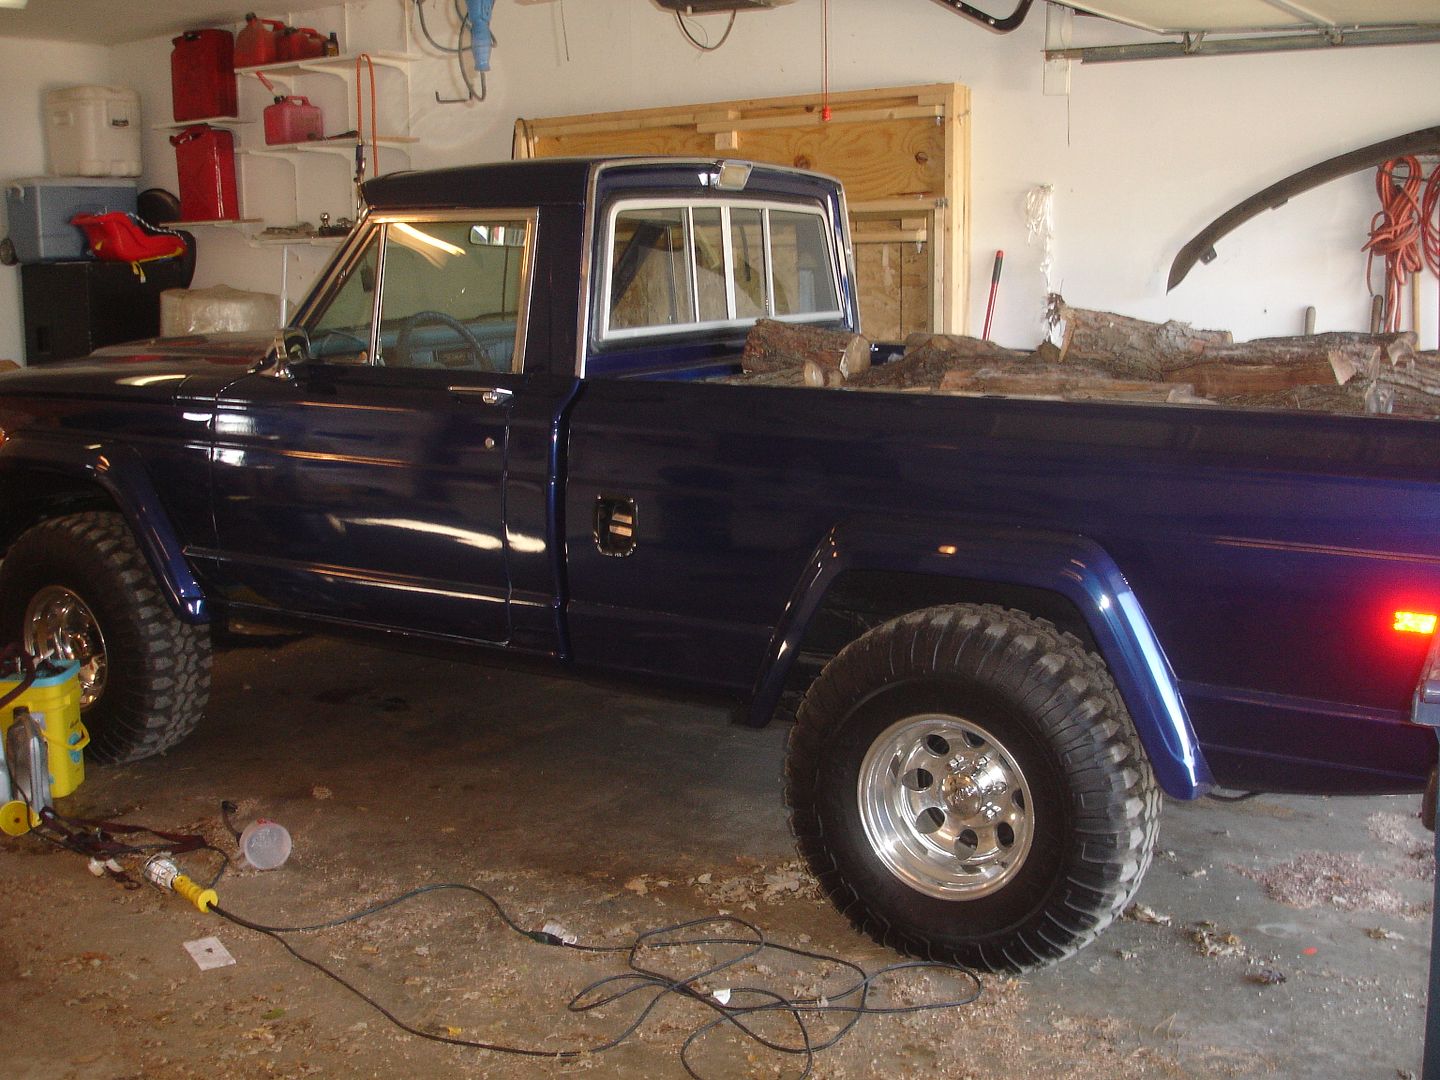
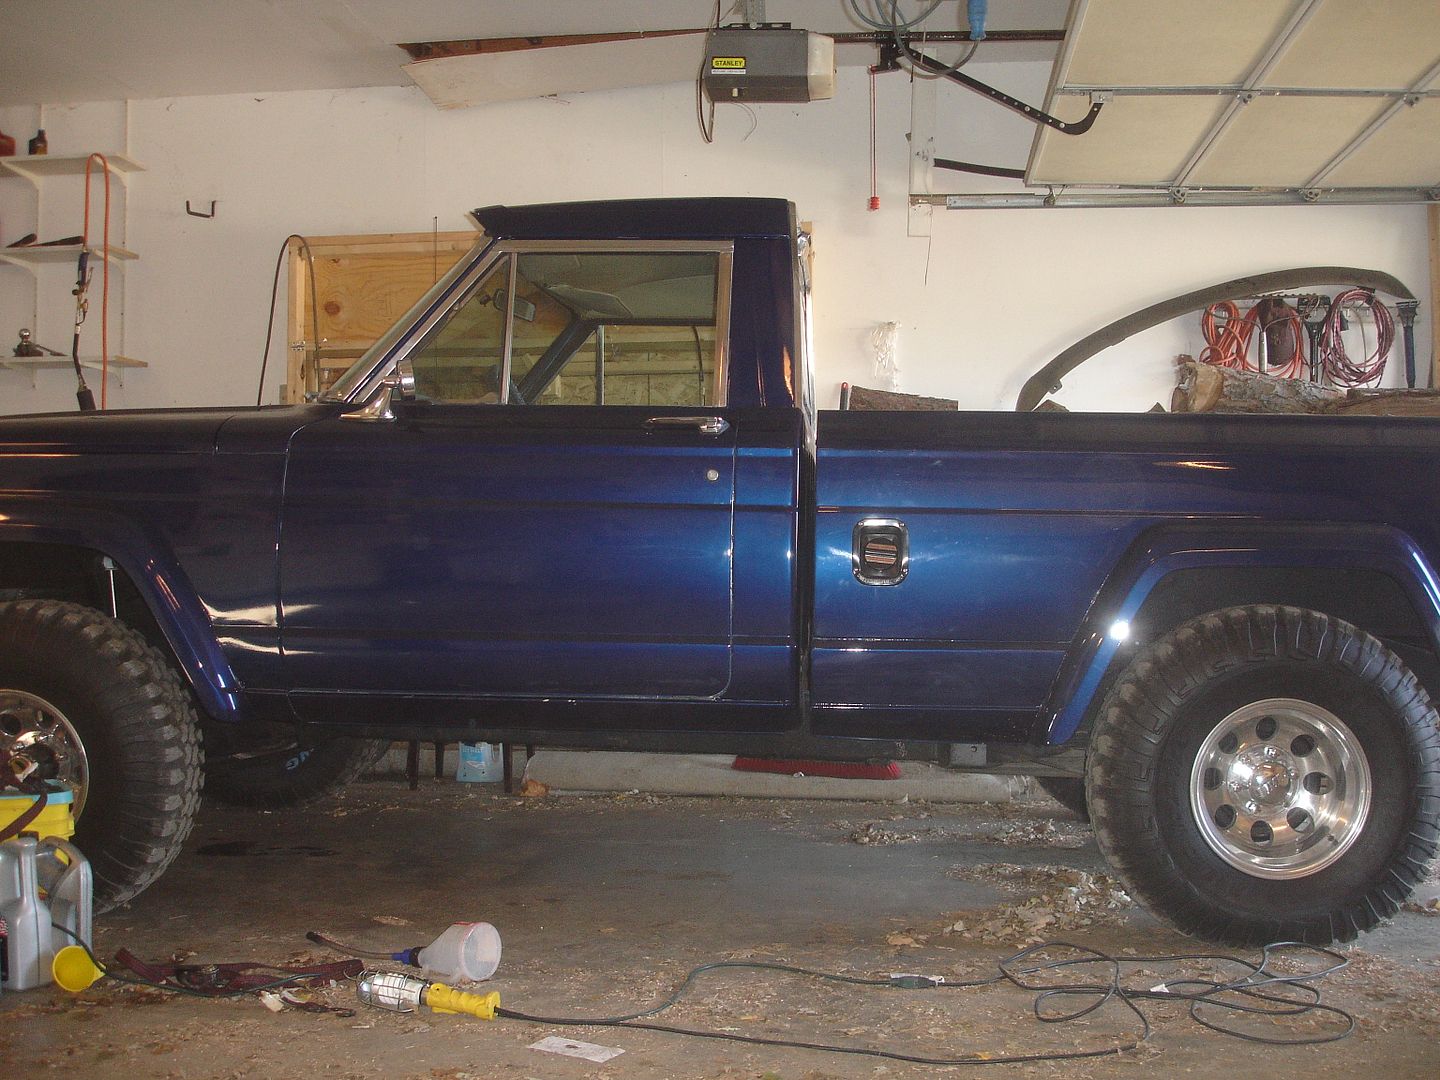
I'm finally getting some pictures up!! Don't mind the messy garage - It's clean now! 
For the first round of pictures...
I loaded the truck up with a bunch of wood (mainly silver maple with a little walnut mixed in) for my Grandpa. The Rough Country springs sure keep the sagging to a minimal!
For the first round of pictures...
I loaded the truck up with a bunch of wood (mainly silver maple with a little walnut mixed in) for my Grandpa. The Rough Country springs sure keep the sagging to a minimal!


ChrisHager's 79 J-10 Build Thread: http://fsjnetwork.com/forum/viewtopic.php?f=12&t=3585
-
ChrisHager
Topic author - Posts: 182
- Joined: Wed Sep 11, 2013 12:03 pm
Re: ChrisHager's 79 J-10 Build Thread
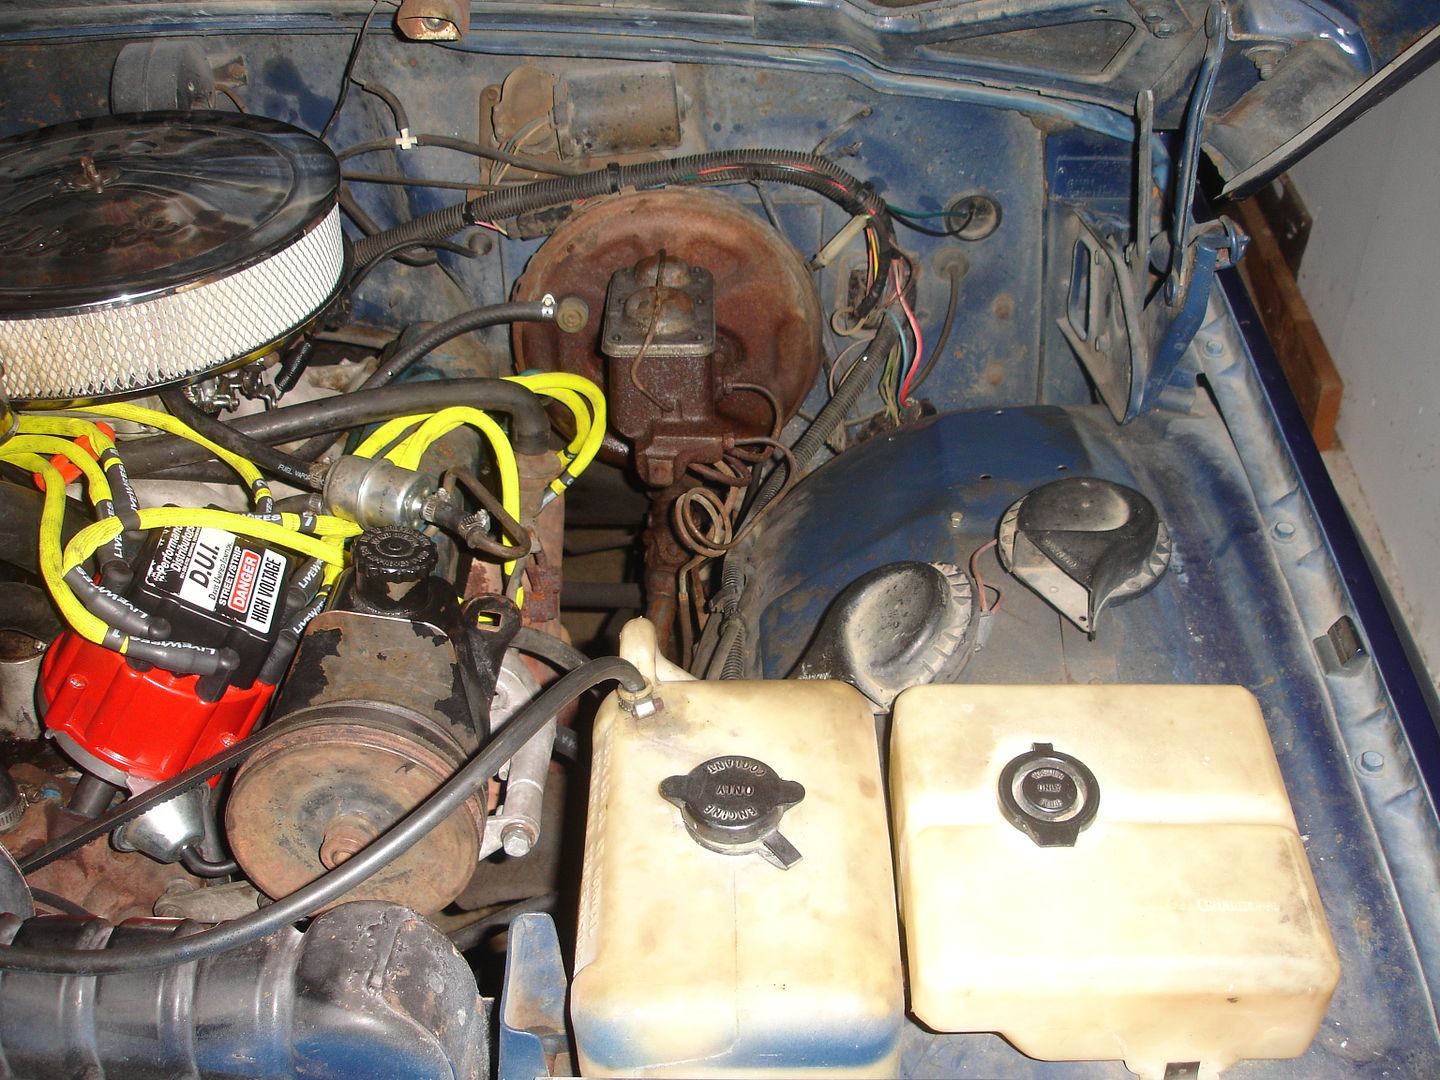
D.U.I. Distributor Install
Since the instructions pretty much walk you through the steps quite well, I won't get too detailed and instead will mainly show pictures of what I've done. In short, you remove the current distributor, drop in the new distributor in the same orientation, run new wiring for the distributor, install newly gapped spark plugs, and run new spark plug wires.
Alrighty - time for some random-ish pictures.
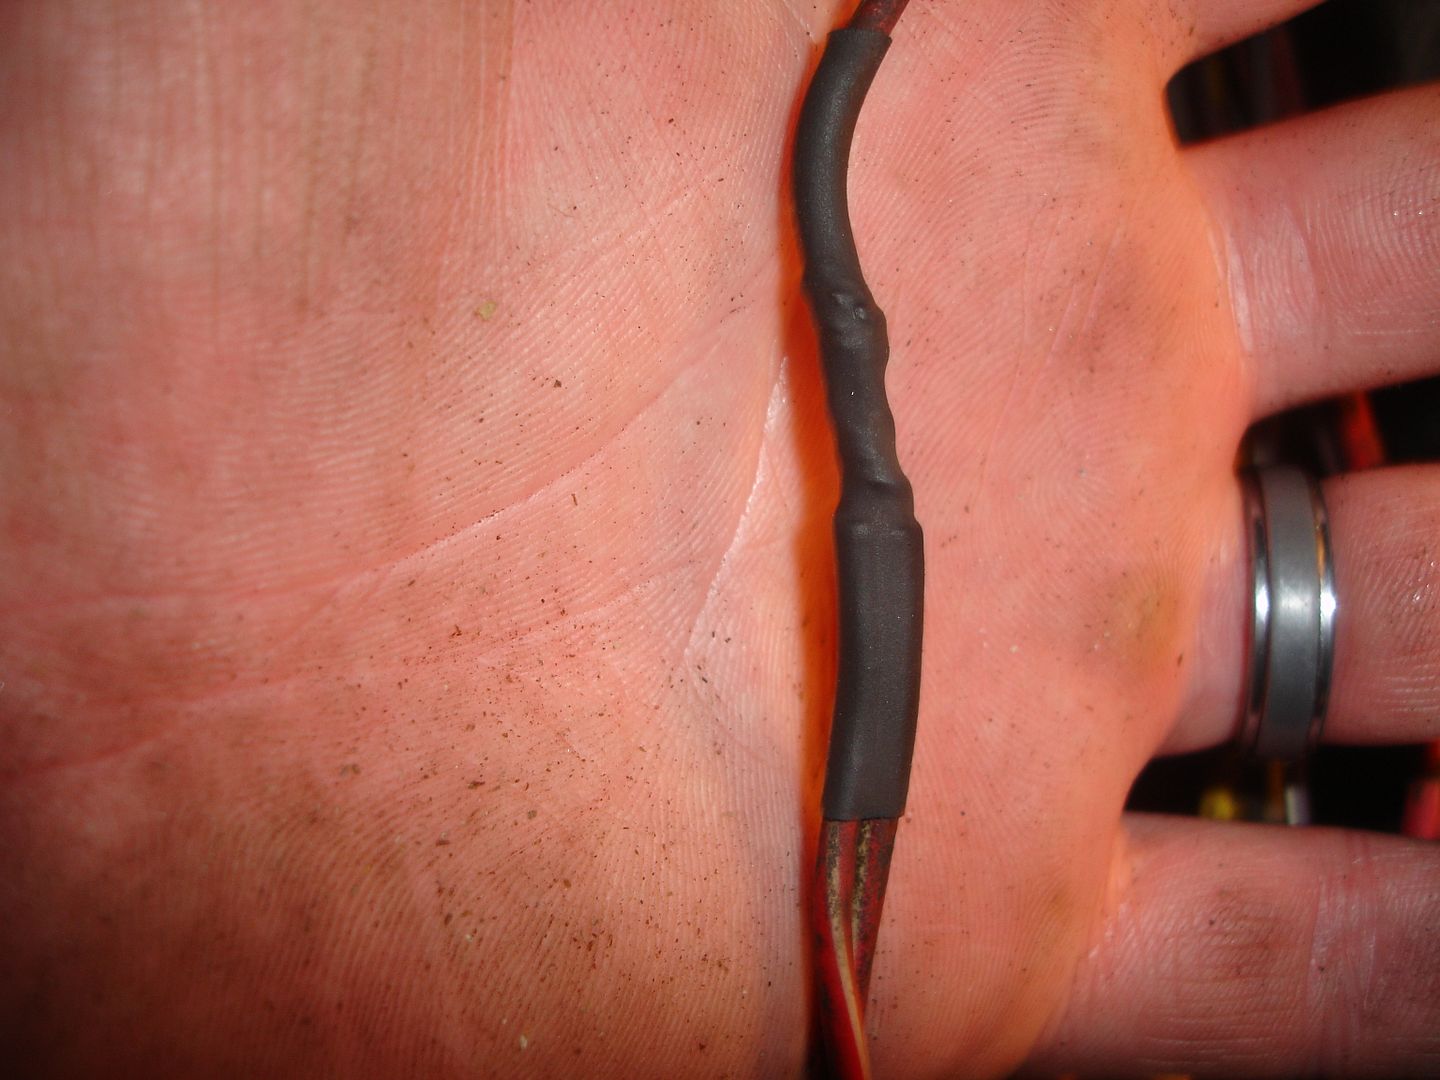
I removed the factory split loom in order to remove the old ignition stuff. Once the loom was removed, I found a few factory duct tape splices...
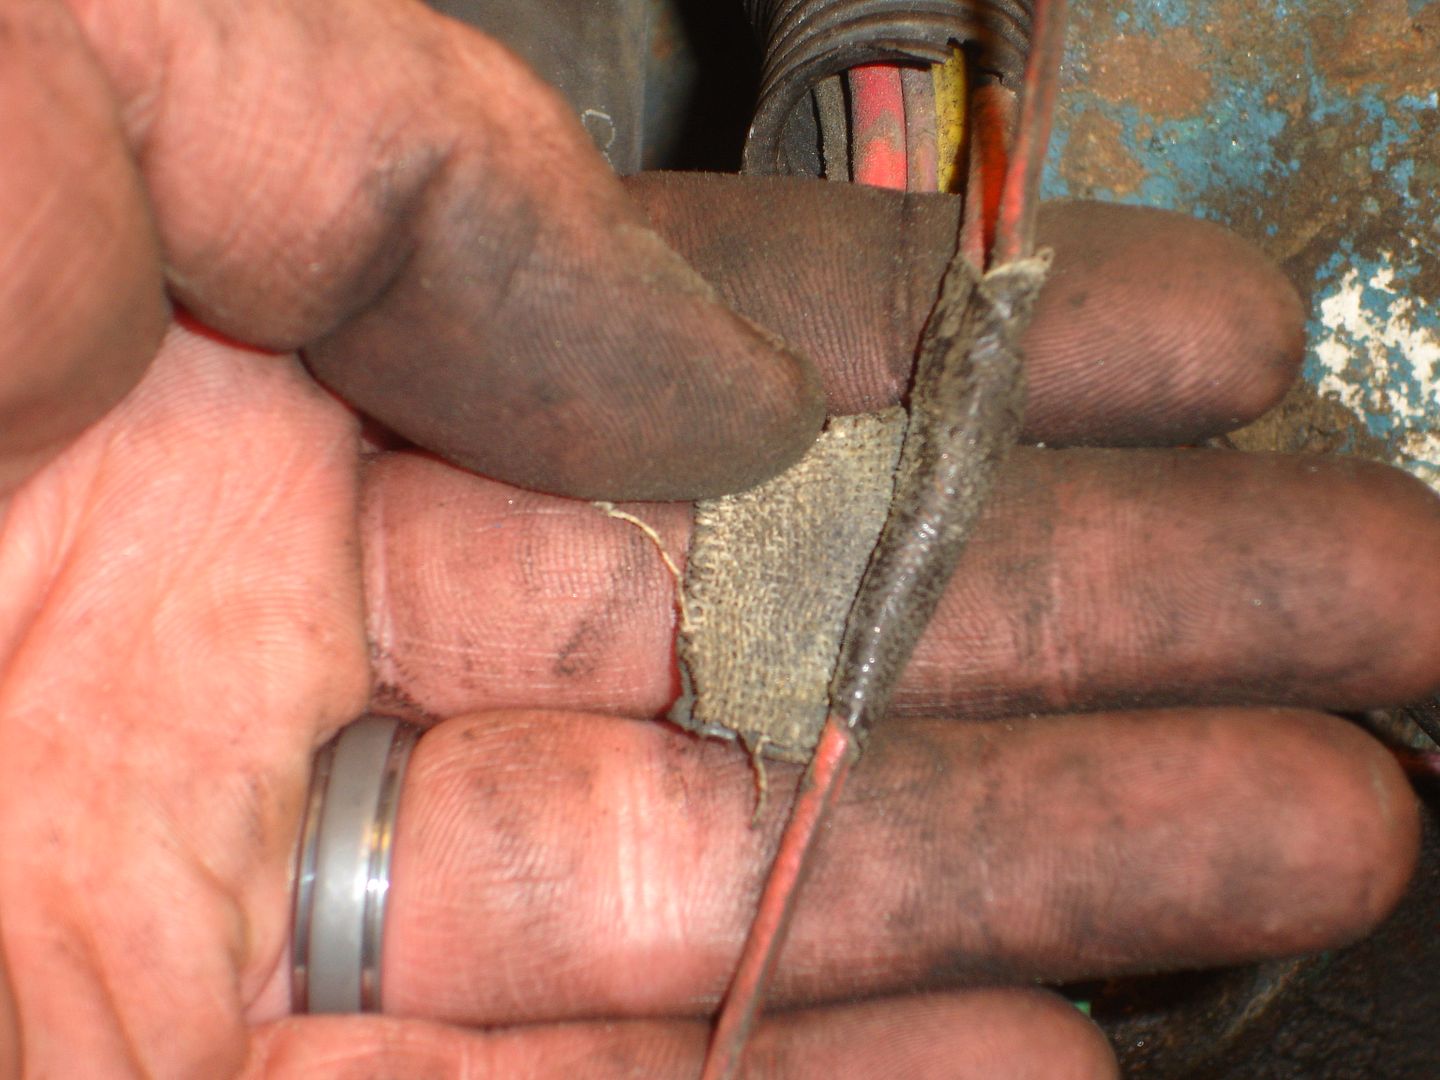

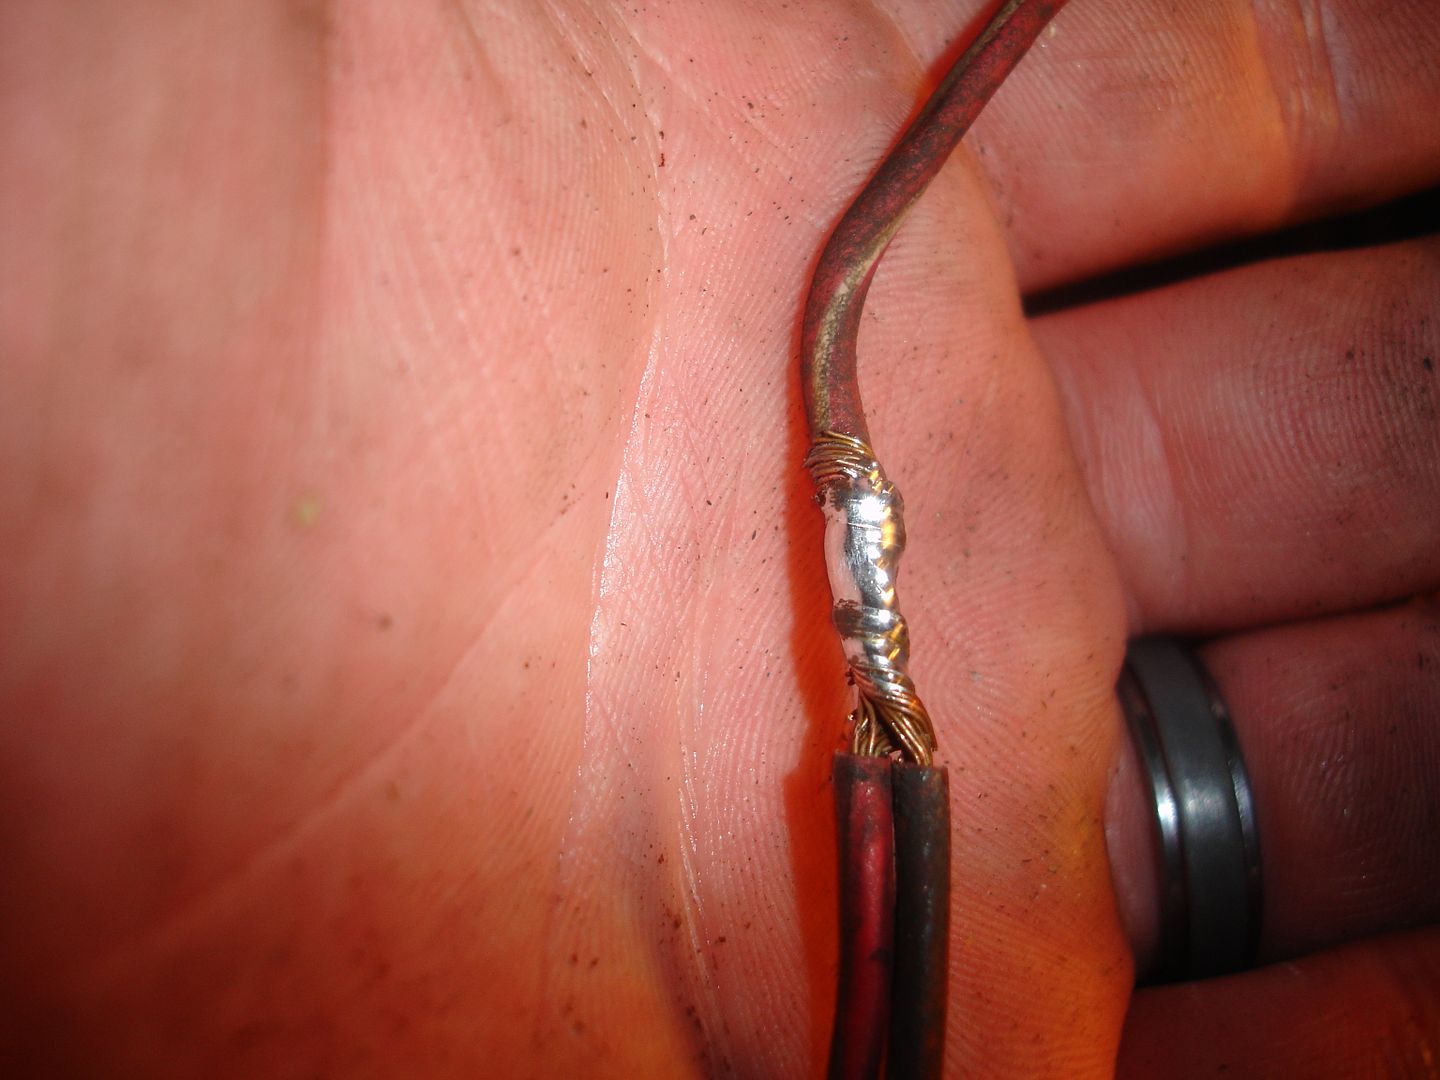
To their benefit, the wires were crimped together...
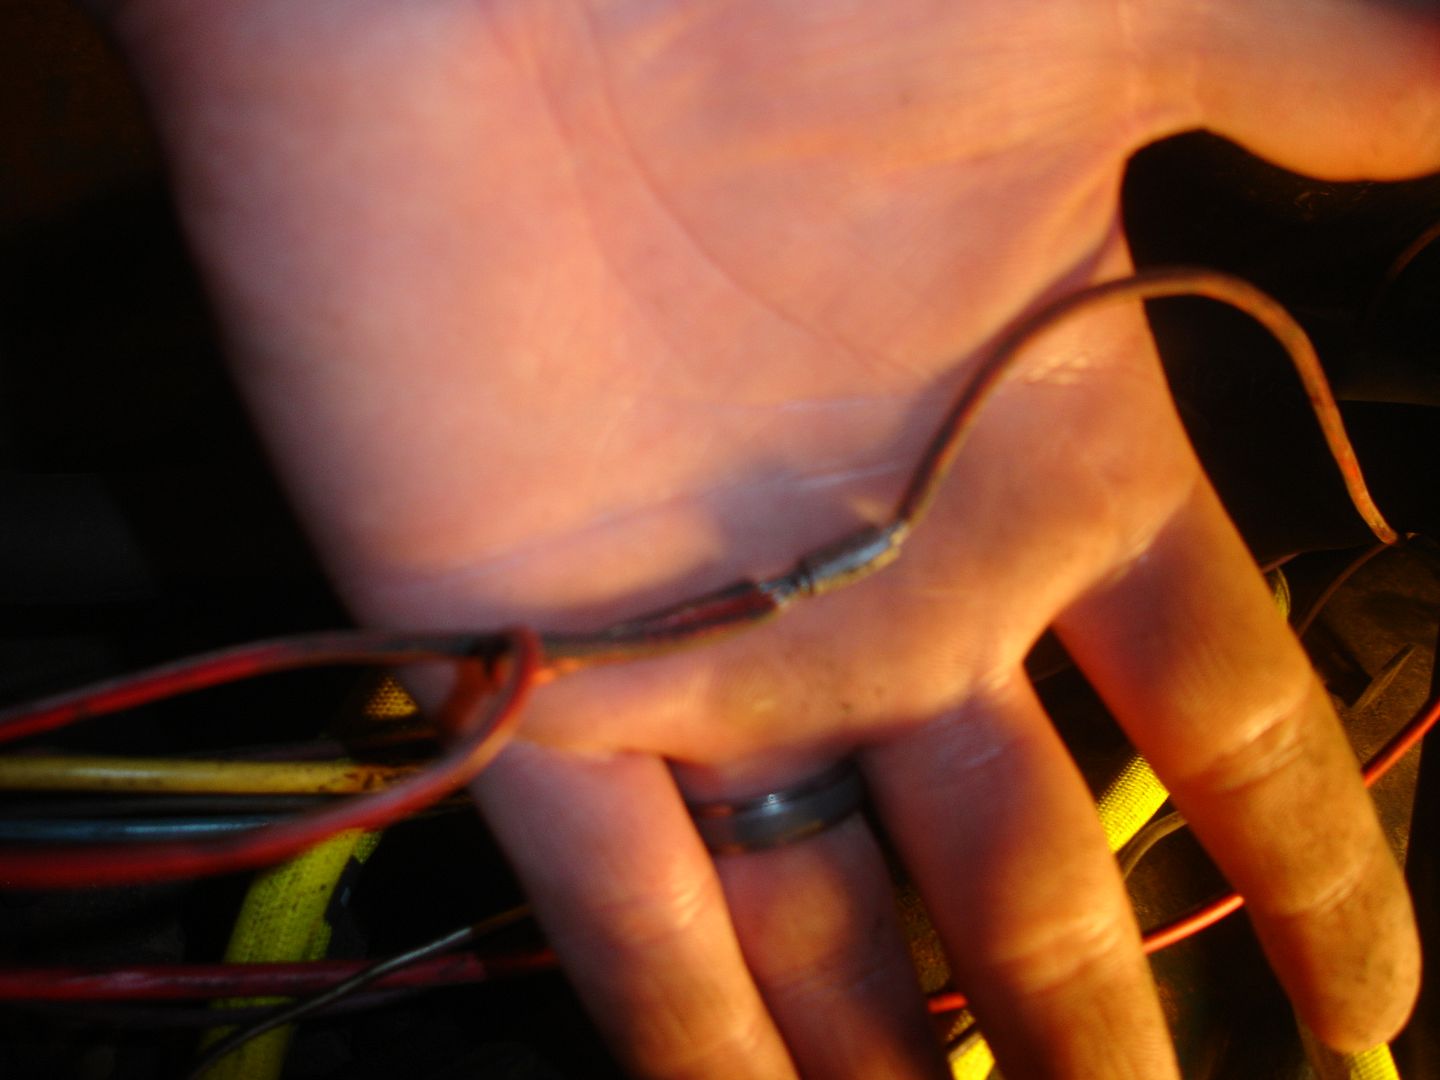
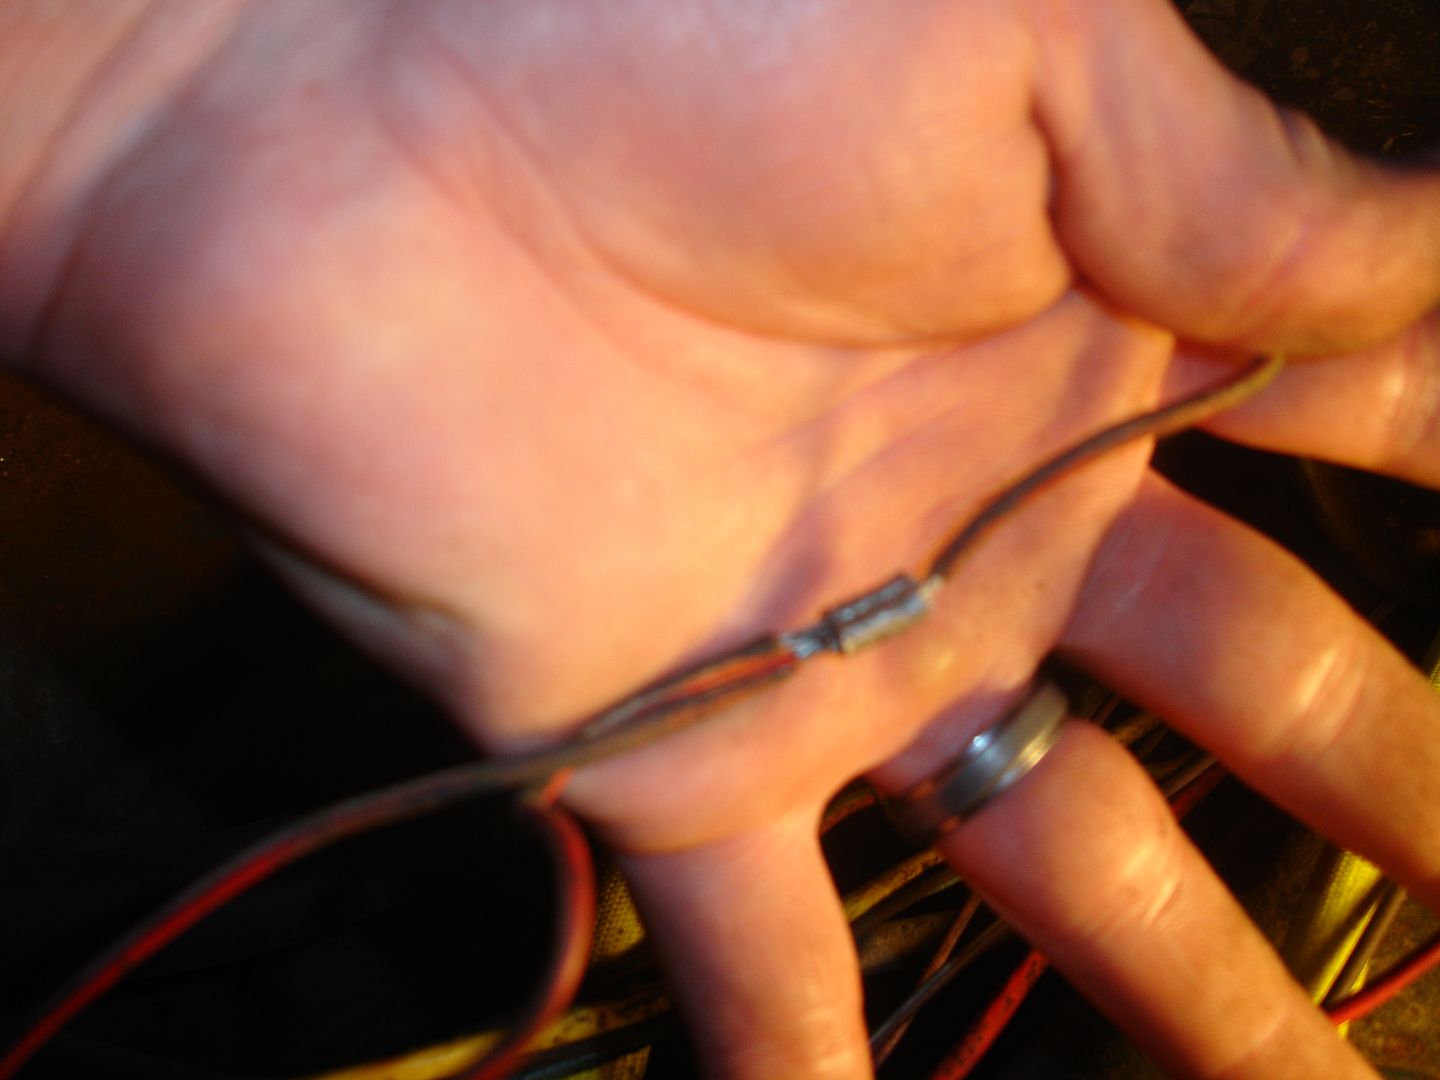
I soldered up what I could and finished it up with heat-shrink tubing. Much better!
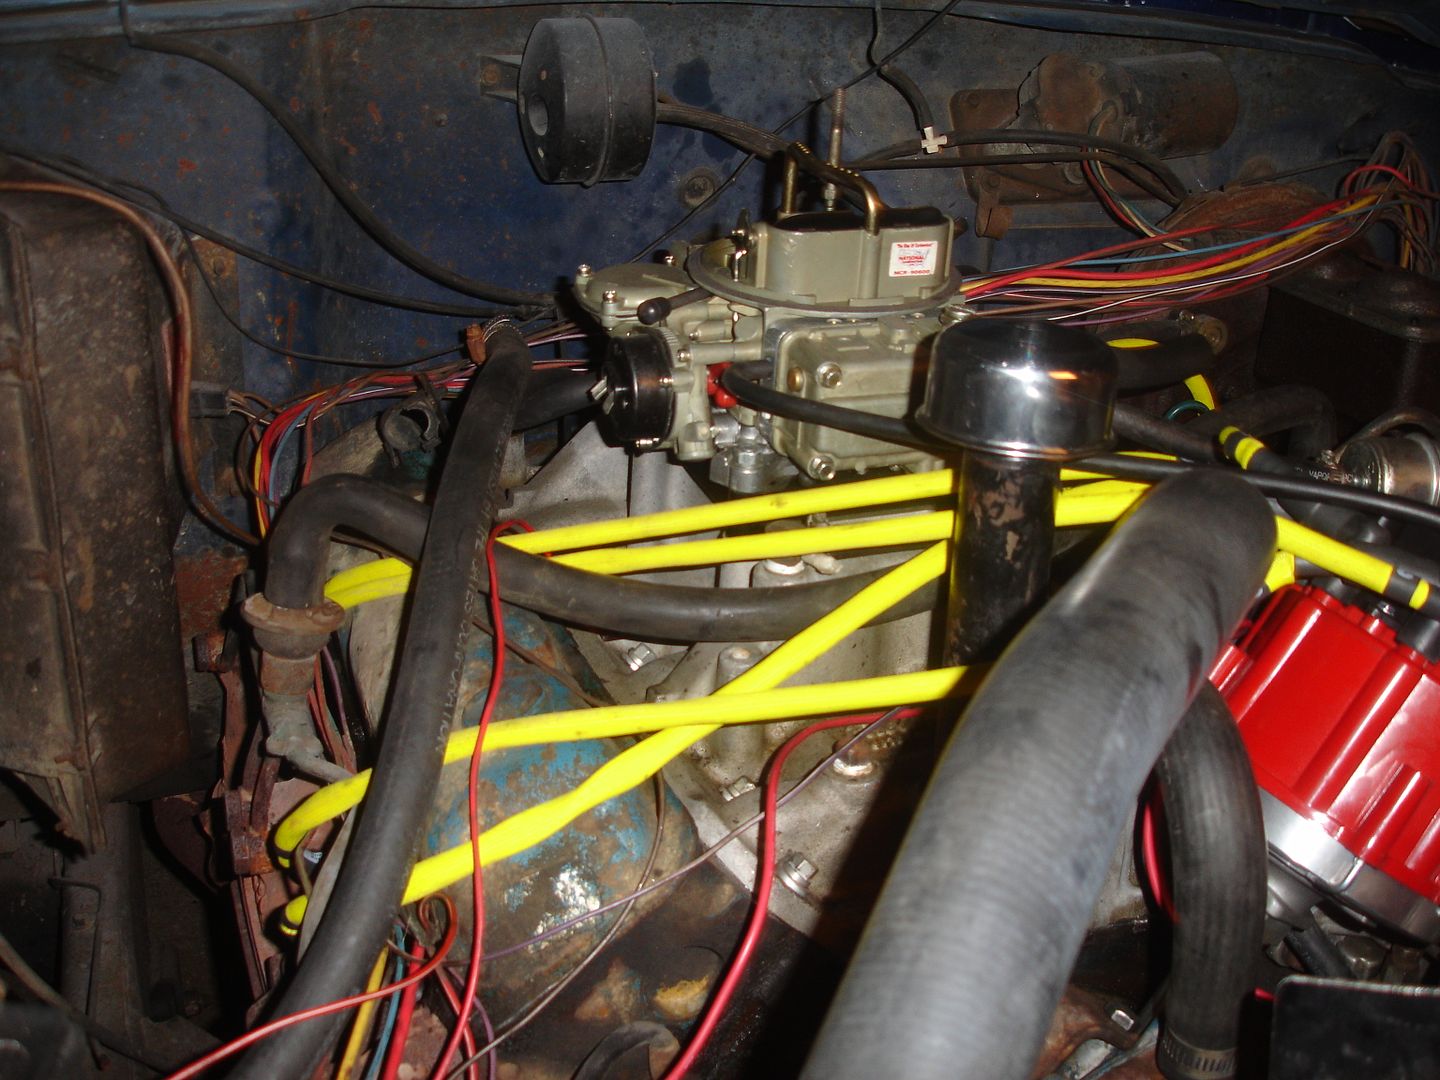
The following pictures are of the distributor installed and wires already ran. As seen in a previous post, the wires aren't for this truck. I re-ran them this previous weekend so they fit much better. This is also early in the install which is why the wires are all over the place.

I wired the relay in the following way (refer to the picture for the colors):
85: Ground (Blue)
30: Hot to Relay (Fused) (Red)
87: Hot to Distributor (Yellow which I spliced to Red)
86: Power from Key (Green)
I located the relay next to the battery. You can see where I grounded 85.
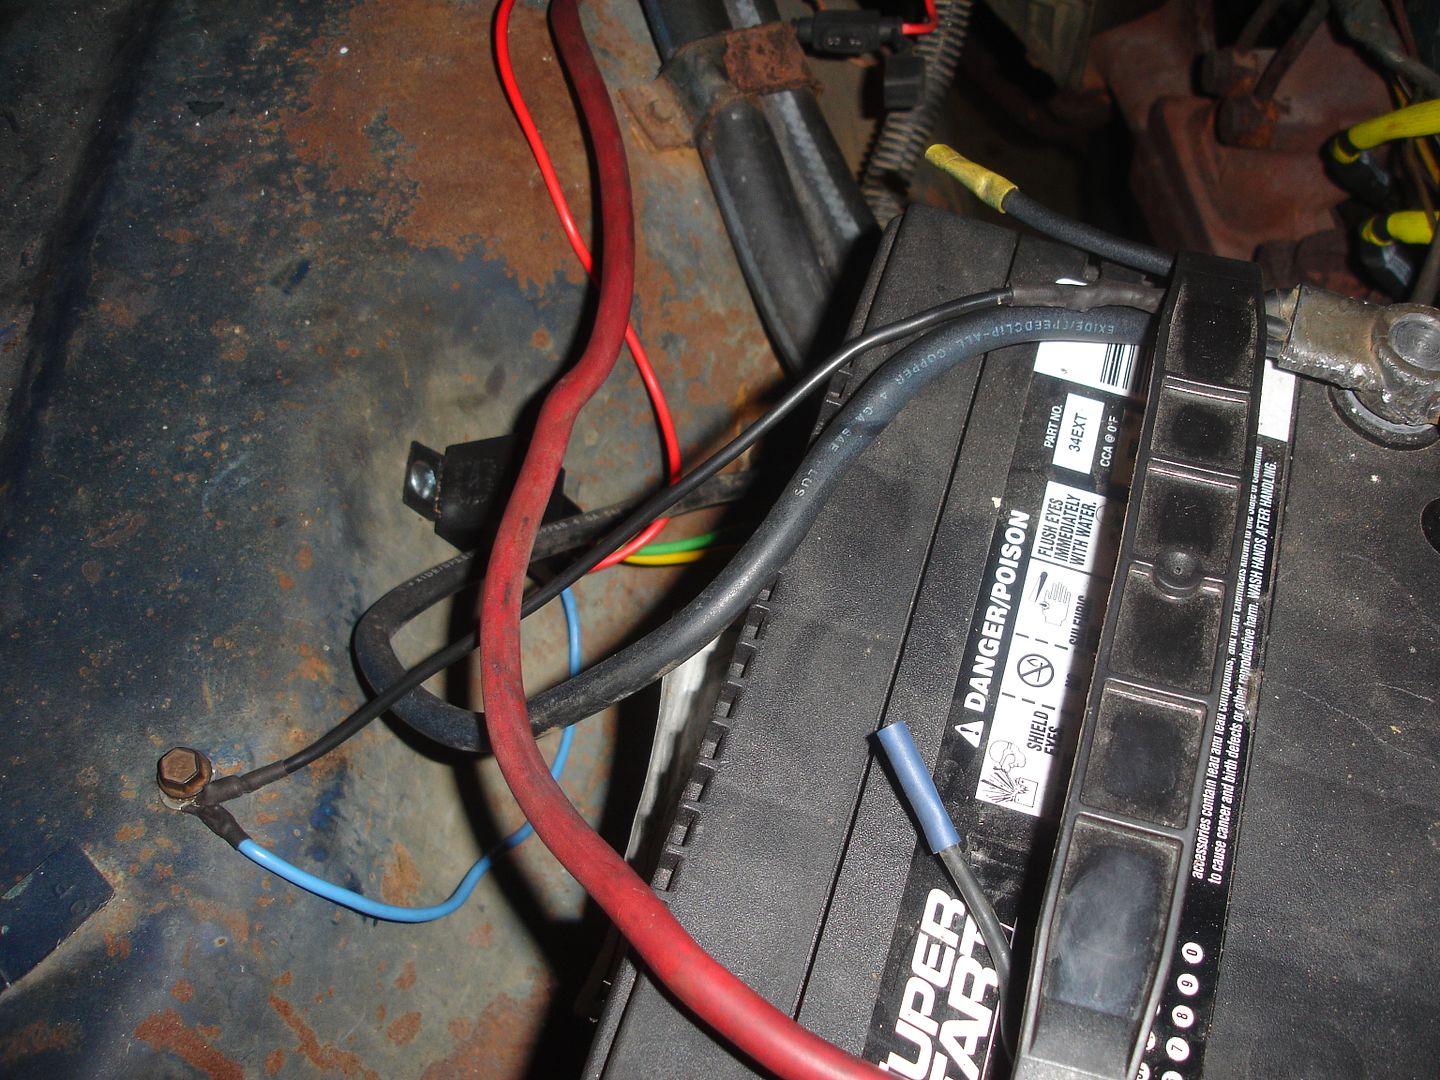
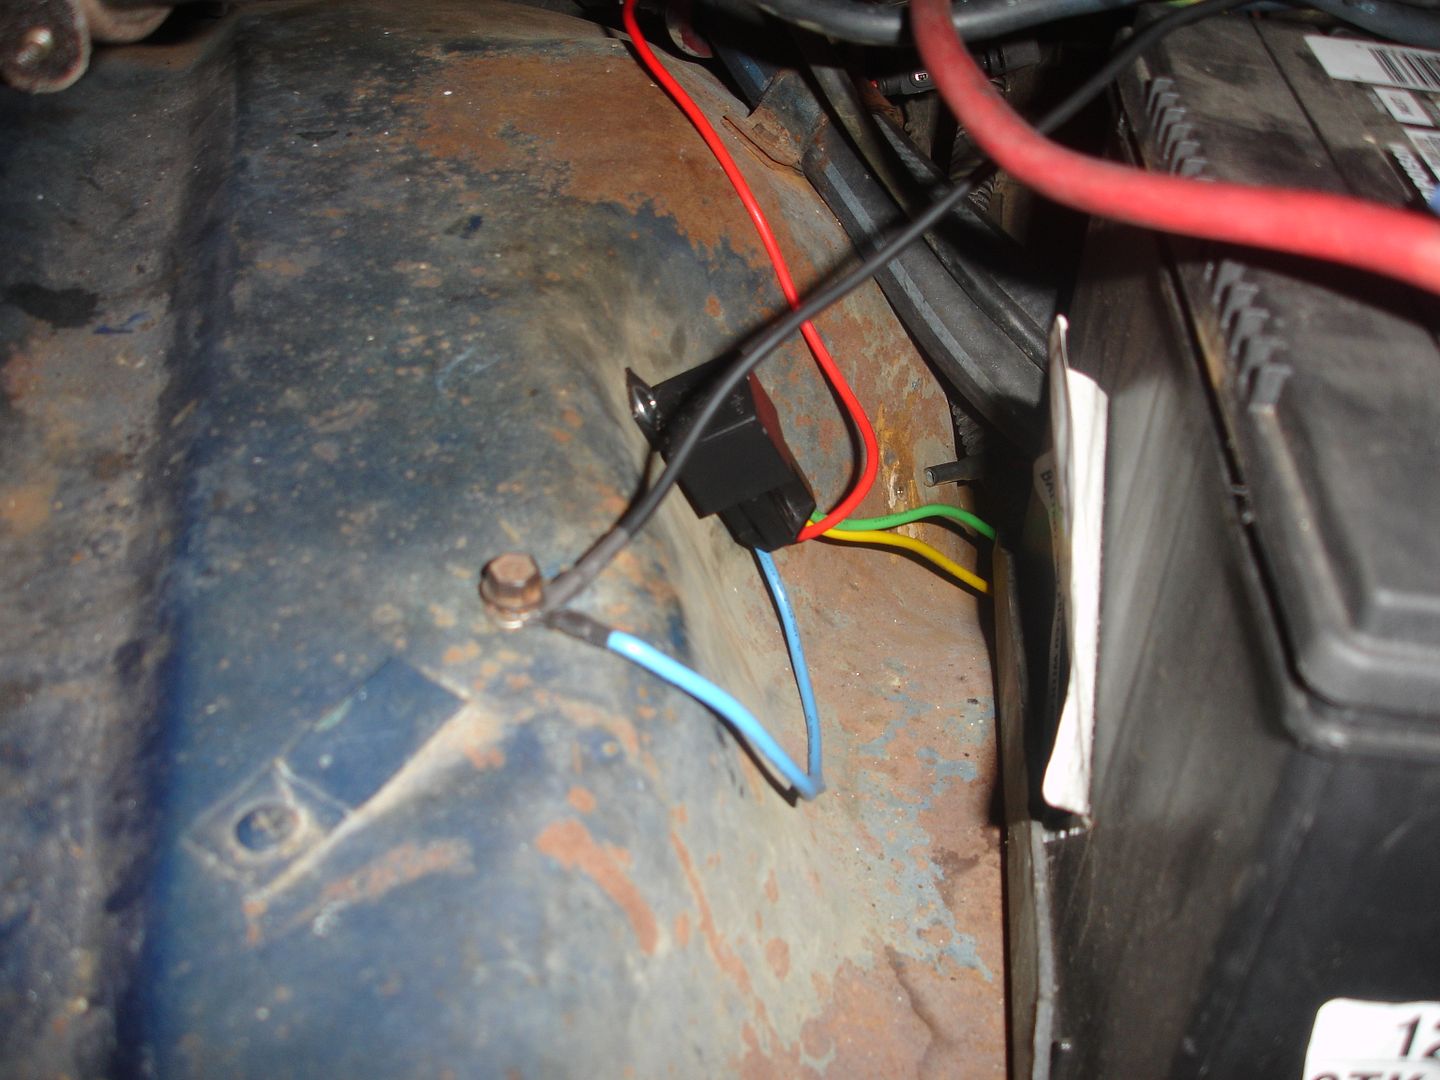
I took the hot (30) from the starter solenoid. You can see where I located the fuse as well. I think this keeps everything cleaner than having wires running off the battery.
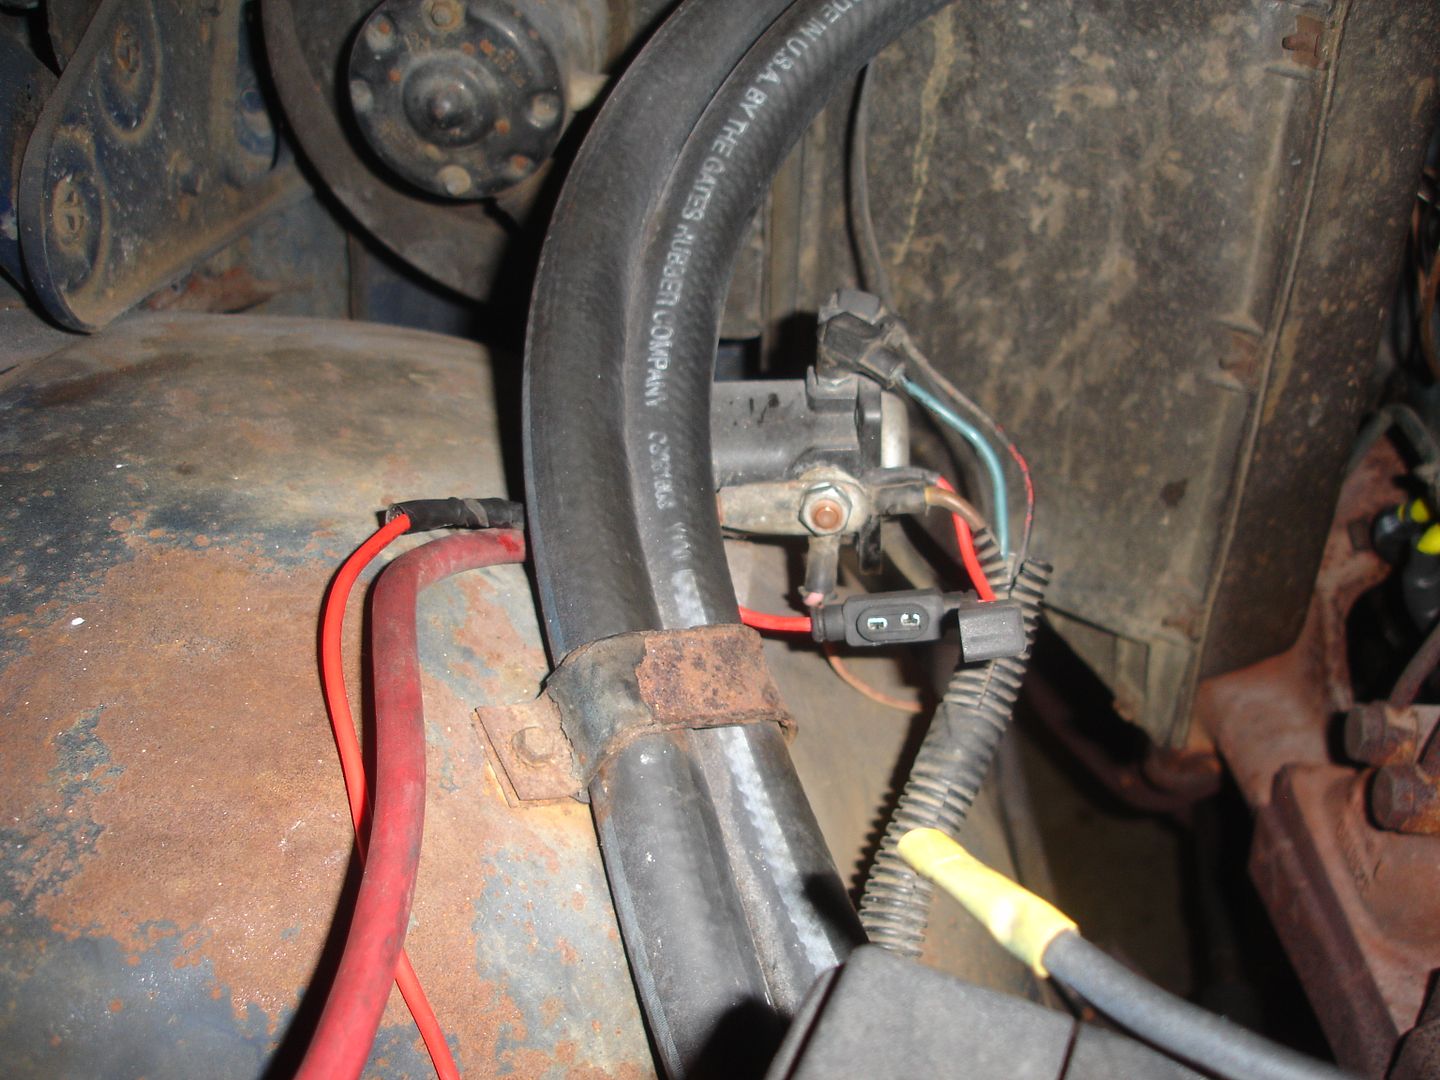
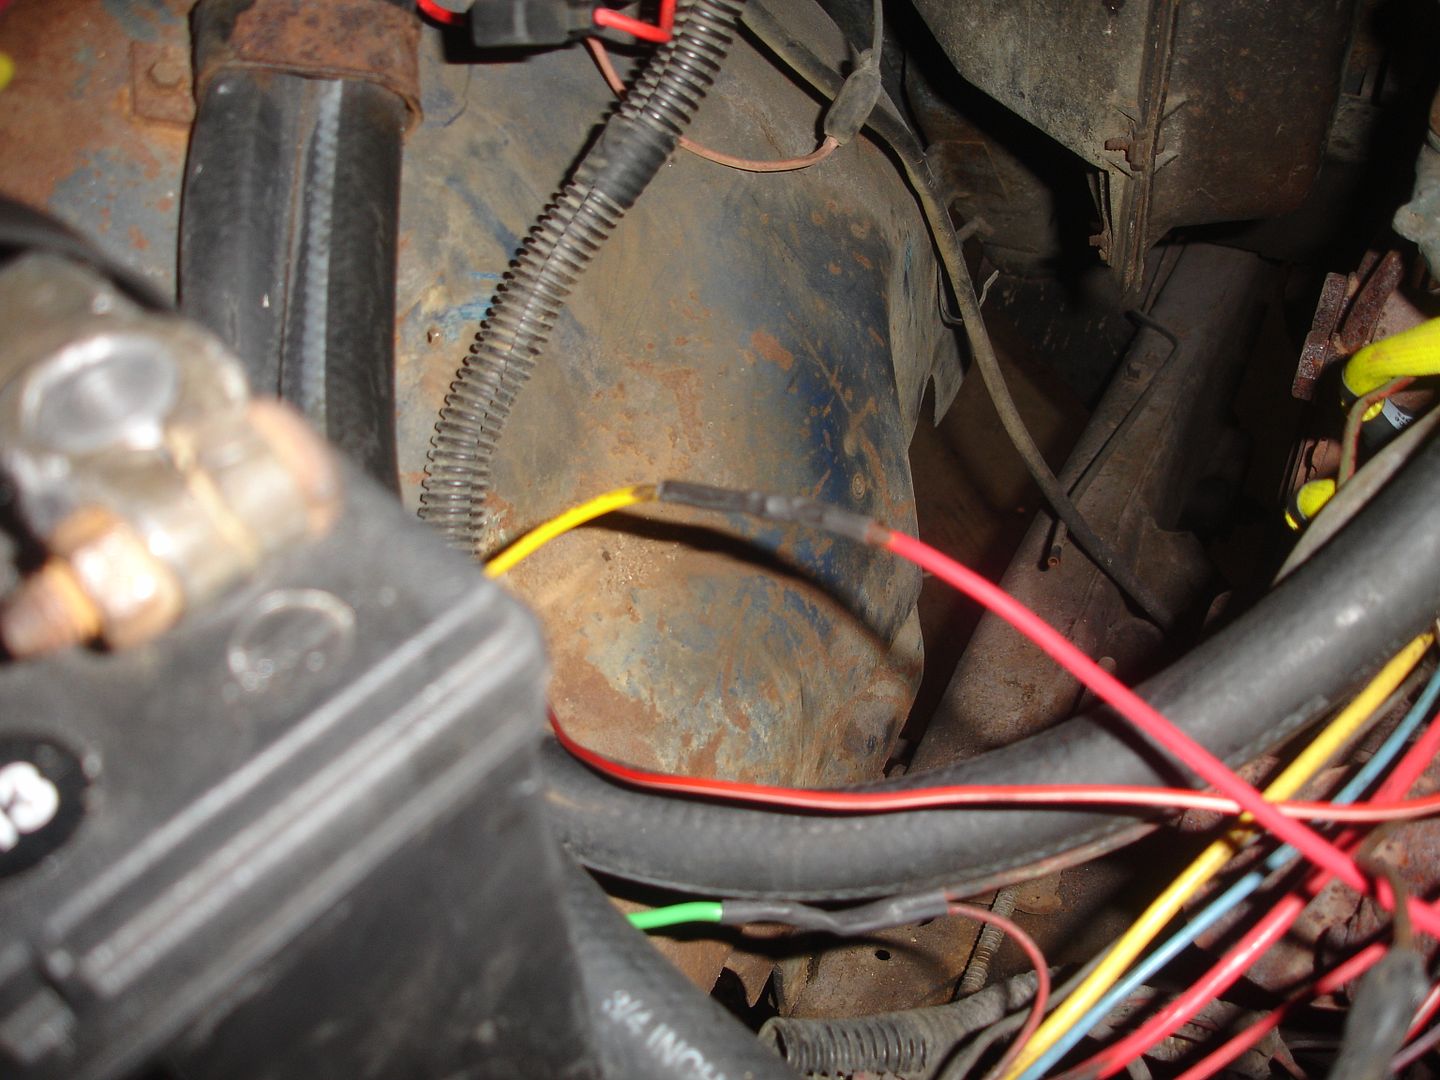
Here you see where I spliced the yellow wire (87) with a red wire going to the distributor. Also, further below in the following picture, you can see where I spliced the green wire (86) with the factory wire that triggered the old coil (key on).
For reference, check out the following picture from this thread: http://www.jeepforum.com/forum/f8/dui-d ... ly-845594/

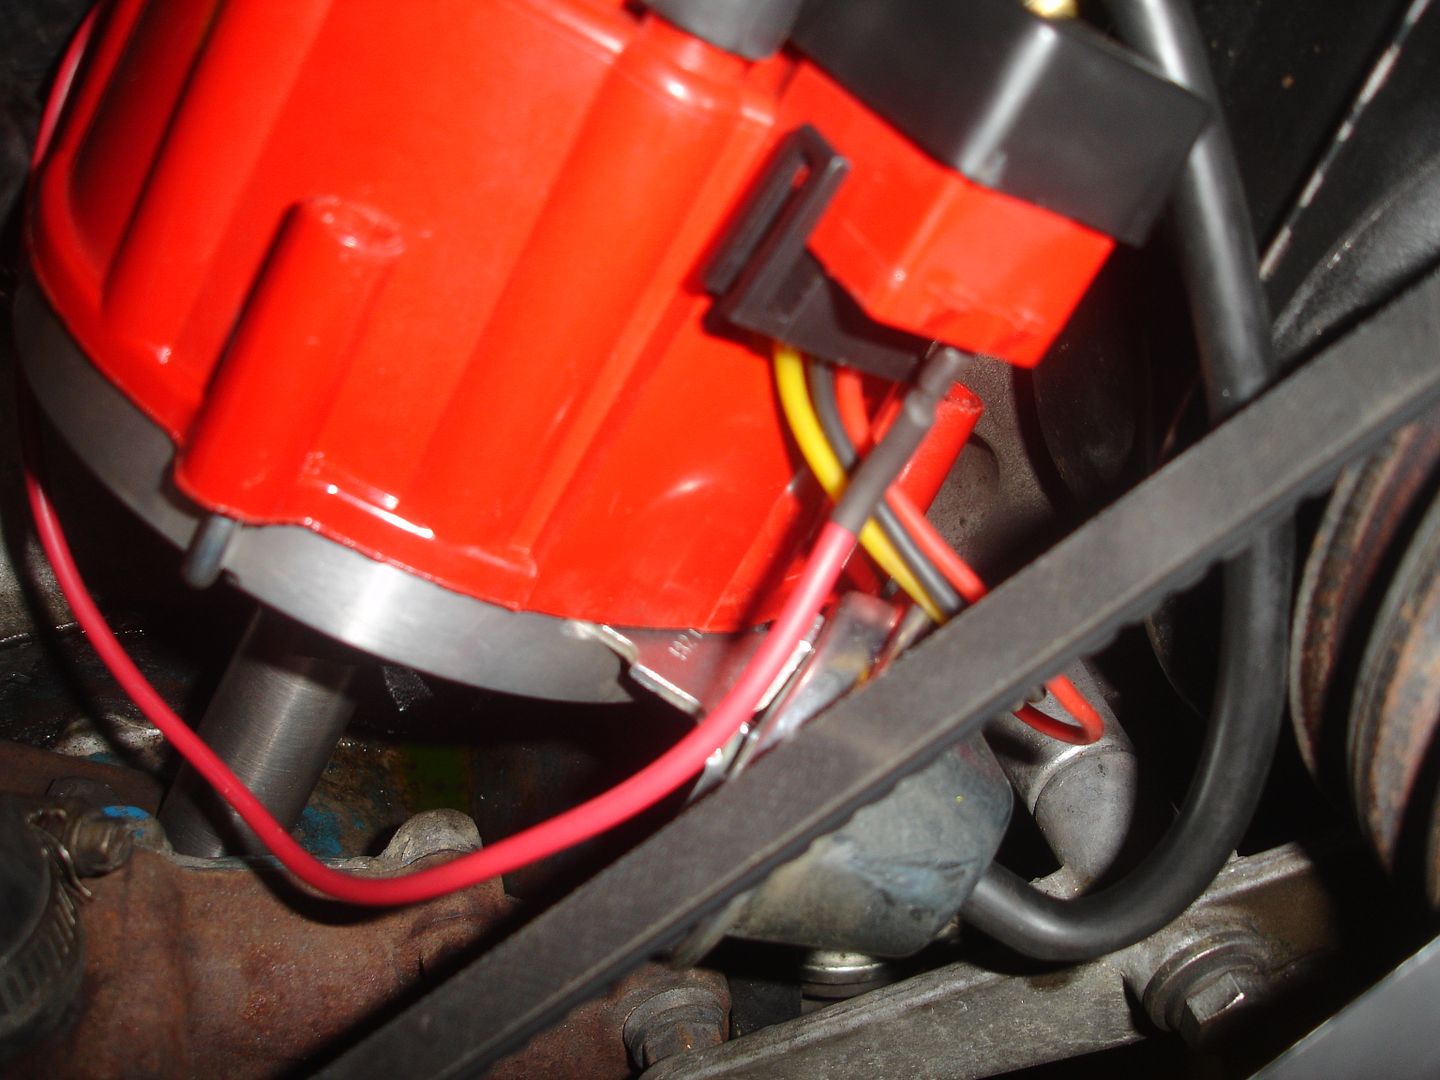
The hot wire (87) plugs into the distributor on the cap. This was while we were still in 'test phase'. I later installed the proper connectors on the wire.
And wouldn't you know it - I just now realized I don't have pictures of the final product. I also installed the Tachometer during this project. I'll try to snap some pictures of everything tonight!
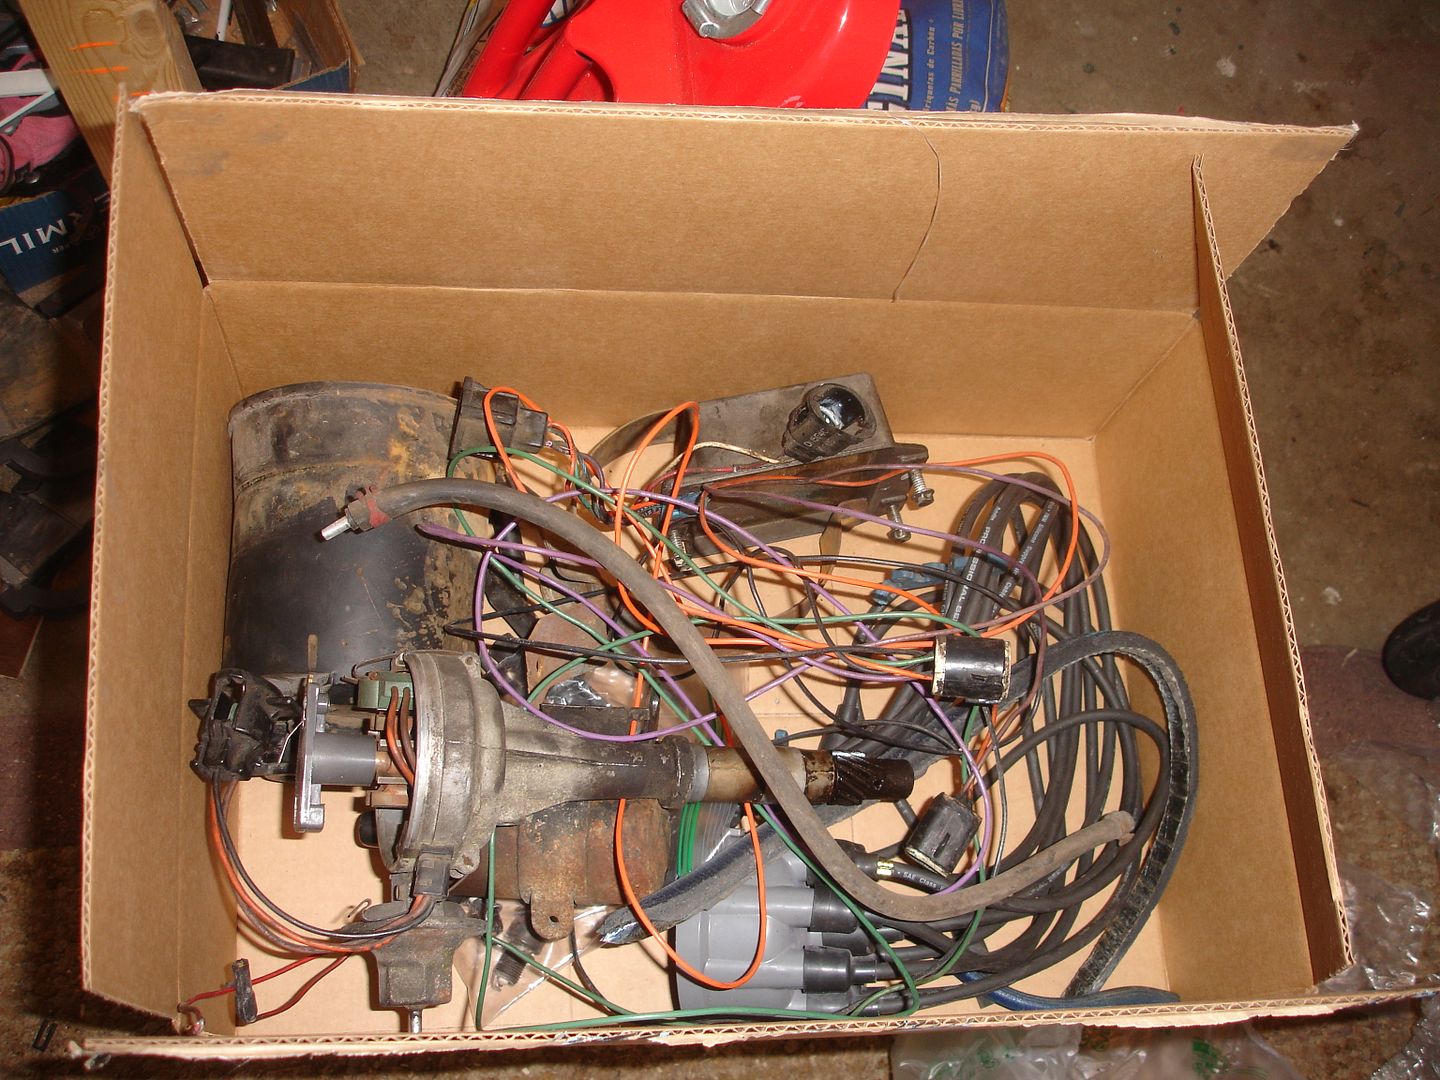
I do, however, have a picture of everything I was able to remove from under the hood!
So far, she runs well. I haven't had a chance to really test it out and fiddle with the timing as there's been too much snow on the roads. Over the holidays, I'm sure I'll have it tuned up nicely.
Also, as a random question, does anyone know what this fuseable link goes to (sorry for the blurry picture)? It looks factory and the wire runs down under the truck. I haven't yet traced it but was curious...
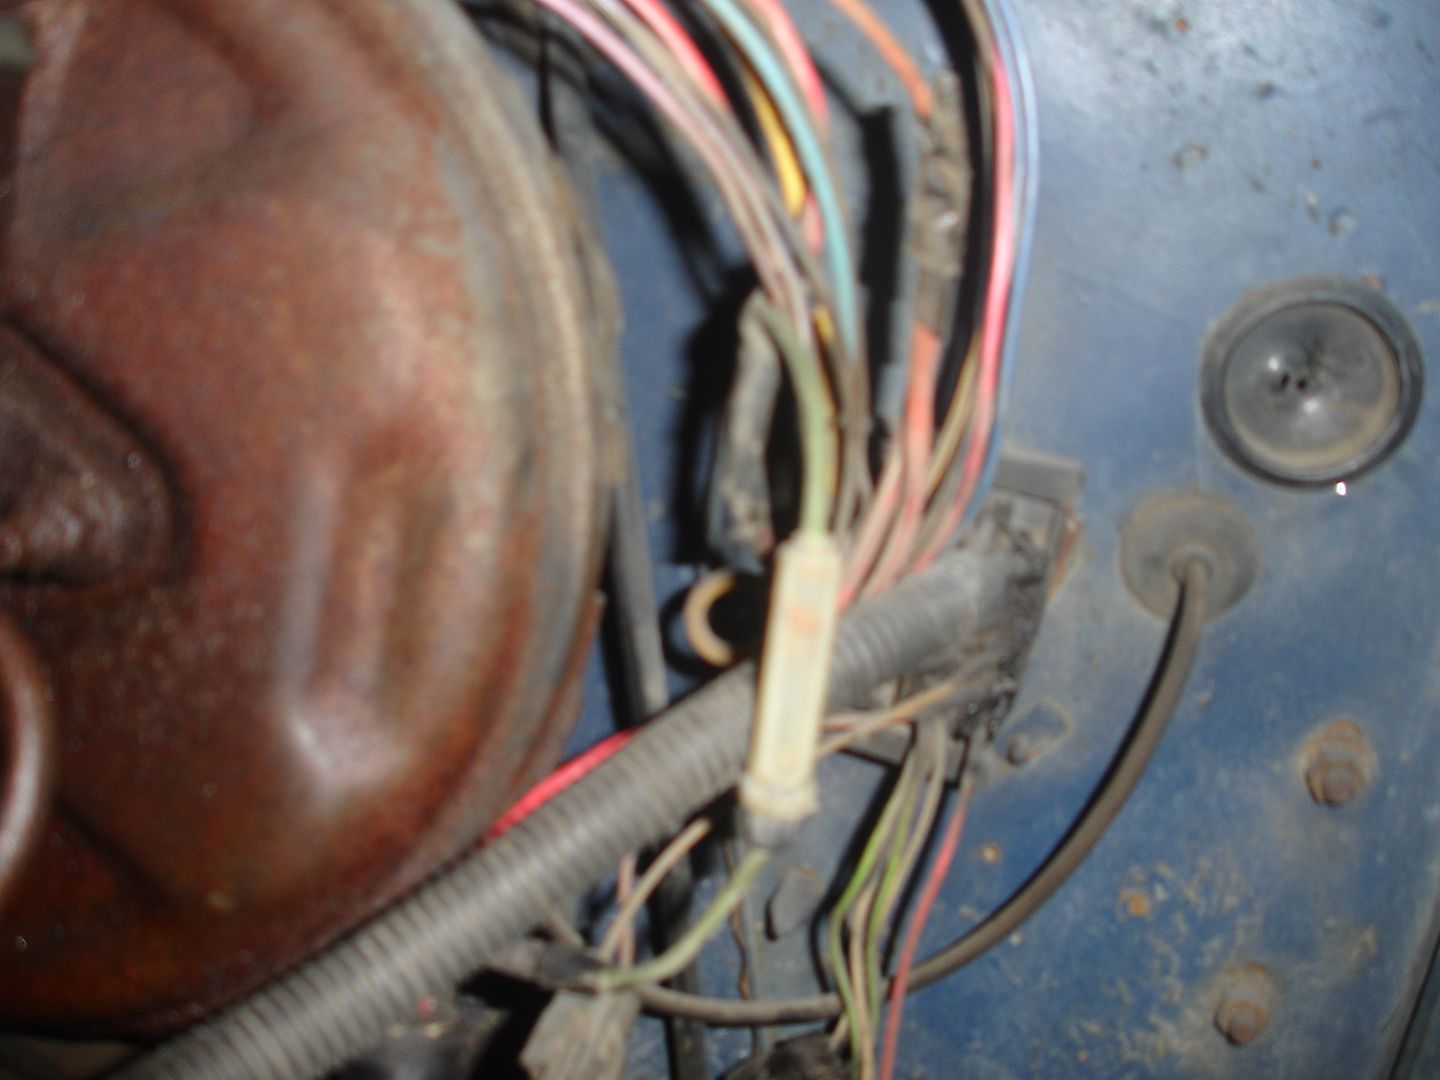
Secondly, how does the factory under hood light work?
Here you can see a black wire running from it...
In this picture, the black wire continues on (draped over the heater core)...
Finally, the black wire splices into something (fuse?), the wire changes to red, then hooks directly to hot. Does the under hood light stay lit all the time?

That's all for now until I snap more pictures!
Since the instructions pretty much walk you through the steps quite well, I won't get too detailed and instead will mainly show pictures of what I've done. In short, you remove the current distributor, drop in the new distributor in the same orientation, run new wiring for the distributor, install newly gapped spark plugs, and run new spark plug wires.
Alrighty - time for some random-ish pictures.
I removed the factory split loom in order to remove the old ignition stuff. Once the loom was removed, I found a few factory duct tape splices...


To their benefit, the wires were crimped together...


I soldered up what I could and finished it up with heat-shrink tubing. Much better!


The following pictures are of the distributor installed and wires already ran. As seen in a previous post, the wires aren't for this truck. I re-ran them this previous weekend so they fit much better. This is also early in the install which is why the wires are all over the place.


I wired the relay in the following way (refer to the picture for the colors):
85: Ground (Blue)
30: Hot to Relay (Fused) (Red)
87: Hot to Distributor (Yellow which I spliced to Red)
86: Power from Key (Green)
I located the relay next to the battery. You can see where I grounded 85.


I took the hot (30) from the starter solenoid. You can see where I located the fuse as well. I think this keeps everything cleaner than having wires running off the battery.

Here you see where I spliced the yellow wire (87) with a red wire going to the distributor. Also, further below in the following picture, you can see where I spliced the green wire (86) with the factory wire that triggered the old coil (key on).

For reference, check out the following picture from this thread: http://www.jeepforum.com/forum/f8/dui-d ... ly-845594/
The hot wire (87) plugs into the distributor on the cap. This was while we were still in 'test phase'. I later installed the proper connectors on the wire.

And wouldn't you know it - I just now realized I don't have pictures of the final product. I also installed the Tachometer during this project. I'll try to snap some pictures of everything tonight!
I do, however, have a picture of everything I was able to remove from under the hood!

So far, she runs well. I haven't had a chance to really test it out and fiddle with the timing as there's been too much snow on the roads. Over the holidays, I'm sure I'll have it tuned up nicely.
Also, as a random question, does anyone know what this fuseable link goes to (sorry for the blurry picture)? It looks factory and the wire runs down under the truck. I haven't yet traced it but was curious...

Secondly, how does the factory under hood light work?
Here you can see a black wire running from it...

In this picture, the black wire continues on (draped over the heater core)...

Finally, the black wire splices into something (fuse?), the wire changes to red, then hooks directly to hot. Does the under hood light stay lit all the time?

That's all for now until I snap more pictures!
ChrisHager's 79 J-10 Build Thread: http://fsjnetwork.com/forum/viewtopic.php?f=12&t=3585
-
ChrisHager
Topic author - Posts: 182
- Joined: Wed Sep 11, 2013 12:03 pm
Re: ChrisHager's 79 J-10 Build Thread
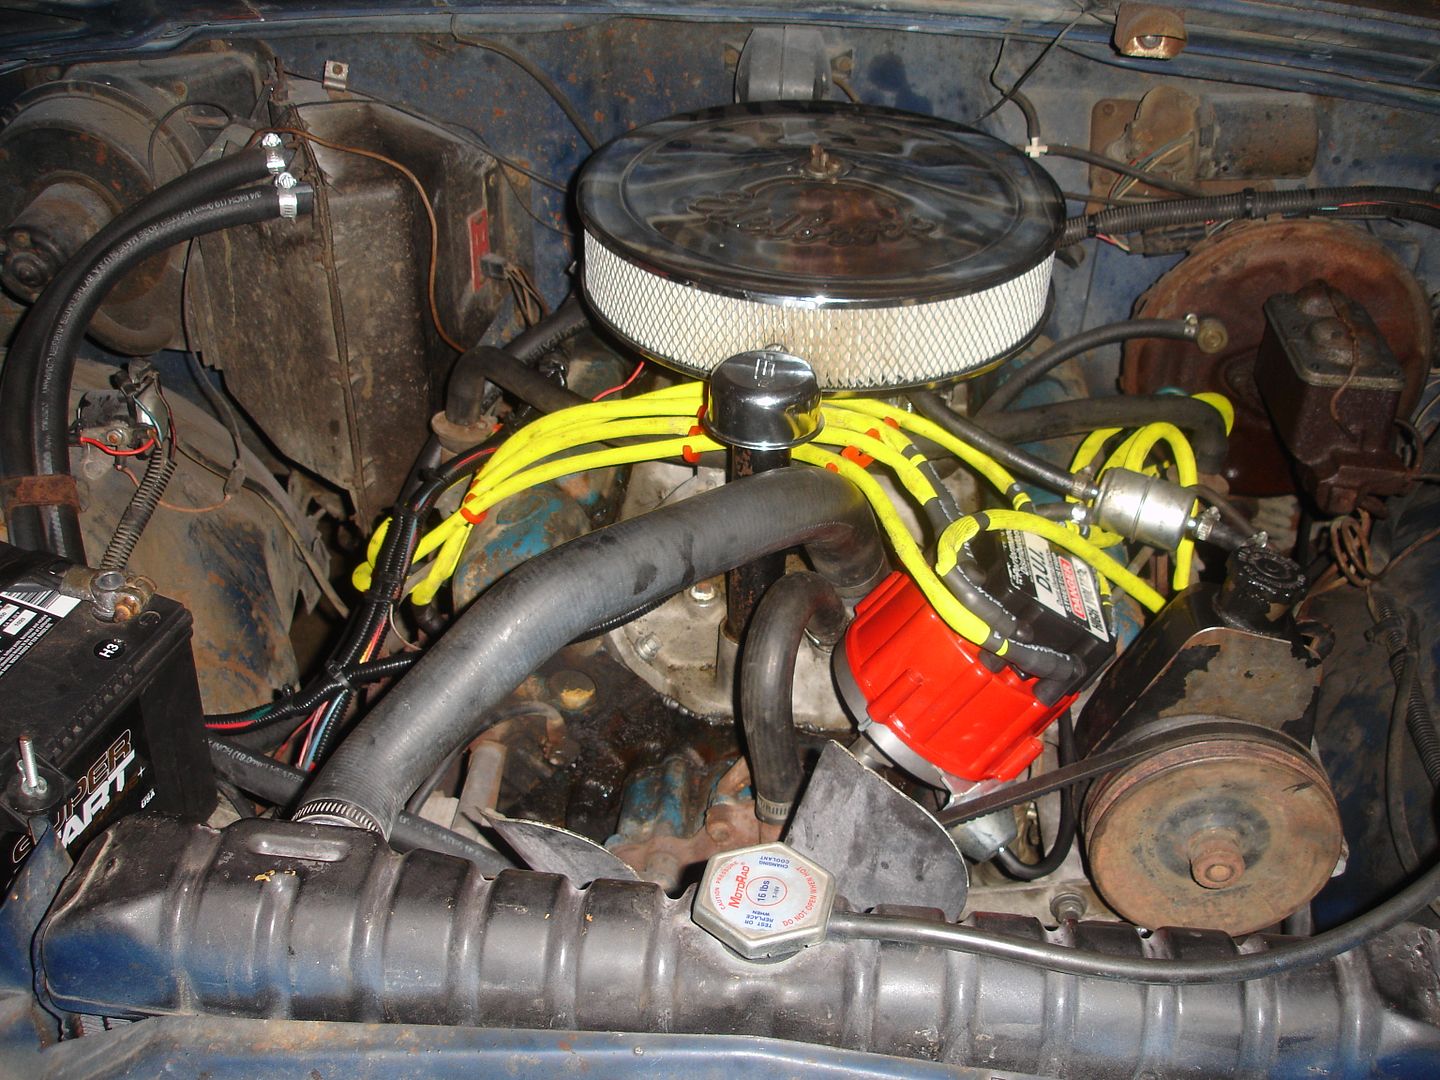
Here are a few pictures of the finished product. I currently have the distributor at 15° advanced without pinging (87 octane). I noticed when the distributor's hold down clamp is completely tight, I can still slightly turn the distributor. I think I'll remove the distributor and install another washer gasket, reinstall it, then bump up the timing to see where that gets me.
I also was able to make the spark plug wires work. They aren't ideal but better now that I've re-ran them. I may tinker a little and see if there are other cleaner options.
I also was able to make the spark plug wires work. They aren't ideal but better now that I've re-ran them. I may tinker a little and see if there are other cleaner options.


ChrisHager's 79 J-10 Build Thread: http://fsjnetwork.com/forum/viewtopic.php?f=12&t=3585
-
 Strode182
- Posts: 374
- Joined: Sat Jun 09, 2012 8:38 am
- Location: Littleton, Co
Re: ChrisHager's 79 J-10 Build Thread
On the hood light: The wire to the light is constant hot, and the light itself has a little mercury switch in it, and it makes contact when the hood goes up.
-
ChrisHager
Topic author - Posts: 182
- Joined: Wed Sep 11, 2013 12:03 pm
Re: ChrisHager's 79 J-10 Build Thread
Thanks Strode182!
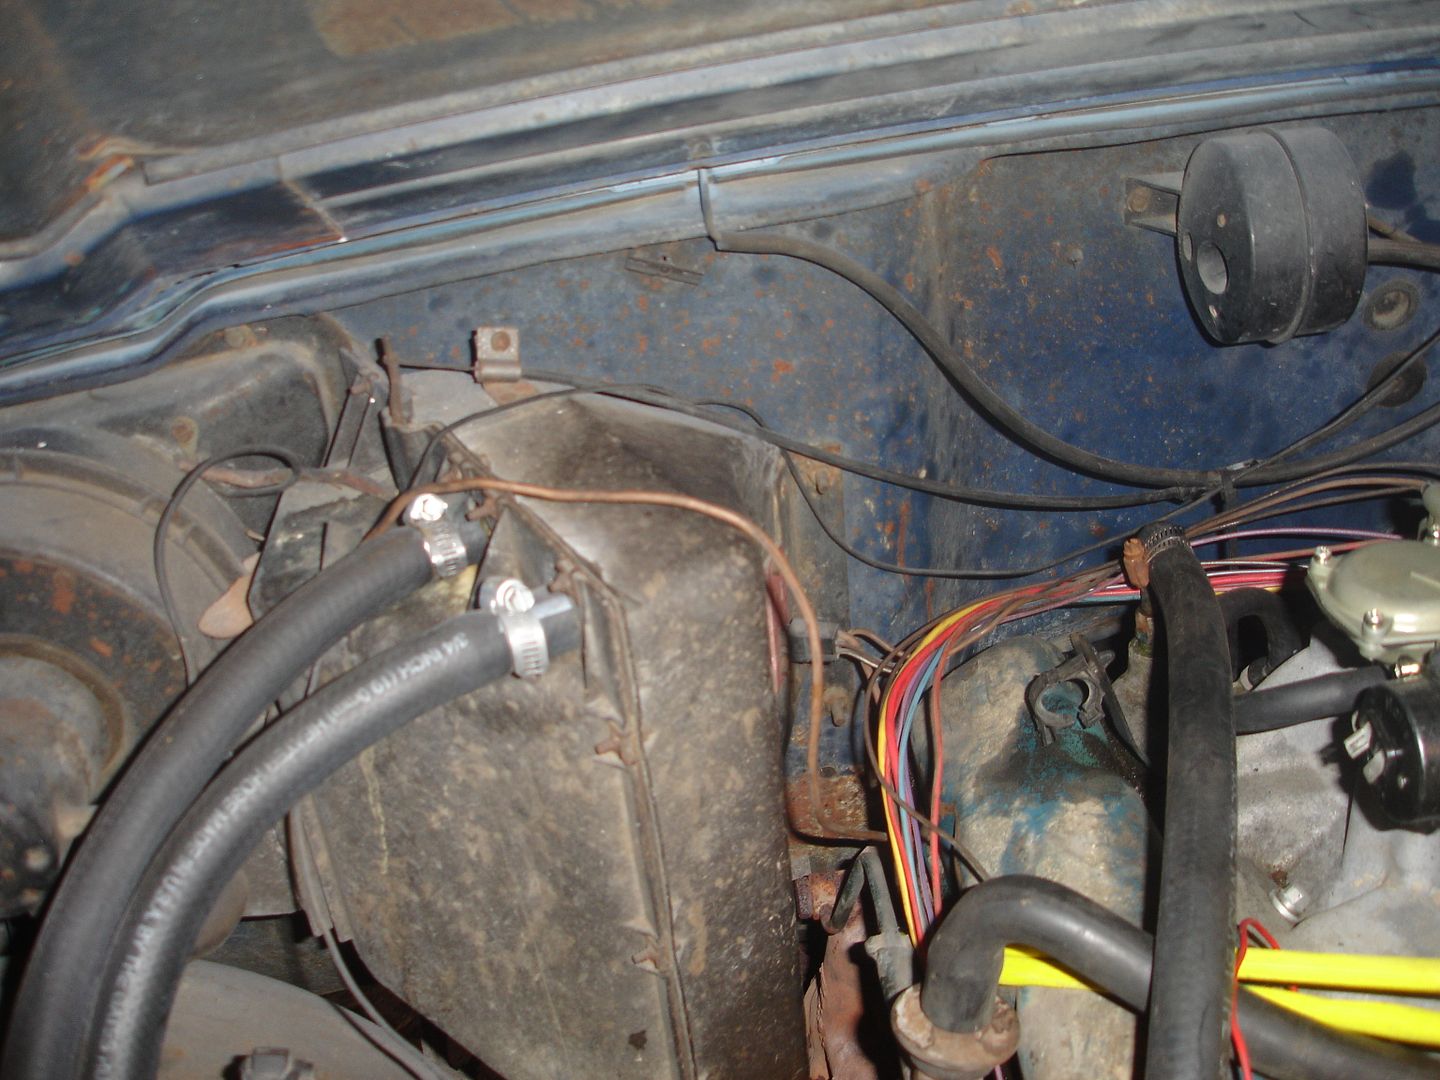
The WJ revealed -1°F on the drive to work this morning. I think tomorrow is supposed to be a little warmer but besides more snow Saturday and Sunday, Monday and Tuesday morning are supposed to be cold (-12°F, windchill -30 to -40 below). Depending on my evening, I may attempt to clean out the heater ...stuff... in the truck so I can play in the snow Sunday. I'm pretty sure the blower works but not much heat makes it into the cab. I have yet to clean out the vents and such which I'm sure are full of 35 years of leaves, rat nests, etc. That being said, what do I need to clean?...
1. Someone suggested cleaning out the cowl. How do I go about that? I have yet to research the removal of the cowl.
2. I may pop out my glove box liner, unhook the vents, and vacuum them out.
3. Heater Core Housing - here's what I found on that:
4. Blower Motor Housing. Is that the circular 'fella to the left of the Heater Core Housing in the following picture? I don't recall seeing it in the cab, though I haven't actually looked for it yet.
Anything I'm missing? Am I going overboard? Thanks in advance!!
The WJ revealed -1°F on the drive to work this morning. I think tomorrow is supposed to be a little warmer but besides more snow Saturday and Sunday, Monday and Tuesday morning are supposed to be cold (-12°F, windchill -30 to -40 below). Depending on my evening, I may attempt to clean out the heater ...stuff... in the truck so I can play in the snow Sunday. I'm pretty sure the blower works but not much heat makes it into the cab. I have yet to clean out the vents and such which I'm sure are full of 35 years of leaves, rat nests, etc. That being said, what do I need to clean?...
1. Someone suggested cleaning out the cowl. How do I go about that? I have yet to research the removal of the cowl.
2. I may pop out my glove box liner, unhook the vents, and vacuum them out.
3. Heater Core Housing - here's what I found on that:
...which is this bad boy for reference:http://www.bjsoffroad.com/forum/forum/customer-service/product-installation-instructions/1418-heater-core wrote:Heater Core install basics. To install, you remove the heater core housing in the engine compartment. There are two bolts between the case and the passenger exhaust manifold on the firewall. The other two nuts are inside the cab on the passenger firewall, up behind the a/c assembly. Total of 4 nuts to remove to get it out. Then, there are about 16 or so small screws that hold the heater core housing halves together. Take them apart, clean out the core housing (usually filled with pinestraw and leaves), remove the old core, pop in the new, put it back together (I use RTV between them, as well as weatherstrip from home depot around the vent door) and then reinstall. Super easy.
I also like to quickly sand / scuff it and apply several coats of exterior grade metal primer and several coats of exterior grade metal paint while I'm at it.
4. Blower Motor Housing. Is that the circular 'fella to the left of the Heater Core Housing in the following picture? I don't recall seeing it in the cab, though I haven't actually looked for it yet.
Anything I'm missing? Am I going overboard? Thanks in advance!!
ChrisHager's 79 J-10 Build Thread: http://fsjnetwork.com/forum/viewtopic.php?f=12&t=3585
-
jaber
- Vendor
- Posts: 3067
- Joined: Sat Aug 27, 2011 5:24 pm
- Location: Chino Valley, Az.
Re: ChrisHager's 79 J-10 Build Thread
There's screws holding the grate on, then I'd snake a shop vac hose in as far as possible. Also check the vacuum lines that open the blend doors, might be why you are not feeling it.
sent from somewhere in Az...
sent from somewhere in Az...
Jeff
'46 cj3a
'51 Willys p/u
'51 Willys Parkway Conversion
'74 CJ5
'75 J-20 Wrecker
'75 J-20 Cummins service truck
'77 J-10 p/u
'79 Cherokee
'88 Grand Wagoneer
http://s252.photobucket.com/albums/hh14/jeffaber/
'46 cj3a
'51 Willys p/u
'51 Willys Parkway Conversion
'74 CJ5
'75 J-20 Wrecker
'75 J-20 Cummins service truck
'77 J-10 p/u
'79 Cherokee
'88 Grand Wagoneer
http://s252.photobucket.com/albums/hh14/jeffaber/
-
ChrisHager
Topic author - Posts: 182
- Joined: Wed Sep 11, 2013 12:03 pm
Re: ChrisHager's 79 J-10 Build Thread
Right on! Thanks!
ChrisHager's 79 J-10 Build Thread: http://fsjnetwork.com/forum/viewtopic.php?f=12&t=3585
-
 81Cherokee Laredo
- Posts: 67
- Joined: Sat Nov 10, 2012 3:20 pm
- Location: Tuscola TX
Re: ChrisHager's 79 J-10 Build Thread
Chris, first off thats a great looking truck. second for cleaning out you heater core box, you can pull the fan out right next to it(only 4 screws) and get a vacume hose in there. I would pull off all hard plastic bits off the vacume and just use the flexible hose.
81 Cherokee Laredo 360/727/219 - SOA/SF Inwk - 4.56 D44/AMC20 35 Cooper's - J20 Steering Box
83 Cherokee W/T - Katy - Long term project
89 Grand Wagoneer 360/727/229 - 31 X 10.50
83 Cherokee W/T - Katy - Long term project
89 Grand Wagoneer 360/727/229 - 31 X 10.50
-
ChrisHager
Topic author - Posts: 182
- Joined: Wed Sep 11, 2013 12:03 pm
Re: ChrisHager's 79 J-10 Build Thread
Thanks for the tip! I gave it a try yesterday though I'm not sure what kind of treasures I sucked out.
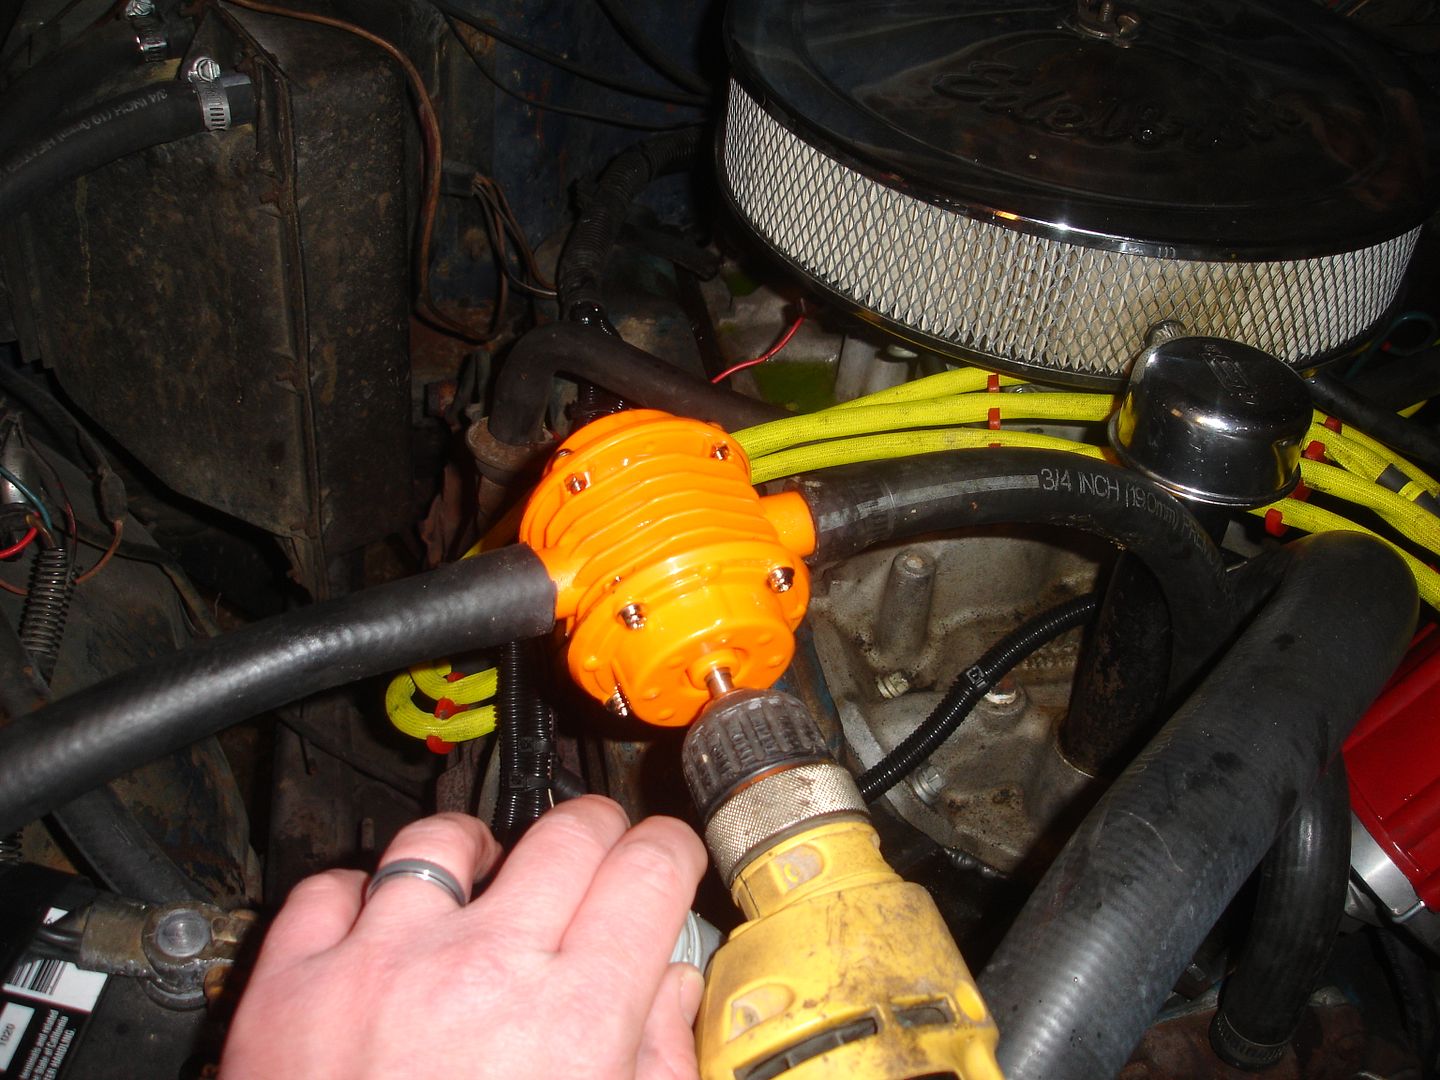
Also, I picked up a drill pump from Harbor Freight to assist in my heater core cleaning. As usual, I took pictures!
http://www.harborfreight.com/heavy-duty ... ?hftref=cj
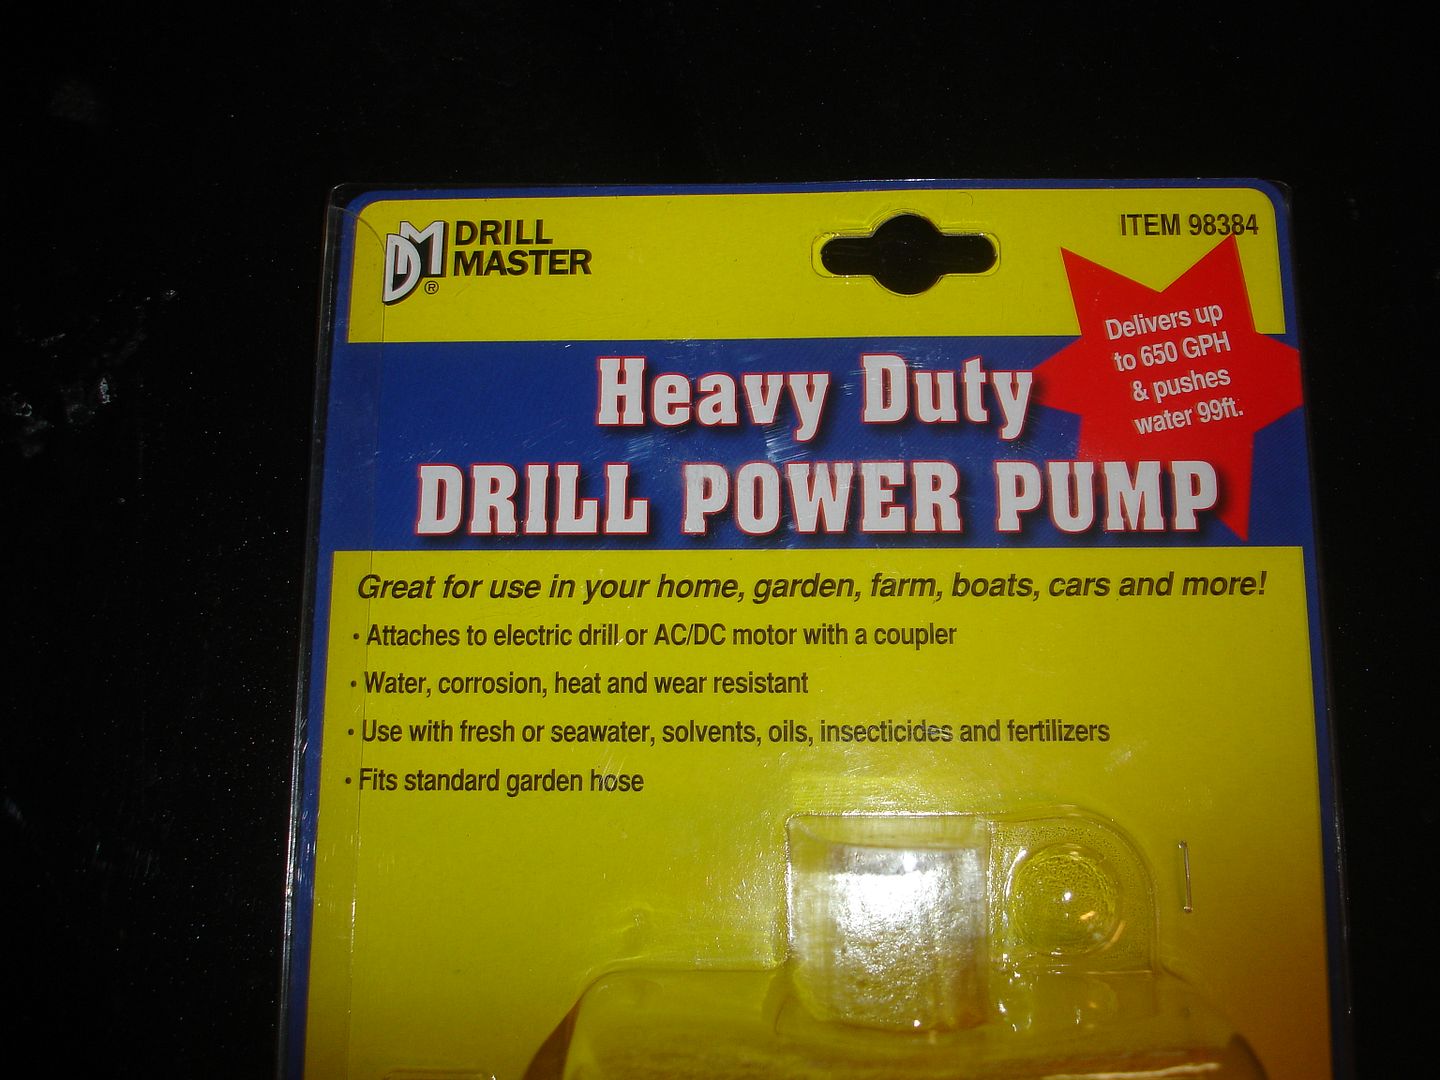
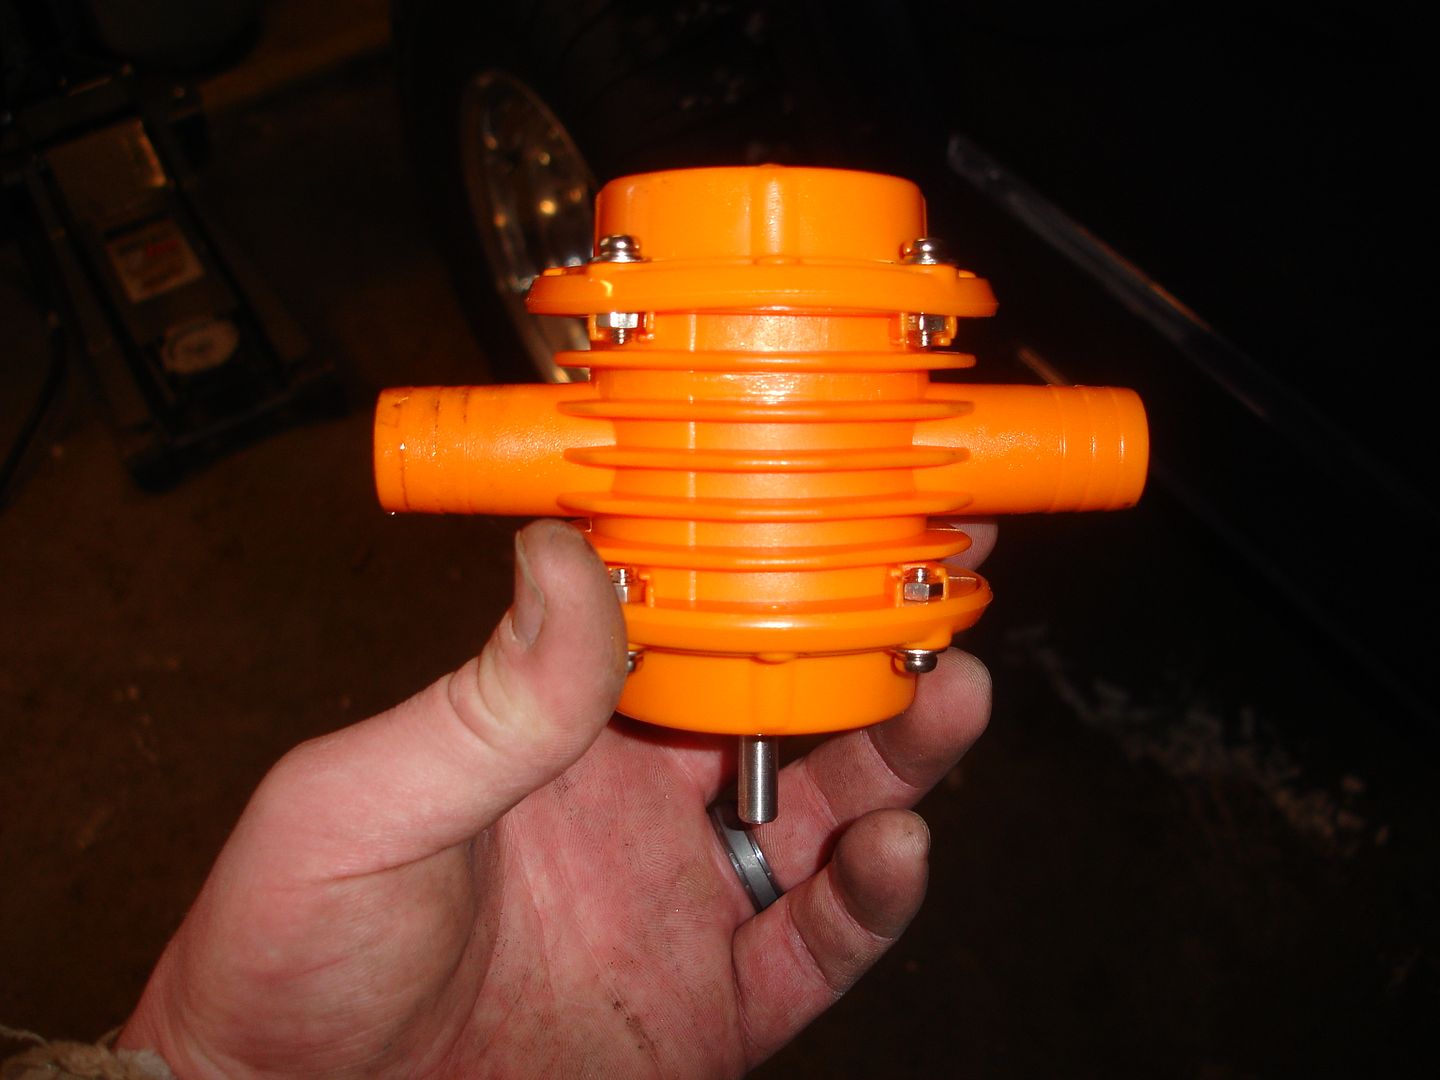
I hooked a heater core hose to one side of the pump and submerged the other heater core hose in a bucket of clean water and started pumping. Note that with this pump, you have to get it cranking before it will self prime. Once primed, it works awesome!
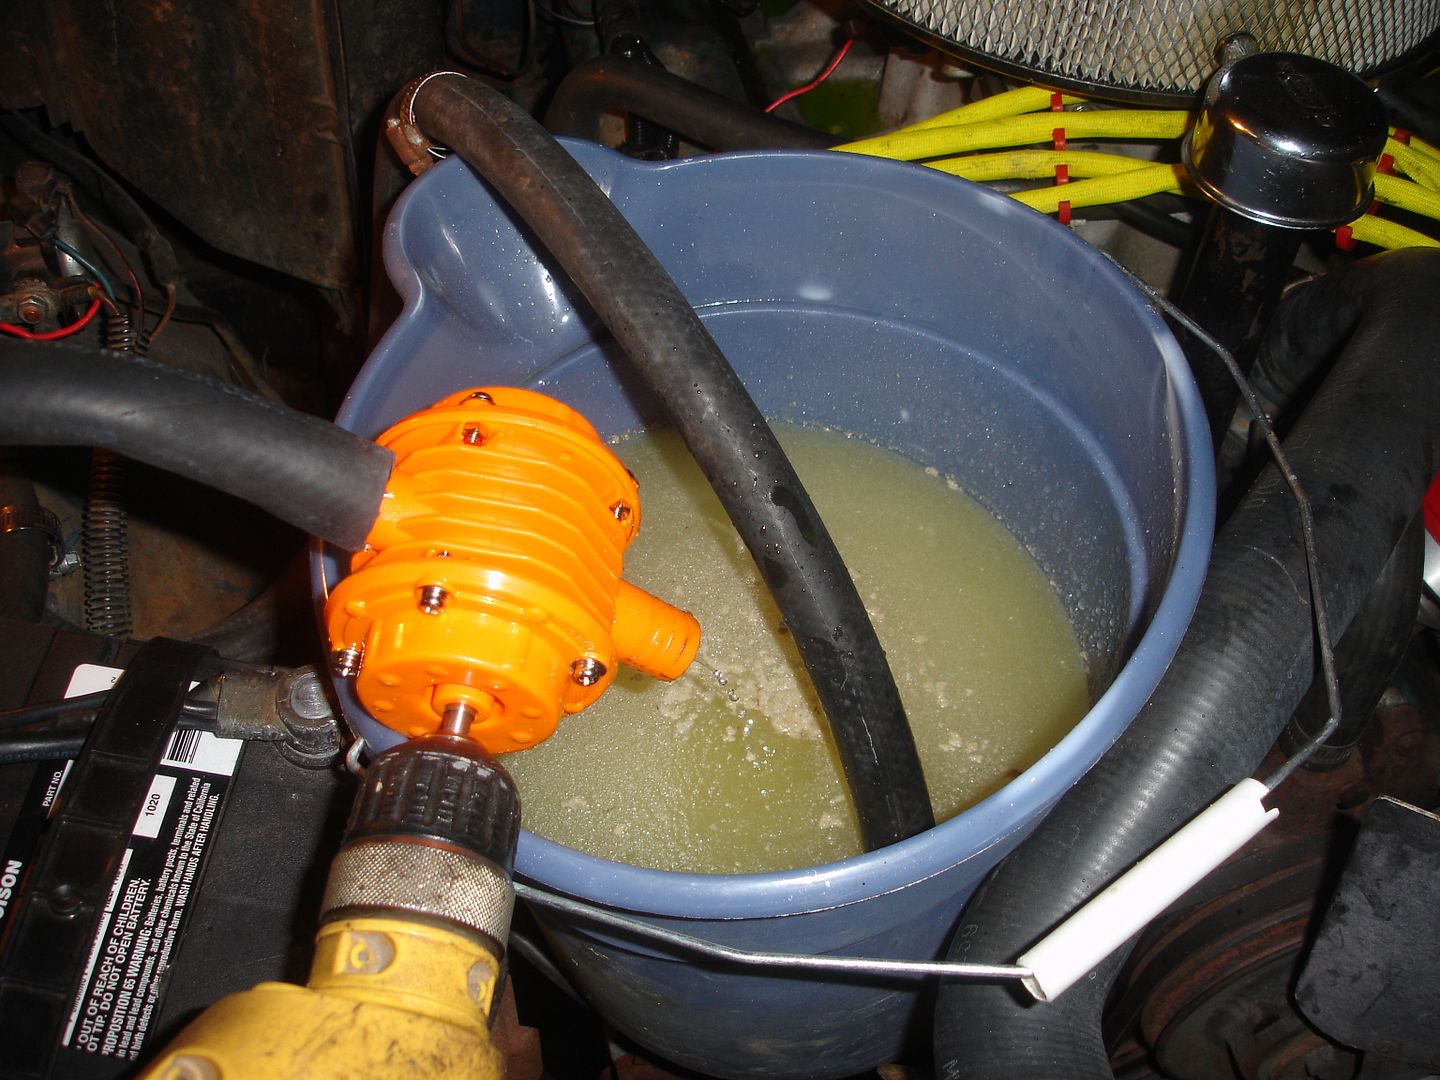
After cycling both directions a few times...
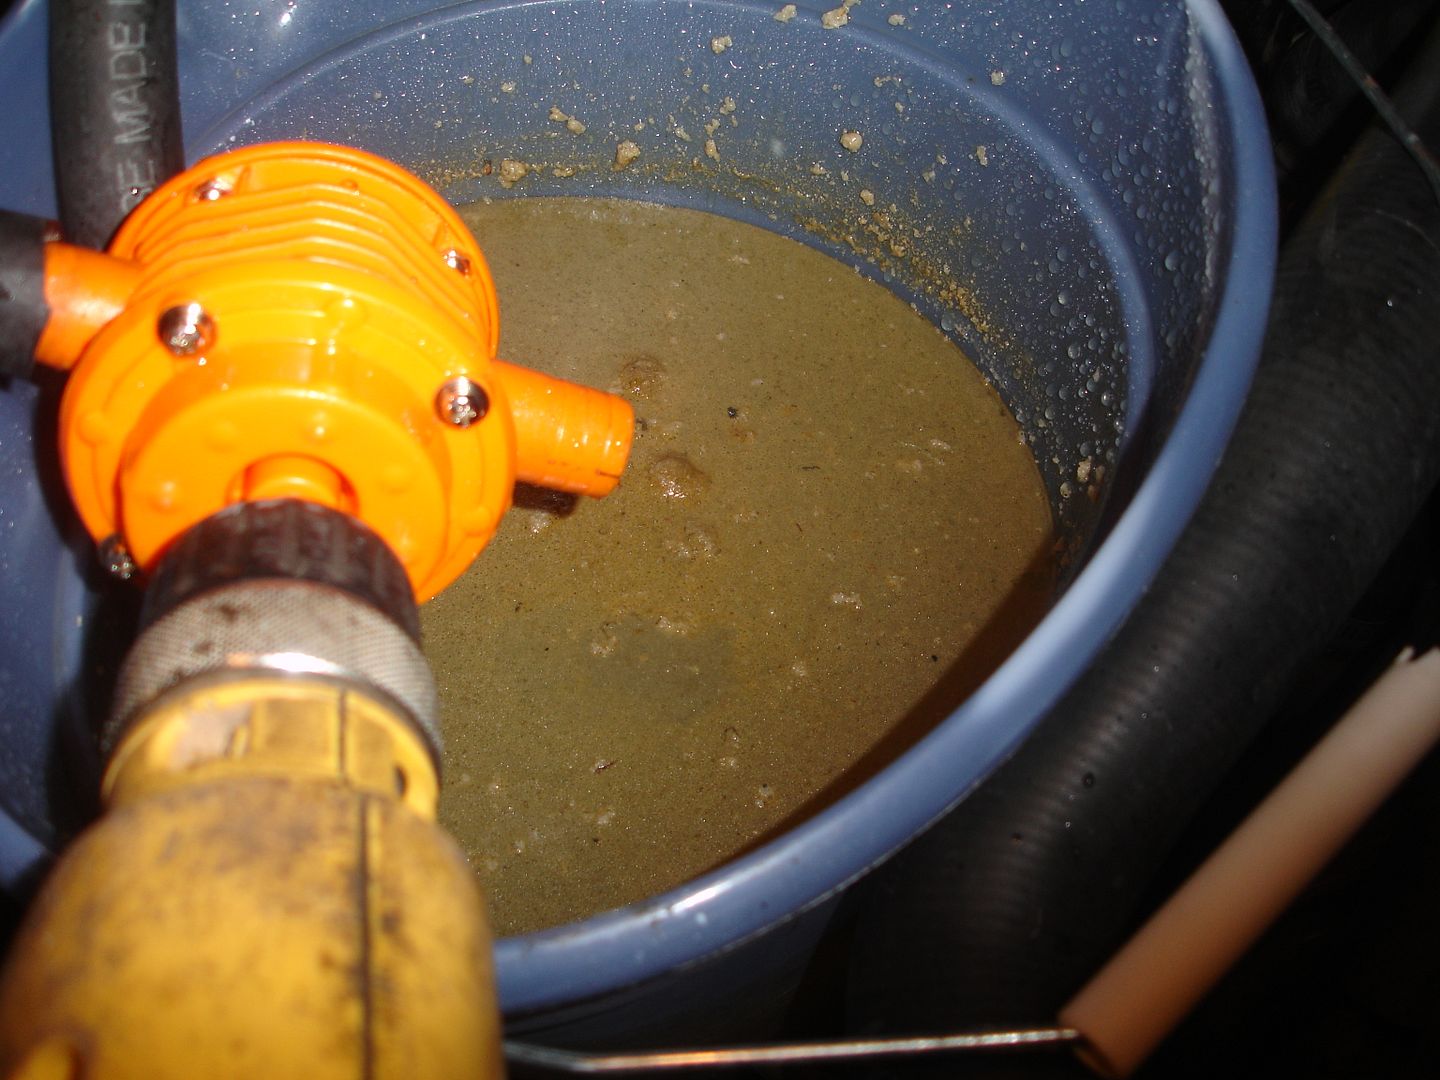
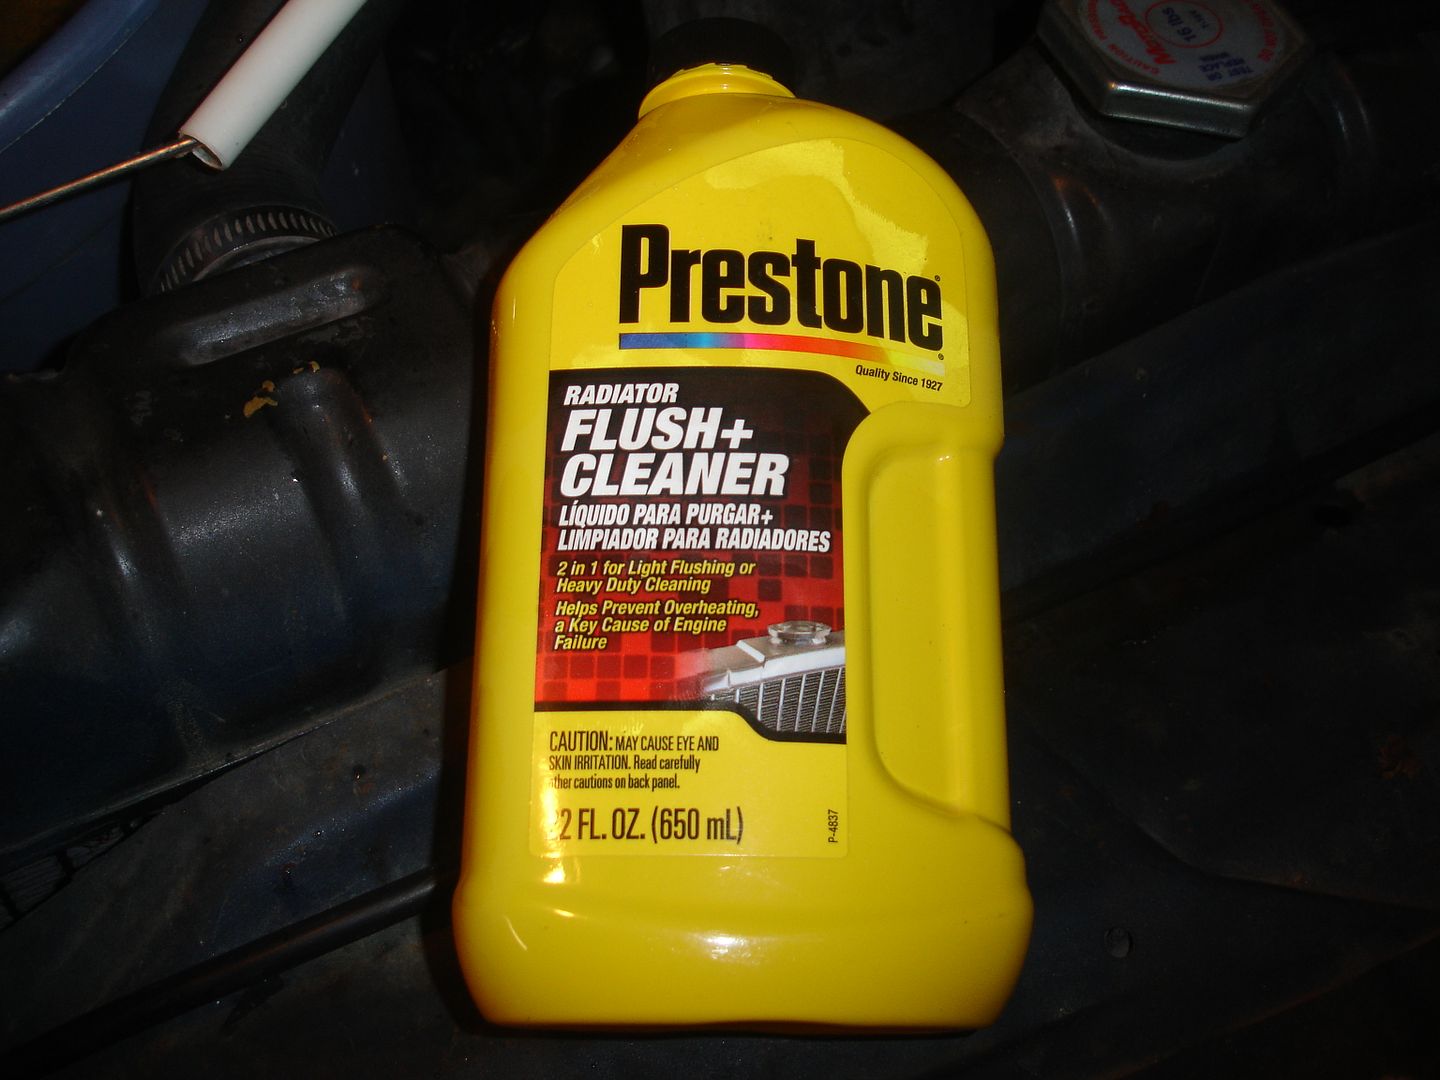
Once I rinsed it, I ran the pump with the hose out of the water in an attempt to empty the core. Then I added some Preston Radiator Flush + Cleaner by dumping it down one of the heater core hoses. I let it sit for 20-30 minutes.
While this was sitting, I poked my head inside and saw this:

Even though I was jealous that I wasn't warm in front of the fire, I decided I needed to go out and get back to work. With the Prestone cleaner still in the heater core, I hooked the hoses up to cycle only the cleaner. I ran it both directions a few times and let it sit.
Lastly, I ran more clean water through both directions to rinse it out. I also attempted to remove most of the fluid from the heater core. In an attempt to not have an air lock in the core, I poured coolant down the hoses before I hooked them back up. Overall, I'm pleased with the outcome. With the temperatures only reaching a high of -2°F and a low of -13°F yesterday, I was pleased to notice an increase in temperature in the cab. I'm still not positive if everything is working as it should but I need to take it for a real drive before I make my final decision on the situation.
Also, I picked up a drill pump from Harbor Freight to assist in my heater core cleaning. As usual, I took pictures!
http://www.harborfreight.com/heavy-duty ... ?hftref=cj


I hooked a heater core hose to one side of the pump and submerged the other heater core hose in a bucket of clean water and started pumping. Note that with this pump, you have to get it cranking before it will self prime. Once primed, it works awesome!

After cycling both directions a few times...

Once I rinsed it, I ran the pump with the hose out of the water in an attempt to empty the core. Then I added some Preston Radiator Flush + Cleaner by dumping it down one of the heater core hoses. I let it sit for 20-30 minutes.

While this was sitting, I poked my head inside and saw this:

Even though I was jealous that I wasn't warm in front of the fire, I decided I needed to go out and get back to work. With the Prestone cleaner still in the heater core, I hooked the hoses up to cycle only the cleaner. I ran it both directions a few times and let it sit.

Lastly, I ran more clean water through both directions to rinse it out. I also attempted to remove most of the fluid from the heater core. In an attempt to not have an air lock in the core, I poured coolant down the hoses before I hooked them back up. Overall, I'm pleased with the outcome. With the temperatures only reaching a high of -2°F and a low of -13°F yesterday, I was pleased to notice an increase in temperature in the cab. I'm still not positive if everything is working as it should but I need to take it for a real drive before I make my final decision on the situation.
Last edited by ChrisHager on Tue Jan 07, 2014 1:52 pm, edited 1 time in total.
ChrisHager's 79 J-10 Build Thread: http://fsjnetwork.com/forum/viewtopic.php?f=12&t=3585
-
ChrisHager
Topic author - Posts: 182
- Joined: Wed Sep 11, 2013 12:03 pm
Re: ChrisHager's 79 J-10 Build Thread
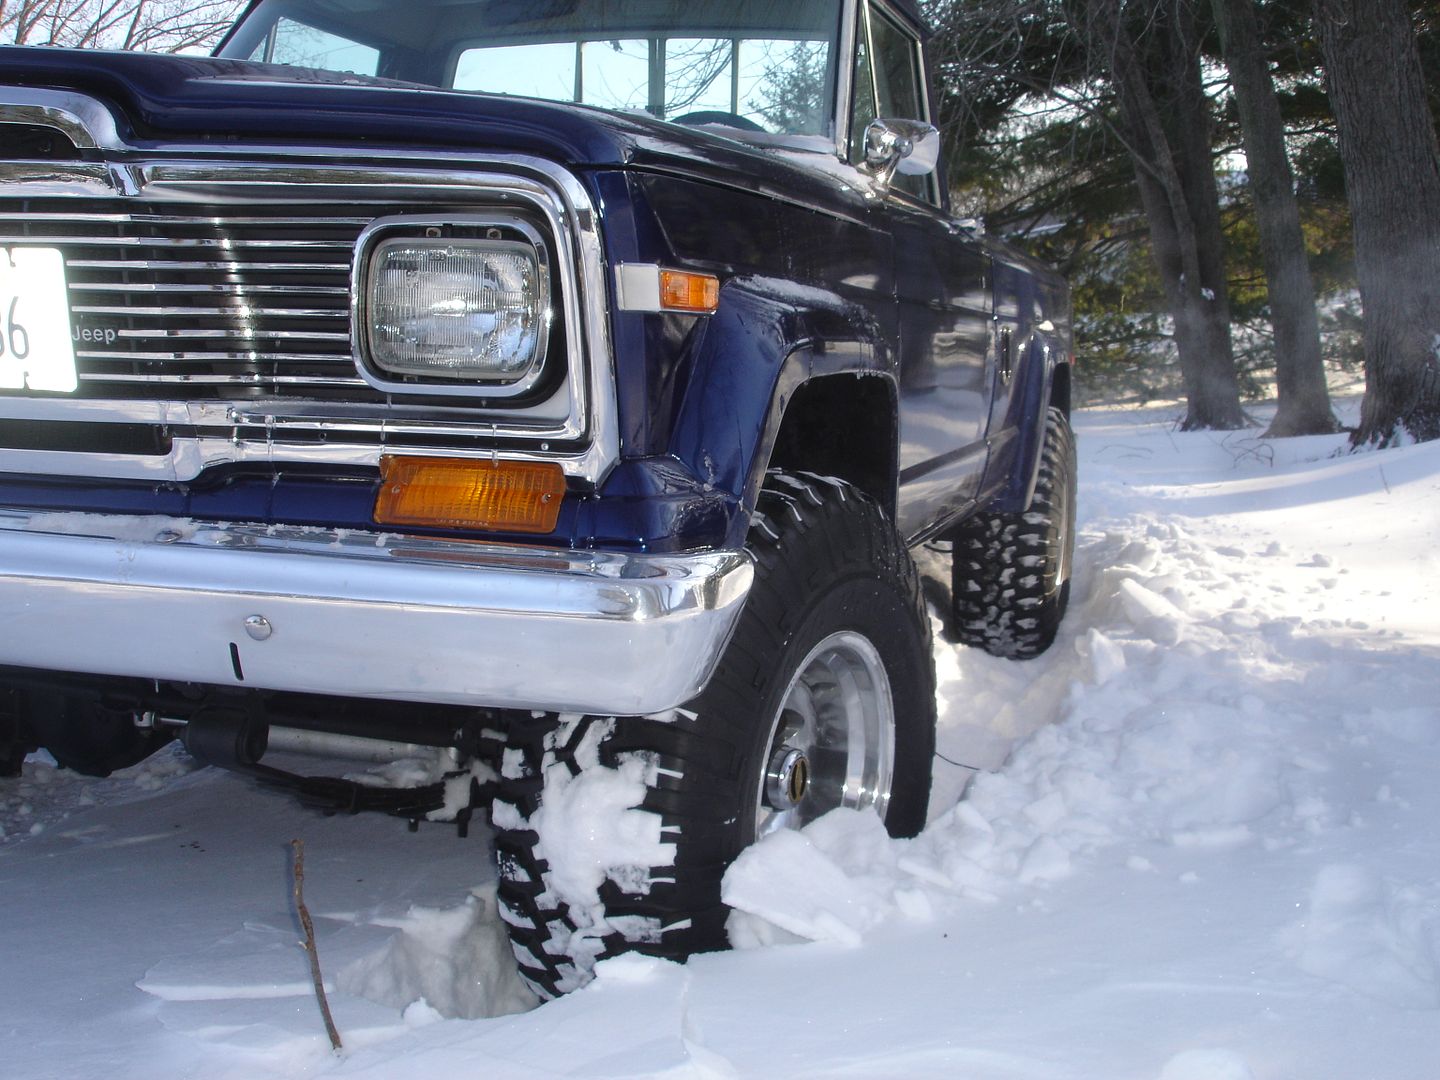
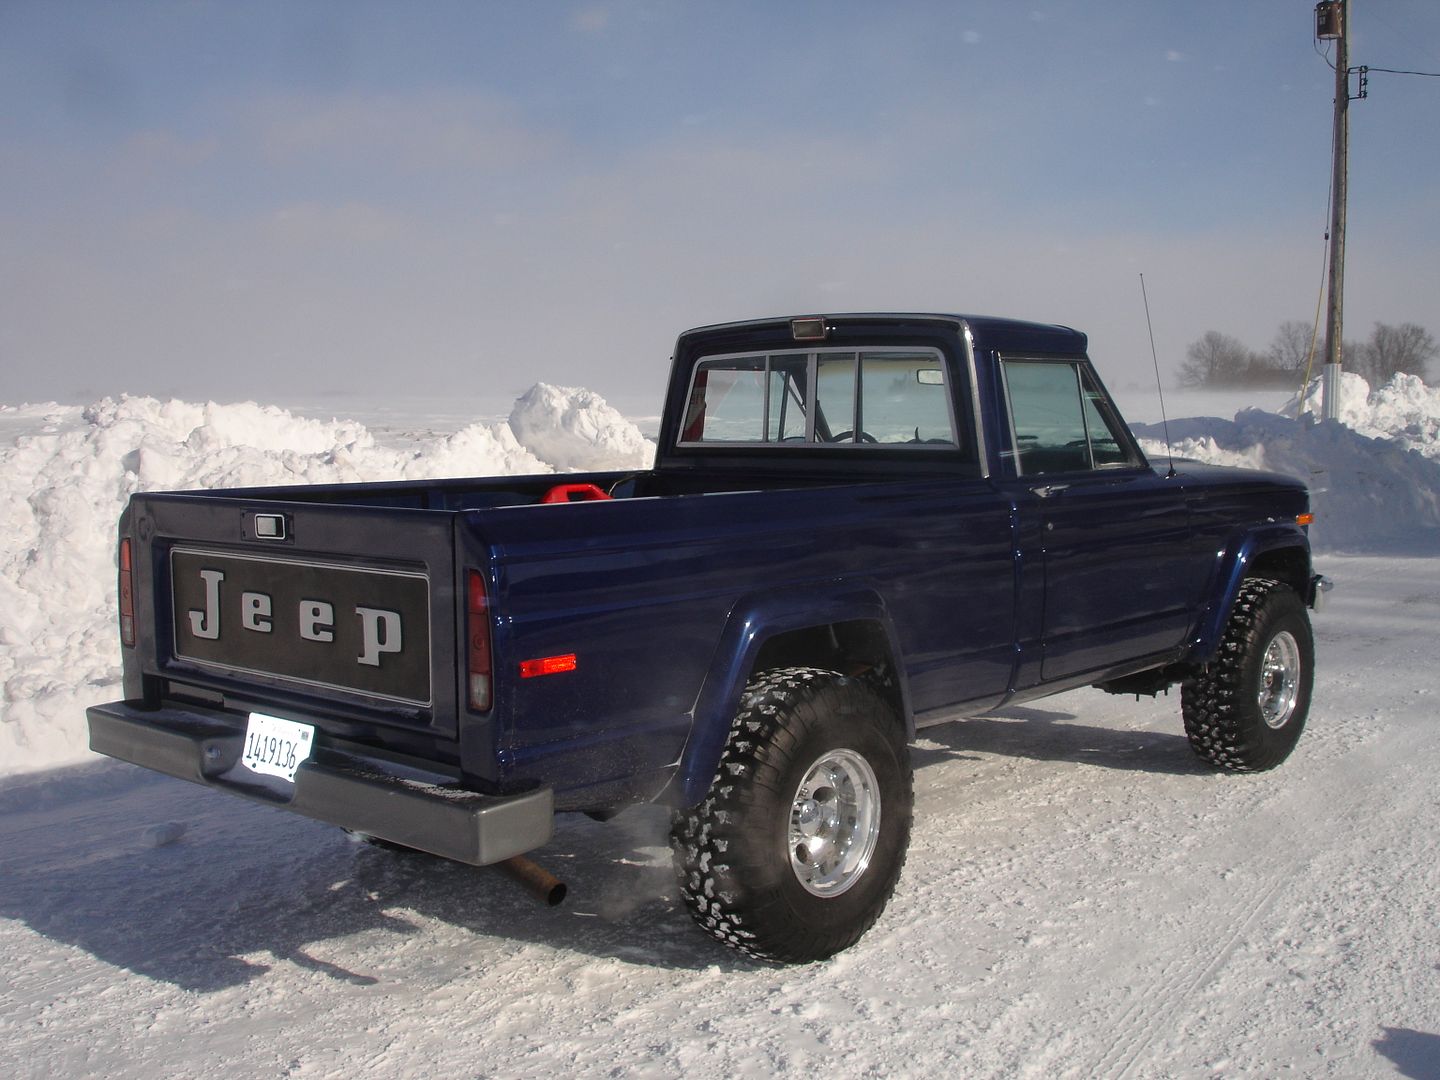
Also, here are a couple pictures from yesterday.


ChrisHager's 79 J-10 Build Thread: http://fsjnetwork.com/forum/viewtopic.php?f=12&t=3585
-
 msh227
- Posts: 281
- Joined: Thu Mar 21, 2013 10:55 am
- Location: Poconos, PA
Re: ChrisHager's 79 J-10 Build Thread
I need to do the same thing with my '78, but first I have to troubleshoot why my blower won't turn on.
Matt
1978 J10 5.3L/700r4/QT swap in progress.....
37x14.50R15 TOYO Open Country MT
4.56 Gears
6" BJs springs w/ BJs offroad shackles in front & 2" blocks in rear to level.
3" body lift
Build Thread:
http://fsjnetwork.com/forum/viewtopic.php?f=12&t=2300
1978 J10 5.3L/700r4/QT swap in progress.....
37x14.50R15 TOYO Open Country MT
4.56 Gears
6" BJs springs w/ BJs offroad shackles in front & 2" blocks in rear to level.
3" body lift
Build Thread:
http://fsjnetwork.com/forum/viewtopic.php?f=12&t=2300
-
ChrisHager
Topic author - Posts: 182
- Joined: Wed Sep 11, 2013 12:03 pm
Re: ChrisHager's 79 J-10 Build Thread
Couple things...
1. I may try the twin-stick install on Saturday. It partially depends on if anyone wants to come over to help. I'd prefer an extra hand if I end up having to slide the D20 away from the transmission...
2. I've been thinking about a rear hitch, especially since I've recently taken a couple loads of wood to my Grandpa. Pulling a trailer would allow for quite a bit more wood per trip. Plus, I need a hitch/recovery point. In one of my first posts, I stated that BJ's Offroad sells a hitch for my truck:
So, since a hitch cannot be purchased, I'm thinking about buying the steel and building one myself. I have two small welders (stick and wire), I have access to a shop with a plasma cutter and a nice welder, I may have access to an actual metal shop, and I have a friend who can cut me stuff on a CNC machine if I so need. In the tool department, I'm pretty much covered. If I go this route, what material do I need (size, type, etc.). I need to look things over but I'm thinking about building one for the front as well while I'm at it.
Any advice would be greatly appreciated. I'm not extremely well versed in this yet but with the friends and resources at hand, I feel confident in how this could turn out.
1. I may try the twin-stick install on Saturday. It partially depends on if anyone wants to come over to help. I'd prefer an extra hand if I end up having to slide the D20 away from the transmission...
2. I've been thinking about a rear hitch, especially since I've recently taken a couple loads of wood to my Grandpa. Pulling a trailer would allow for quite a bit more wood per trip. Plus, I need a hitch/recovery point. In one of my first posts, I stated that BJ's Offroad sells a hitch for my truck:
It took me a while to notice but if you follow that link, you'll see that hitch is only for the Wagoneer, Grand Wagoneer, and Cherokee. I know that the J-10 frame is wider than the Wag frame so clearly, that hitch won't work.ChrisHager wrote:5. I NEED to install a hitch on the truck, especially since I'm going to use this to haul wood on my little trailer. I found BJ's Off-Road sells a new hitch with hardware included for $325 shipped. That doesn't seem too bad! http://www.bjsoffroad.com/prod-1098.htm
So, since a hitch cannot be purchased, I'm thinking about buying the steel and building one myself. I have two small welders (stick and wire), I have access to a shop with a plasma cutter and a nice welder, I may have access to an actual metal shop, and I have a friend who can cut me stuff on a CNC machine if I so need. In the tool department, I'm pretty much covered. If I go this route, what material do I need (size, type, etc.). I need to look things over but I'm thinking about building one for the front as well while I'm at it.
Any advice would be greatly appreciated. I'm not extremely well versed in this yet but with the friends and resources at hand, I feel confident in how this could turn out.
ChrisHager's 79 J-10 Build Thread: http://fsjnetwork.com/forum/viewtopic.php?f=12&t=3585
-
 fulsizjeep
- Moderator
- Posts: 5012
- Joined: Sun Nov 06, 2011 7:21 am
- Location: Fruitville, FL
- Contact:
Re: ChrisHager's 79 J-10 Build Thread
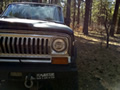
Definitely digging the way your truck looks. Especially in the snow!ChrisHager wrote:Also, here are a couple pictures from yesterday.
Flint Boardman
88 GW, 401/727/208, 5" lift, D44s/4.10s/locked up, 35s
https://jubileejeeps.org/quadratrac
88 GW, 401/727/208, 5" lift, D44s/4.10s/locked up, 35s
https://jubileejeeps.org/quadratrac
-
ChrisHager
Topic author - Posts: 182
- Joined: Wed Sep 11, 2013 12:03 pm
Re: ChrisHager's 79 J-10 Build Thread
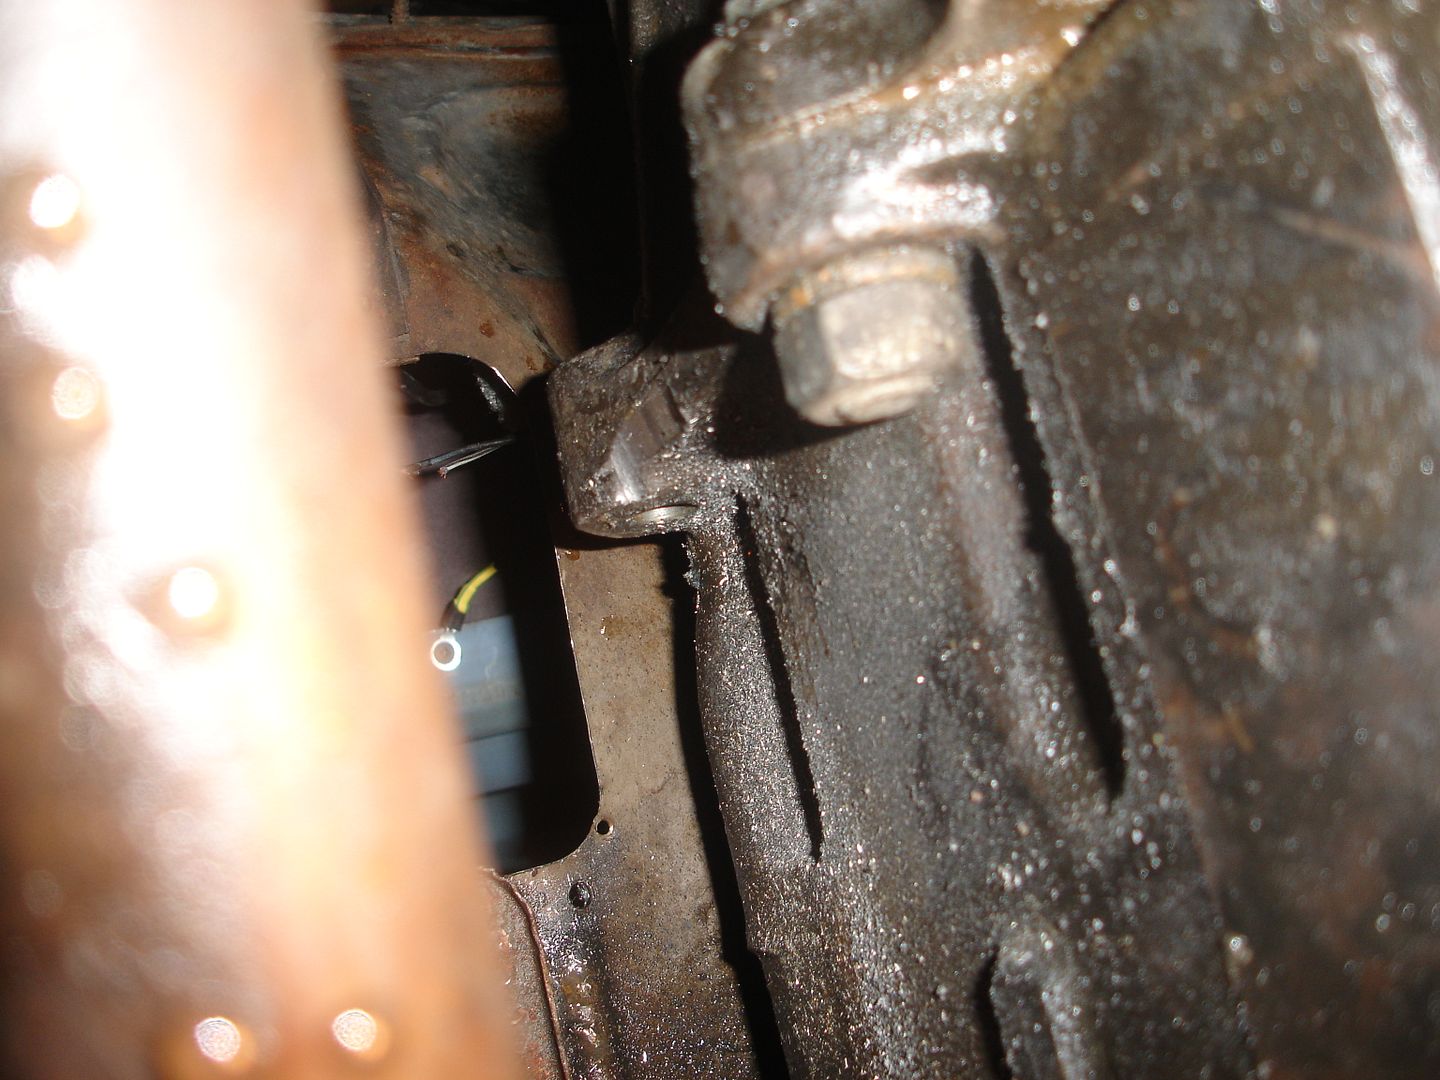
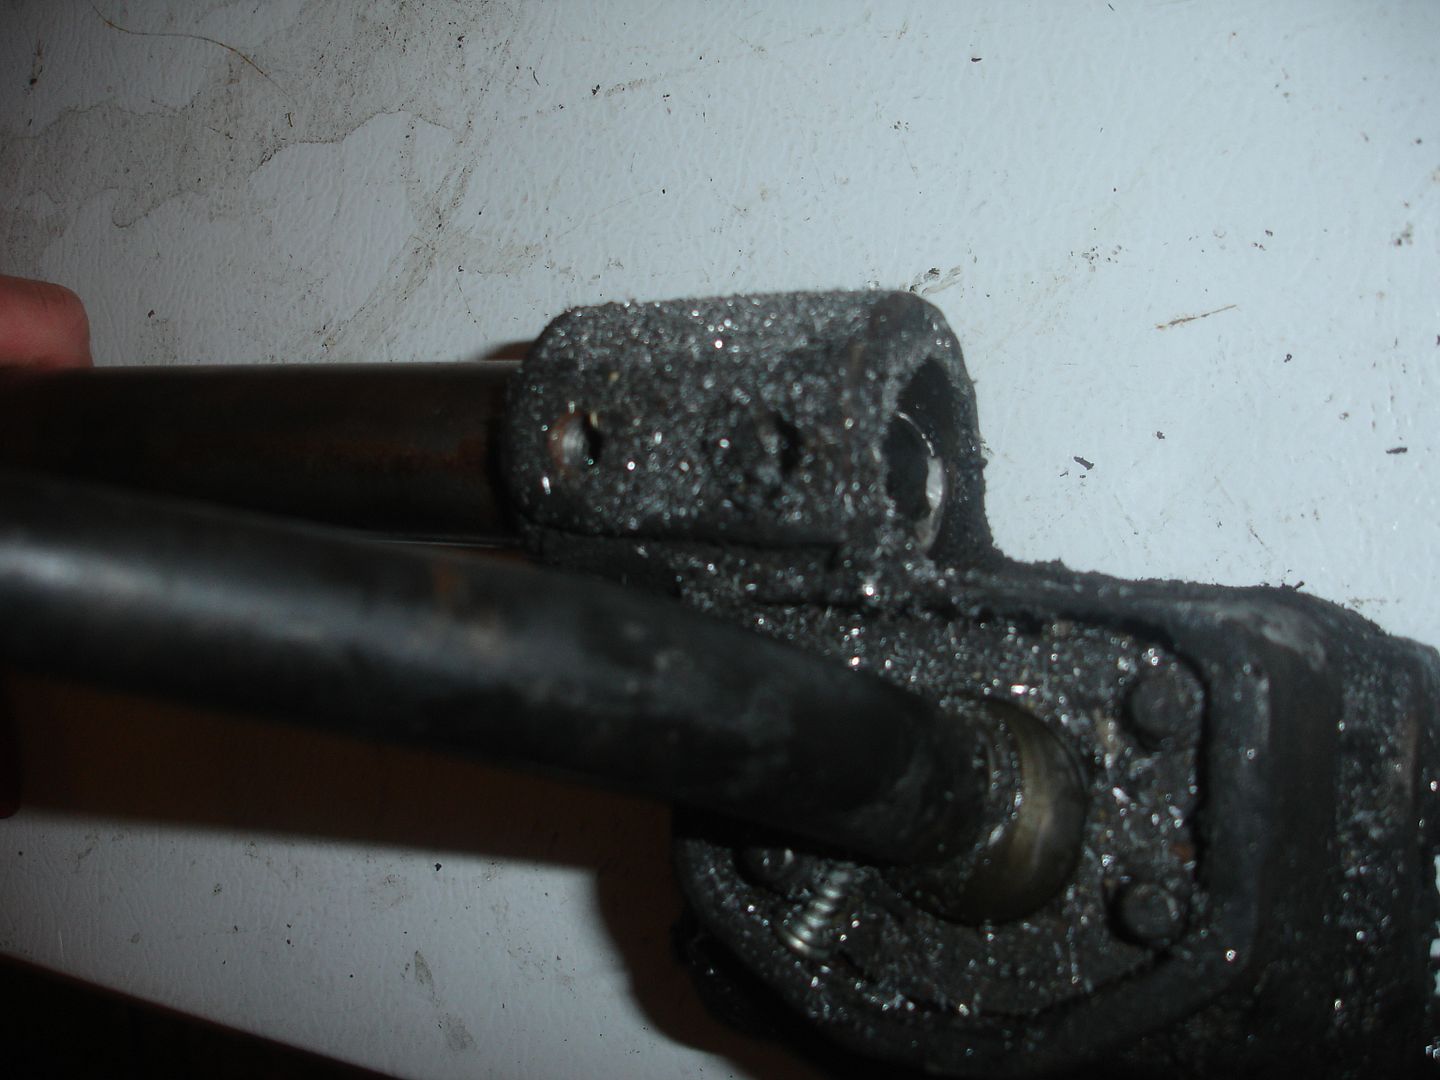
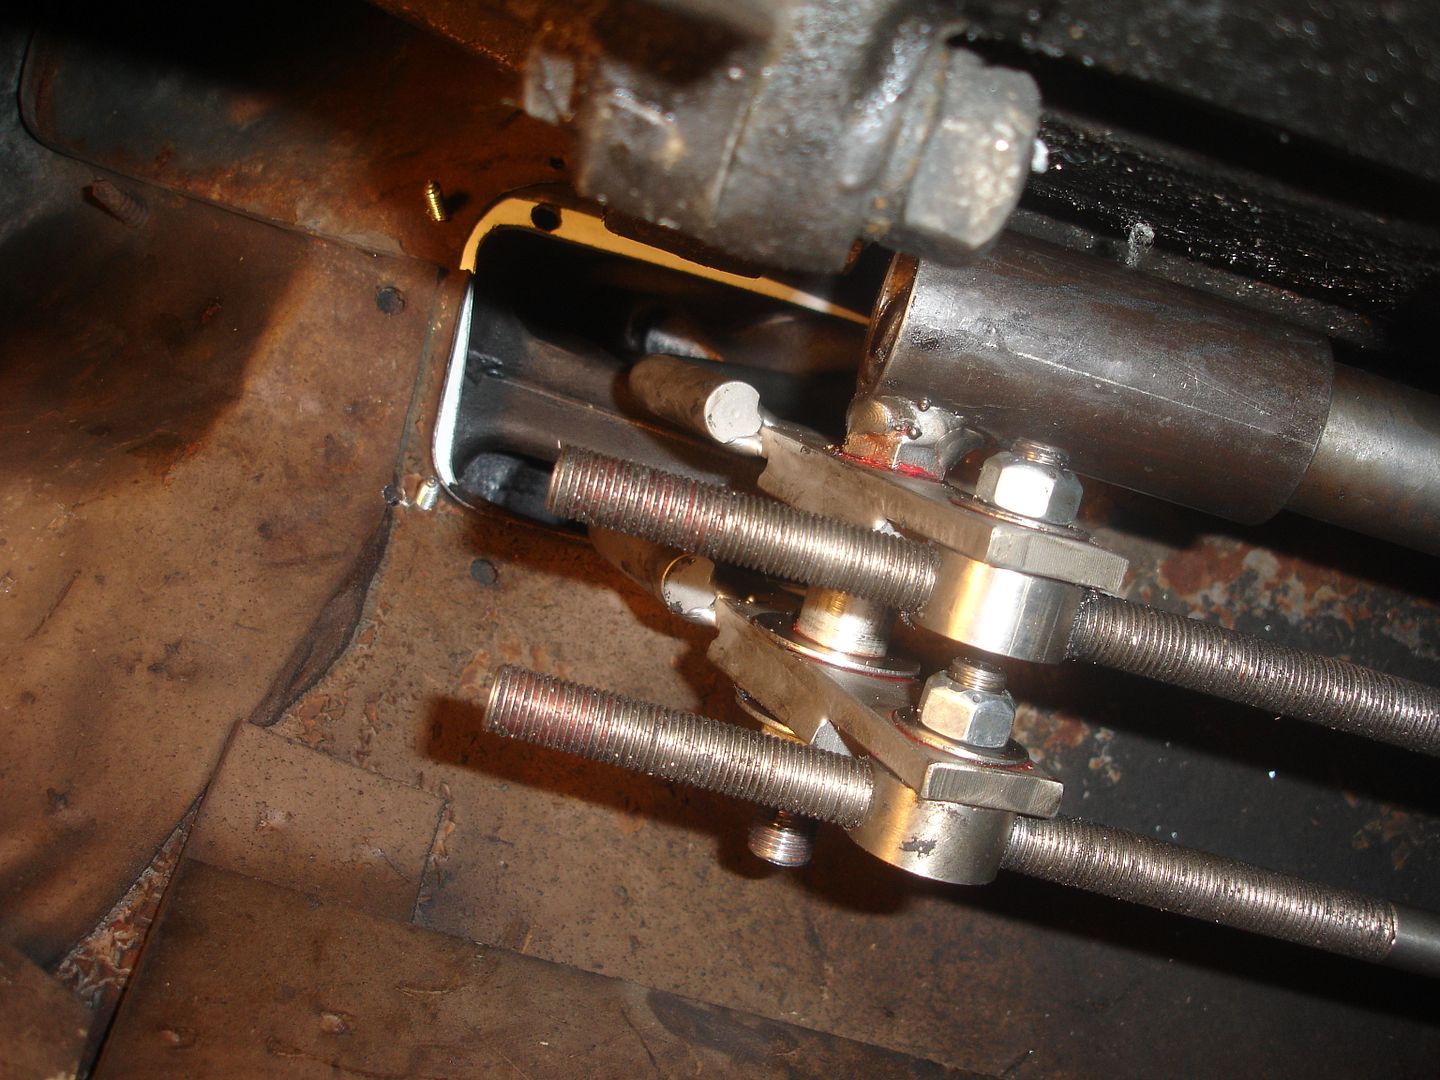
The twin stick is installed!!! While a little head scratching was involved, we were able to figure out how to remove/install the shifters without taking anything apart.
This is the support rail for the shifter.
It mounts to the shifter with two bolts (1/2" square heads).
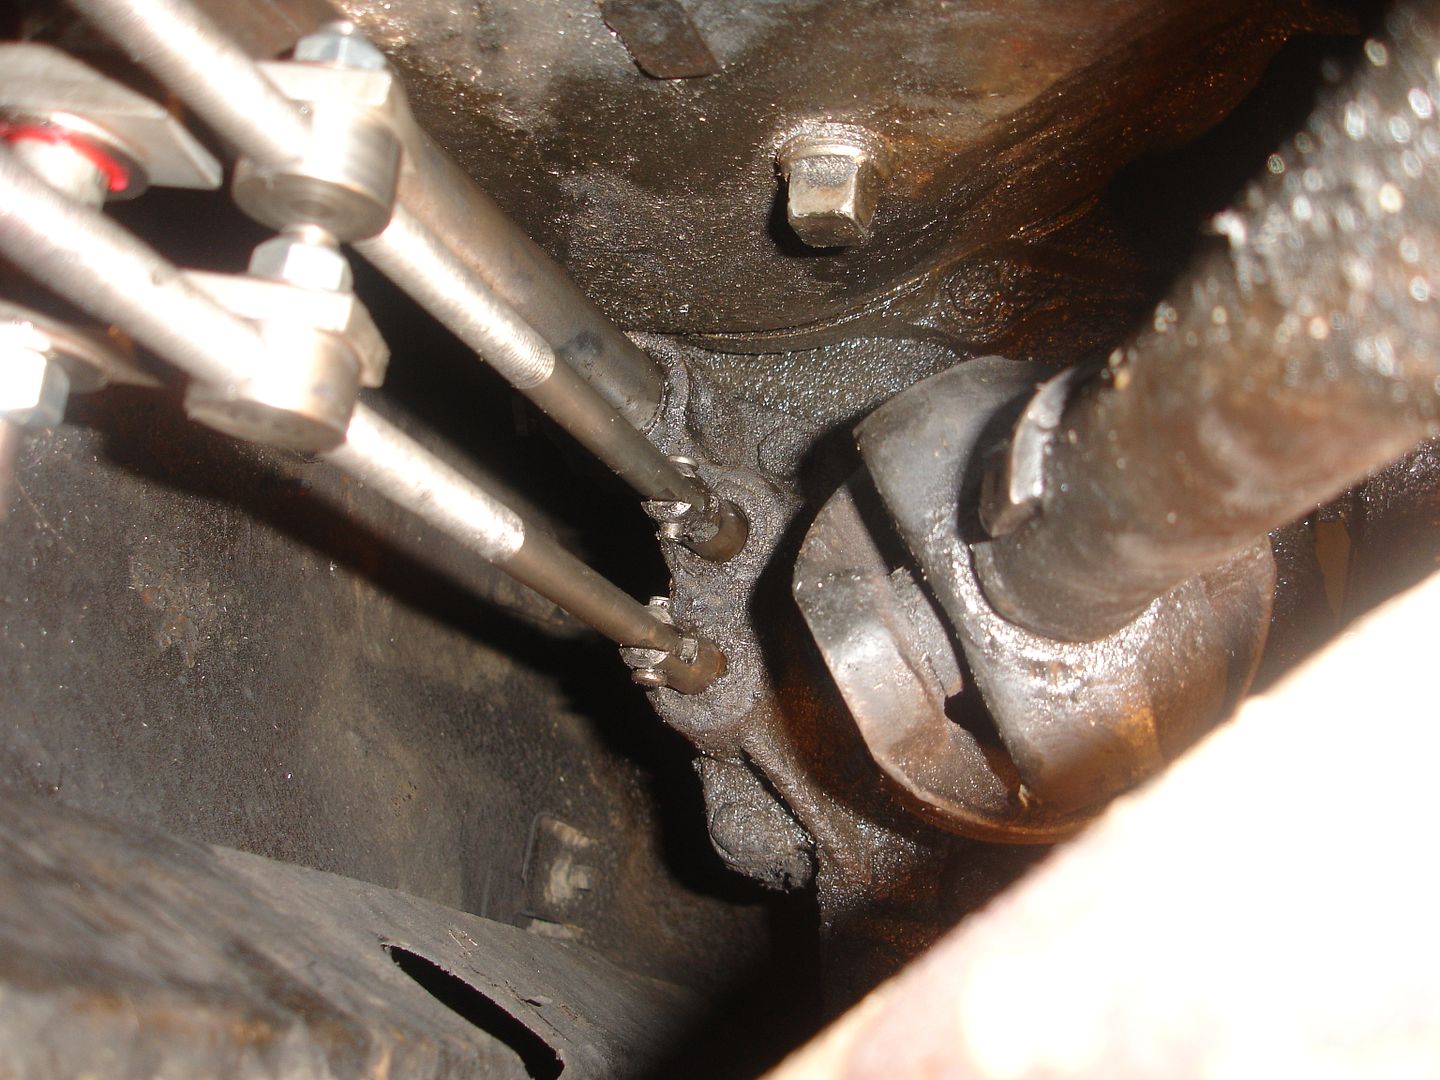
It also mounts to the transfer case in the same way (twin stick installed in this picture).
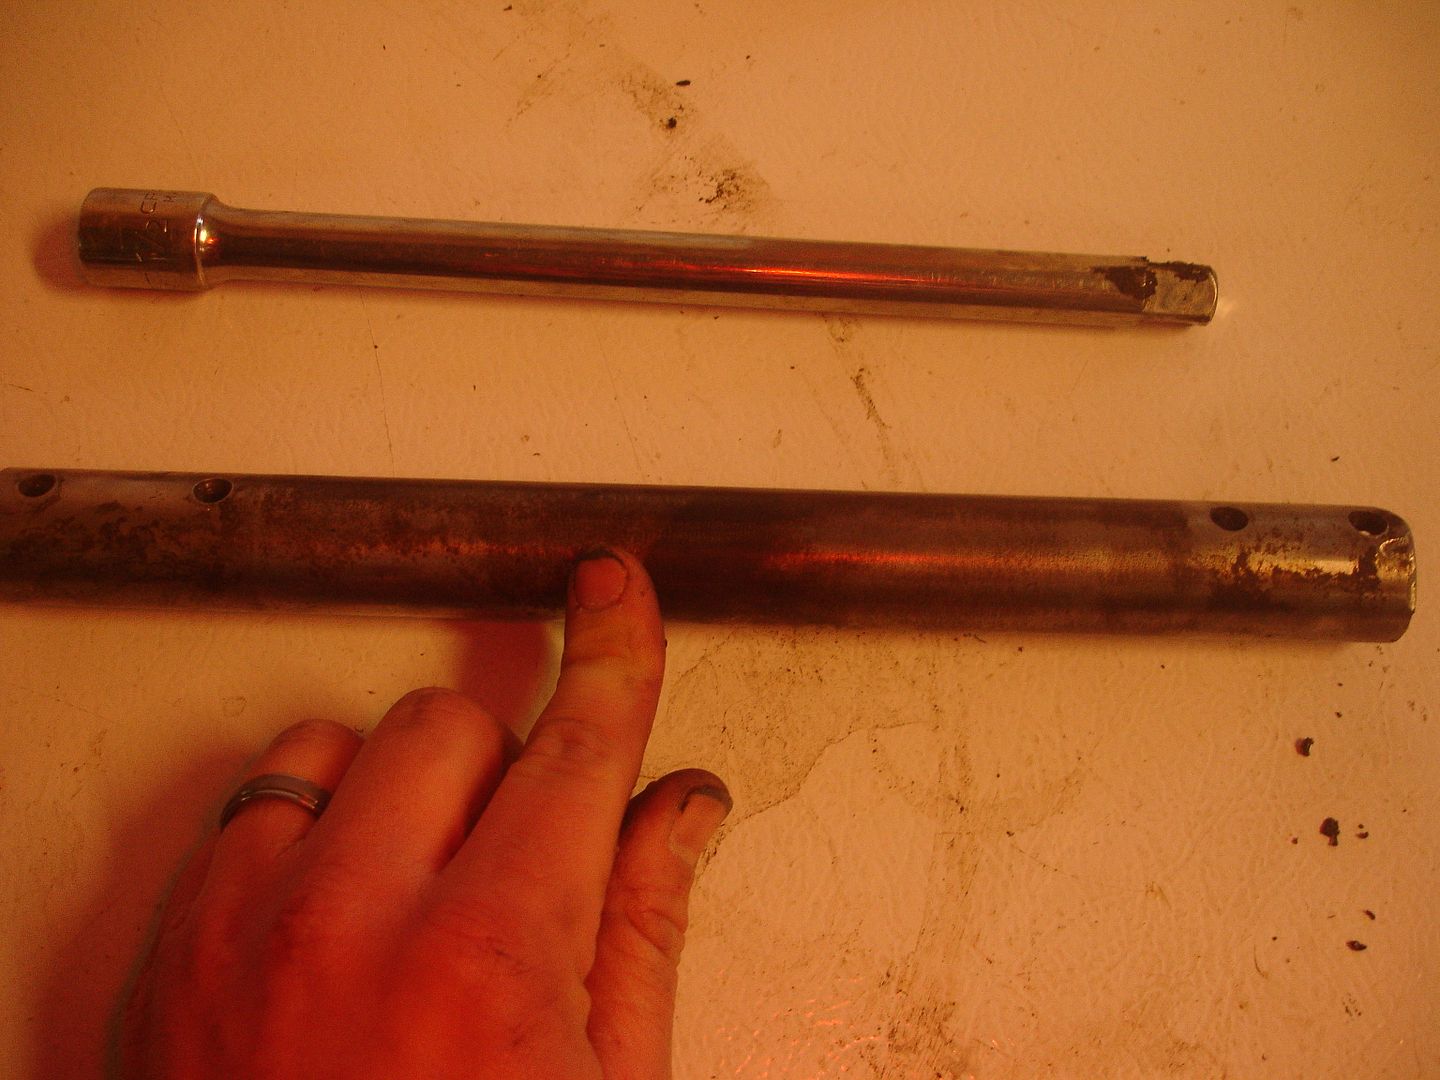
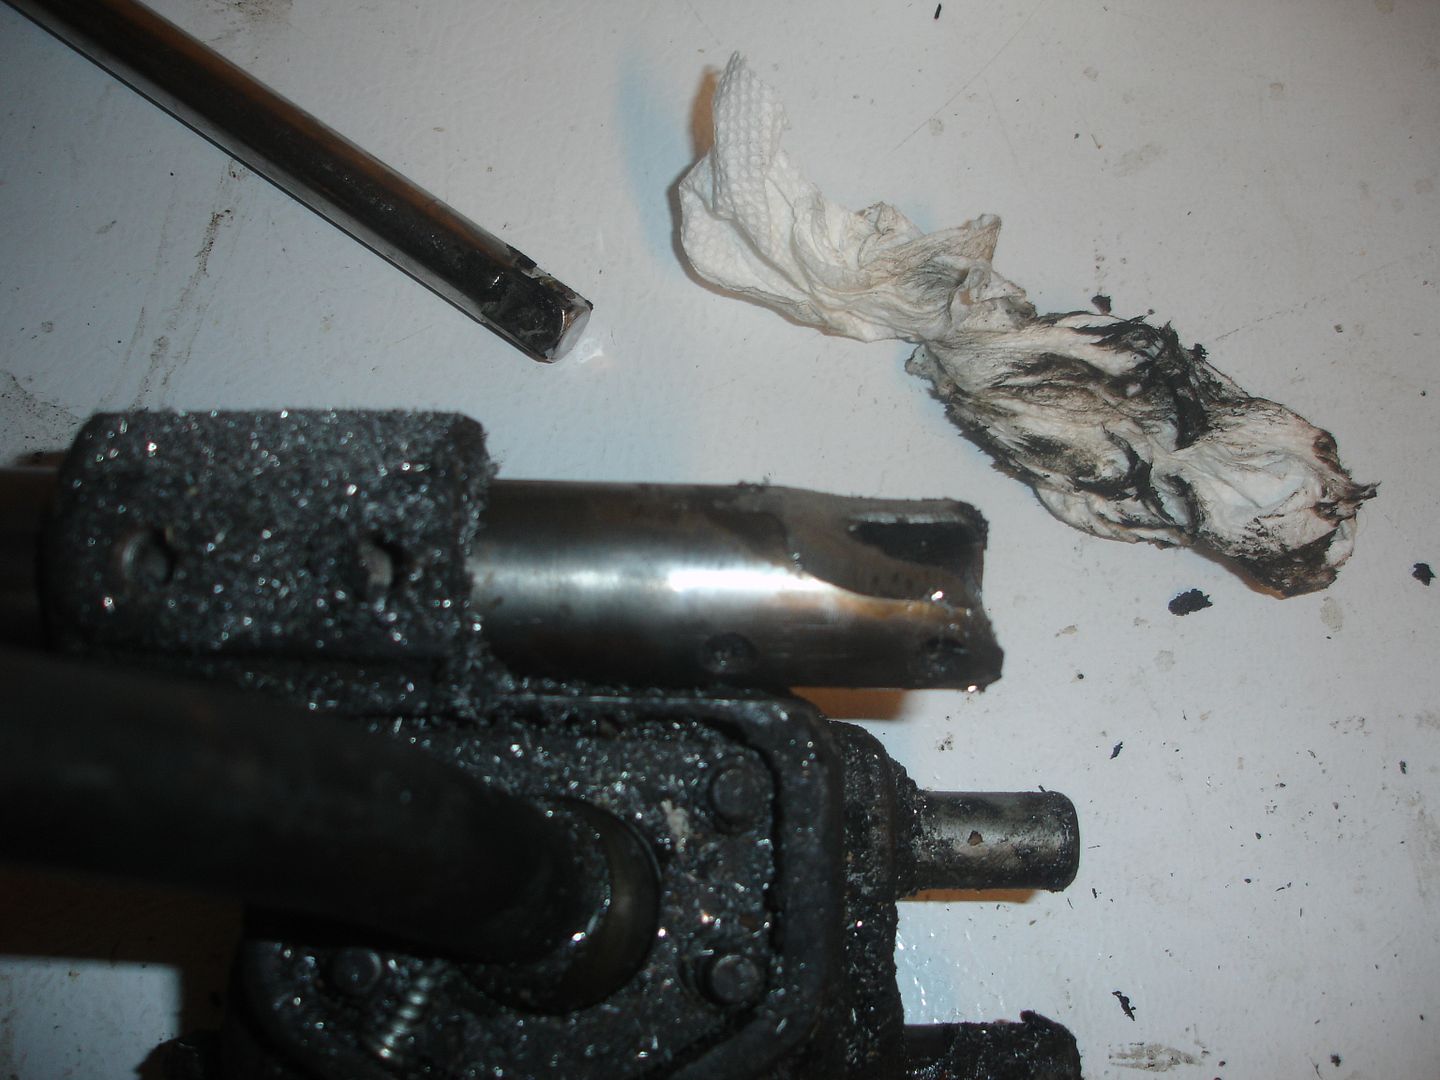
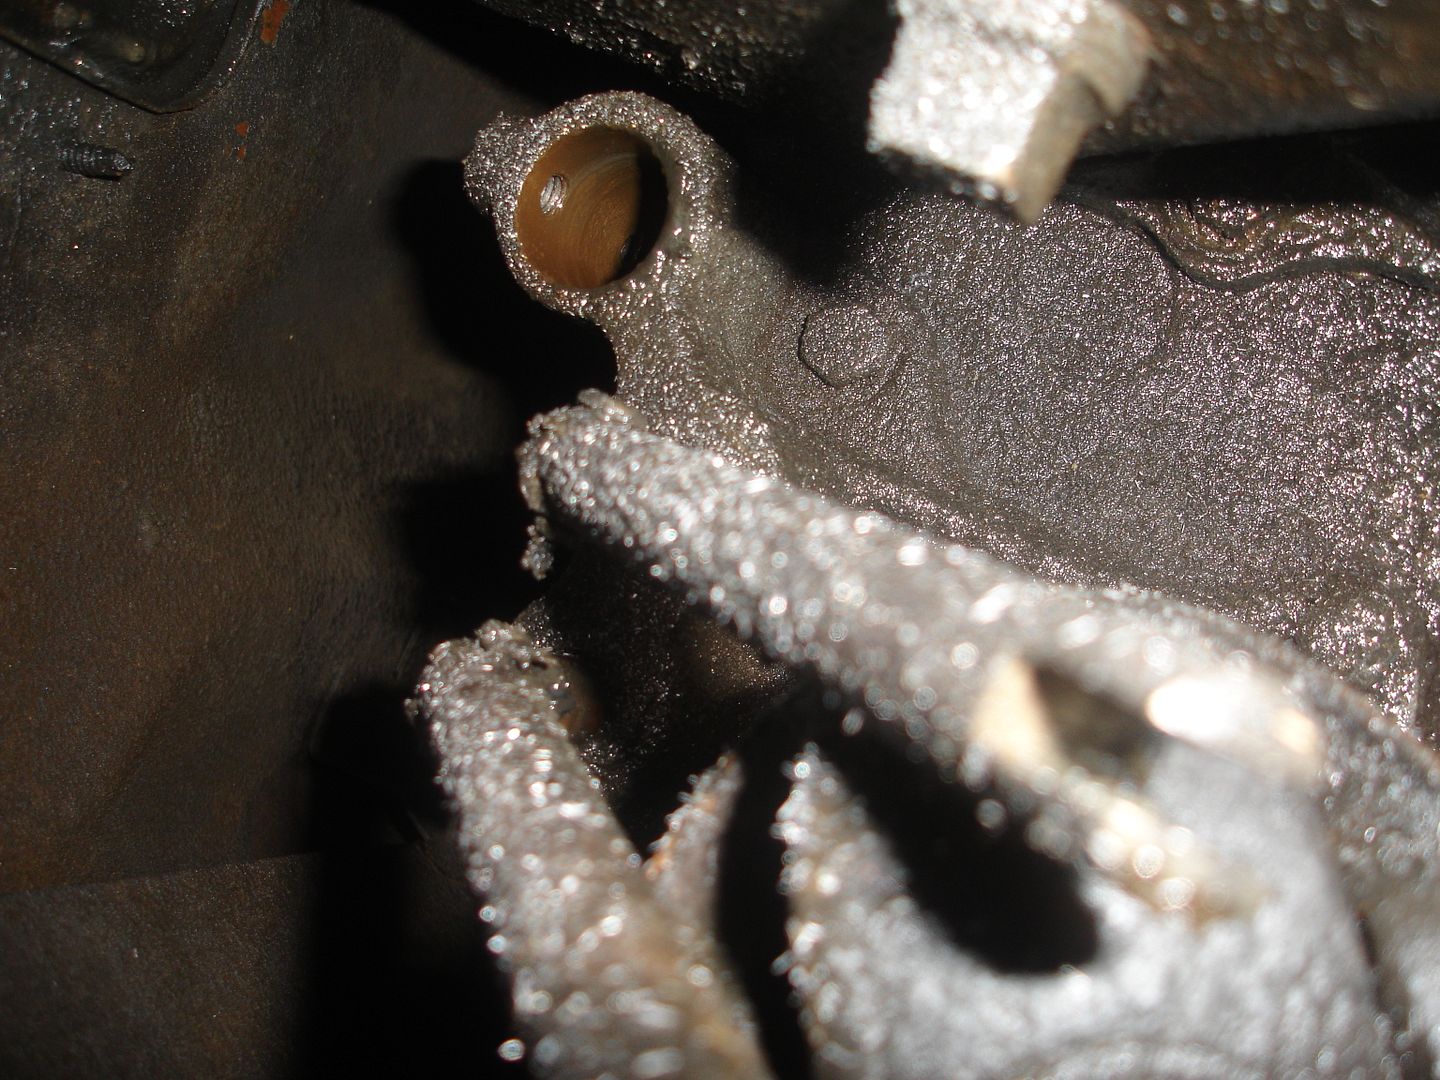
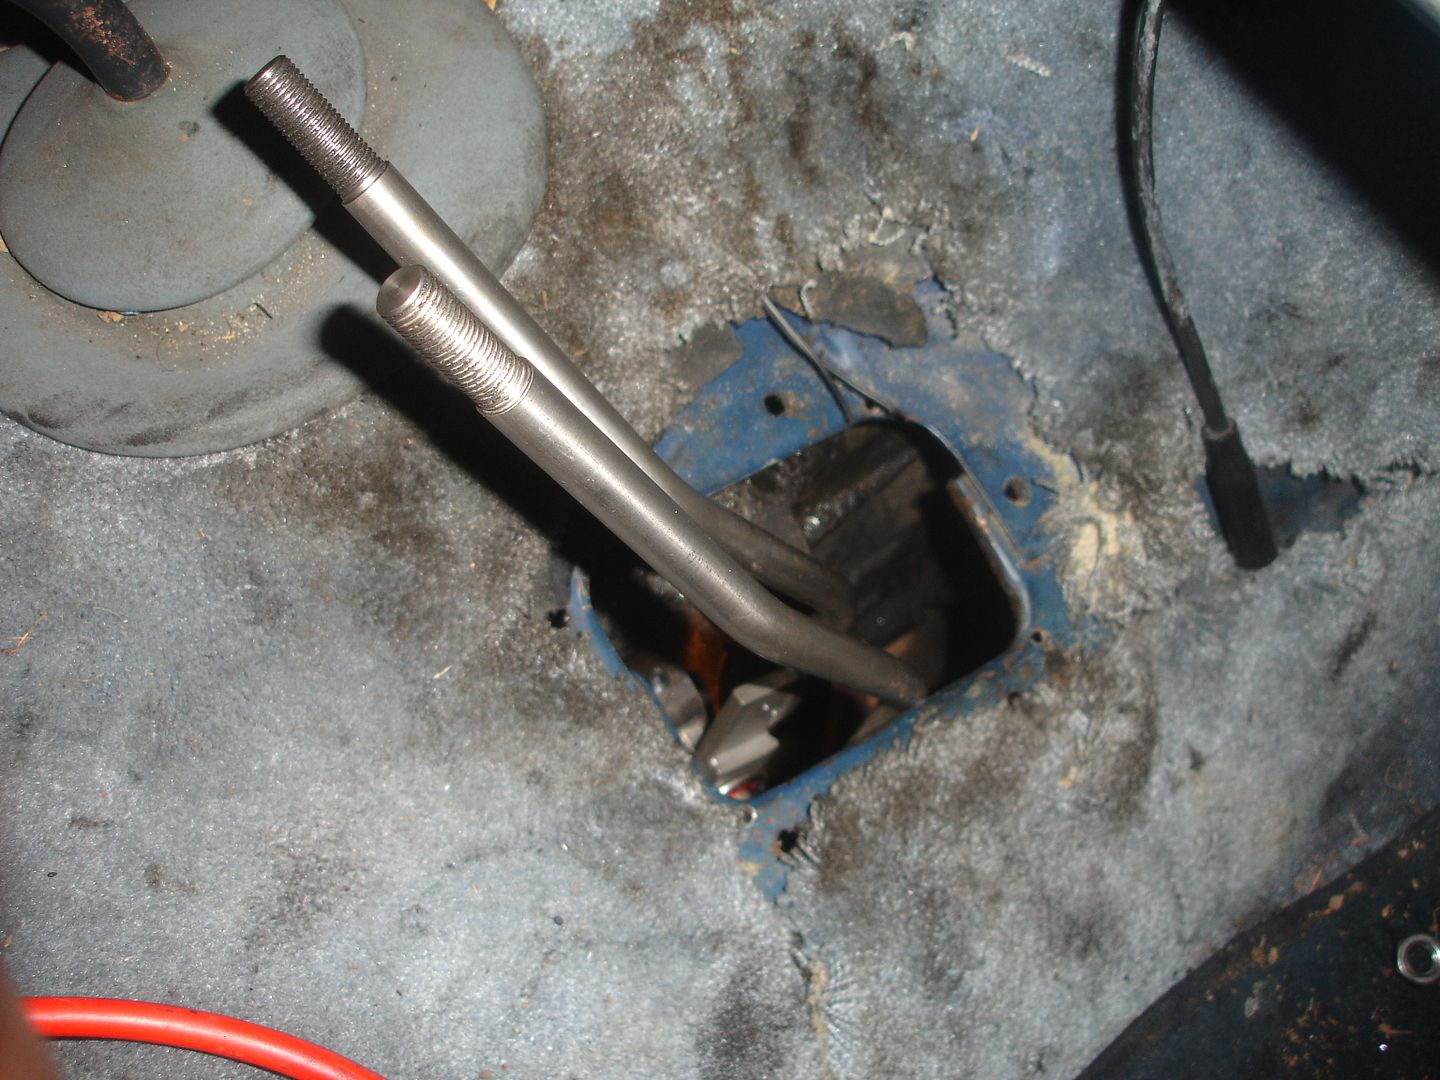
First, I removed the two bolts holding the shifter support rod to the transfer case. In the above picture, you can also see the large bolt missing from the transmission. It came out very easily and allows for much more wiggling room. I also removed the two bolts holding the shifter to the support rod. At this point, you'll find how frustrating it is when you realize how close the rod is to coming out yet hits the transmission and ultimately goes nowhere. To remedy, push the rod as far back into the transfer case as possible and slide the shifter on the rod towards the transfer case as well, revealing the front of the support rod. Once you're to this point, get out your handy die grinder and carbide bit and shave off some of the rod (I did this from above through the shifter hole).
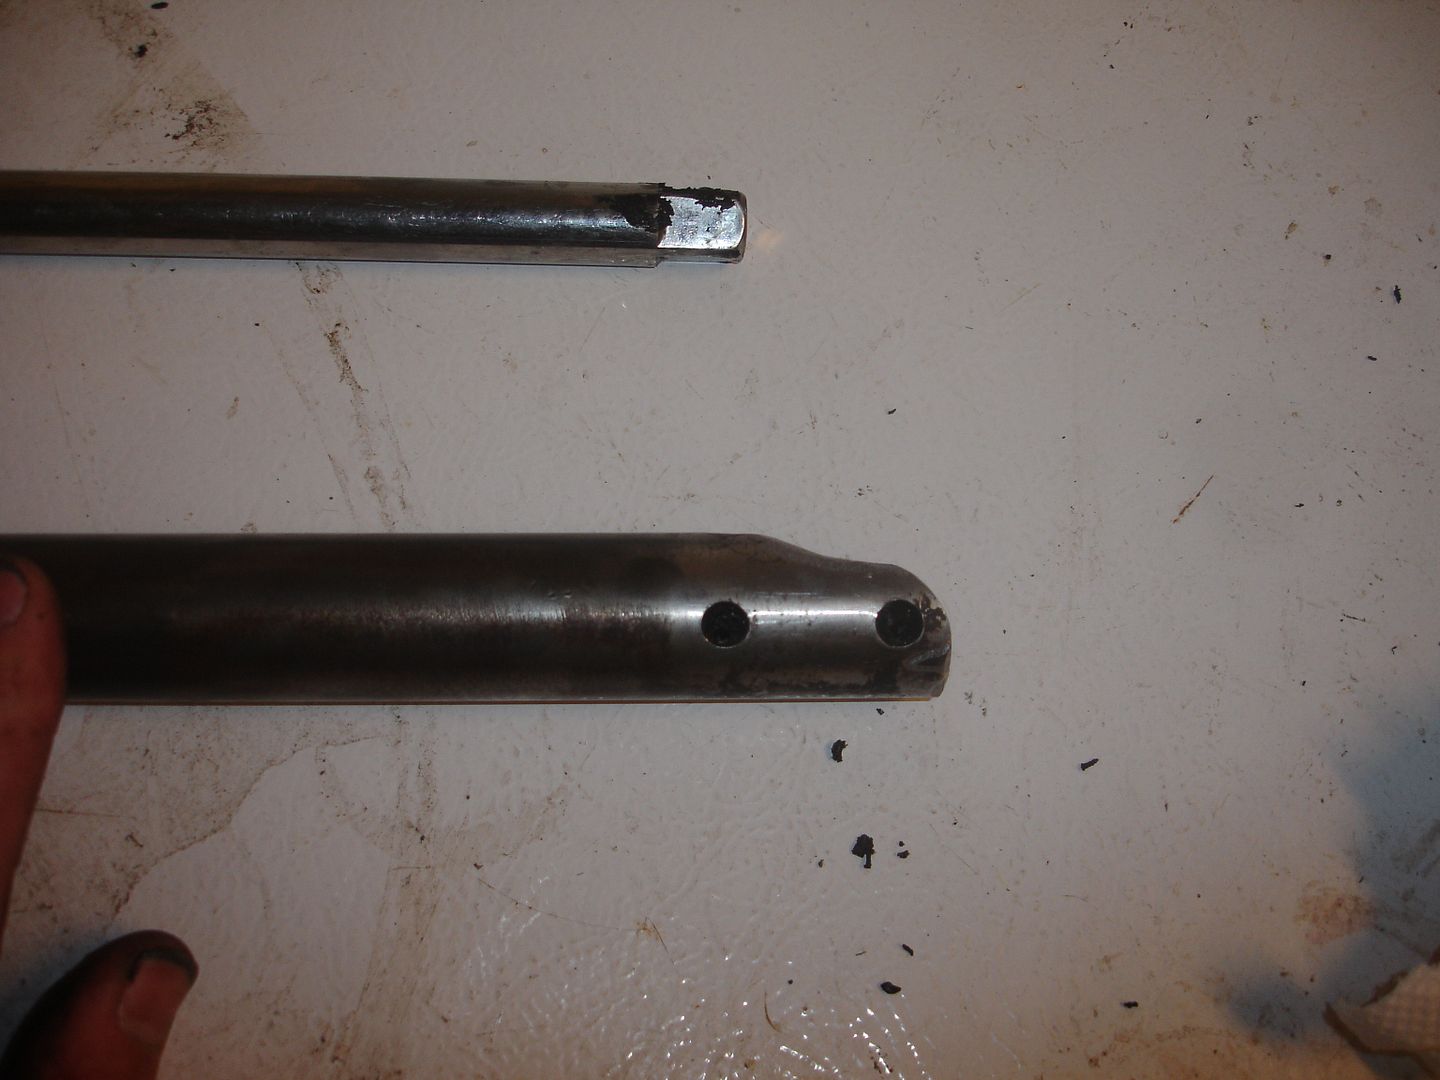
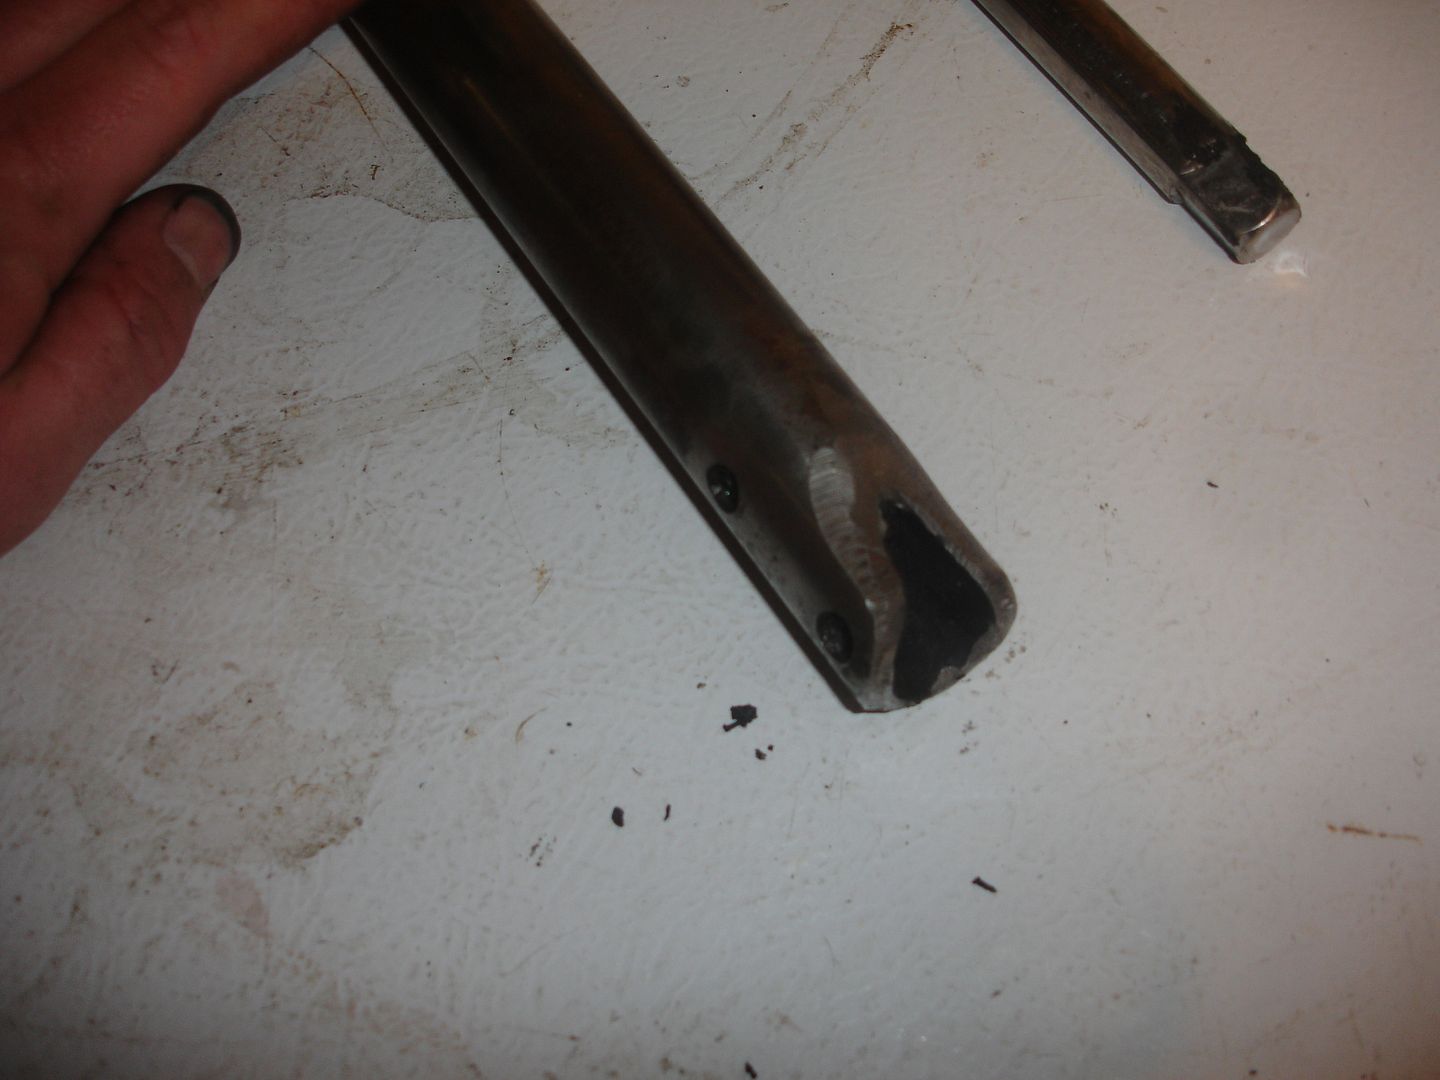
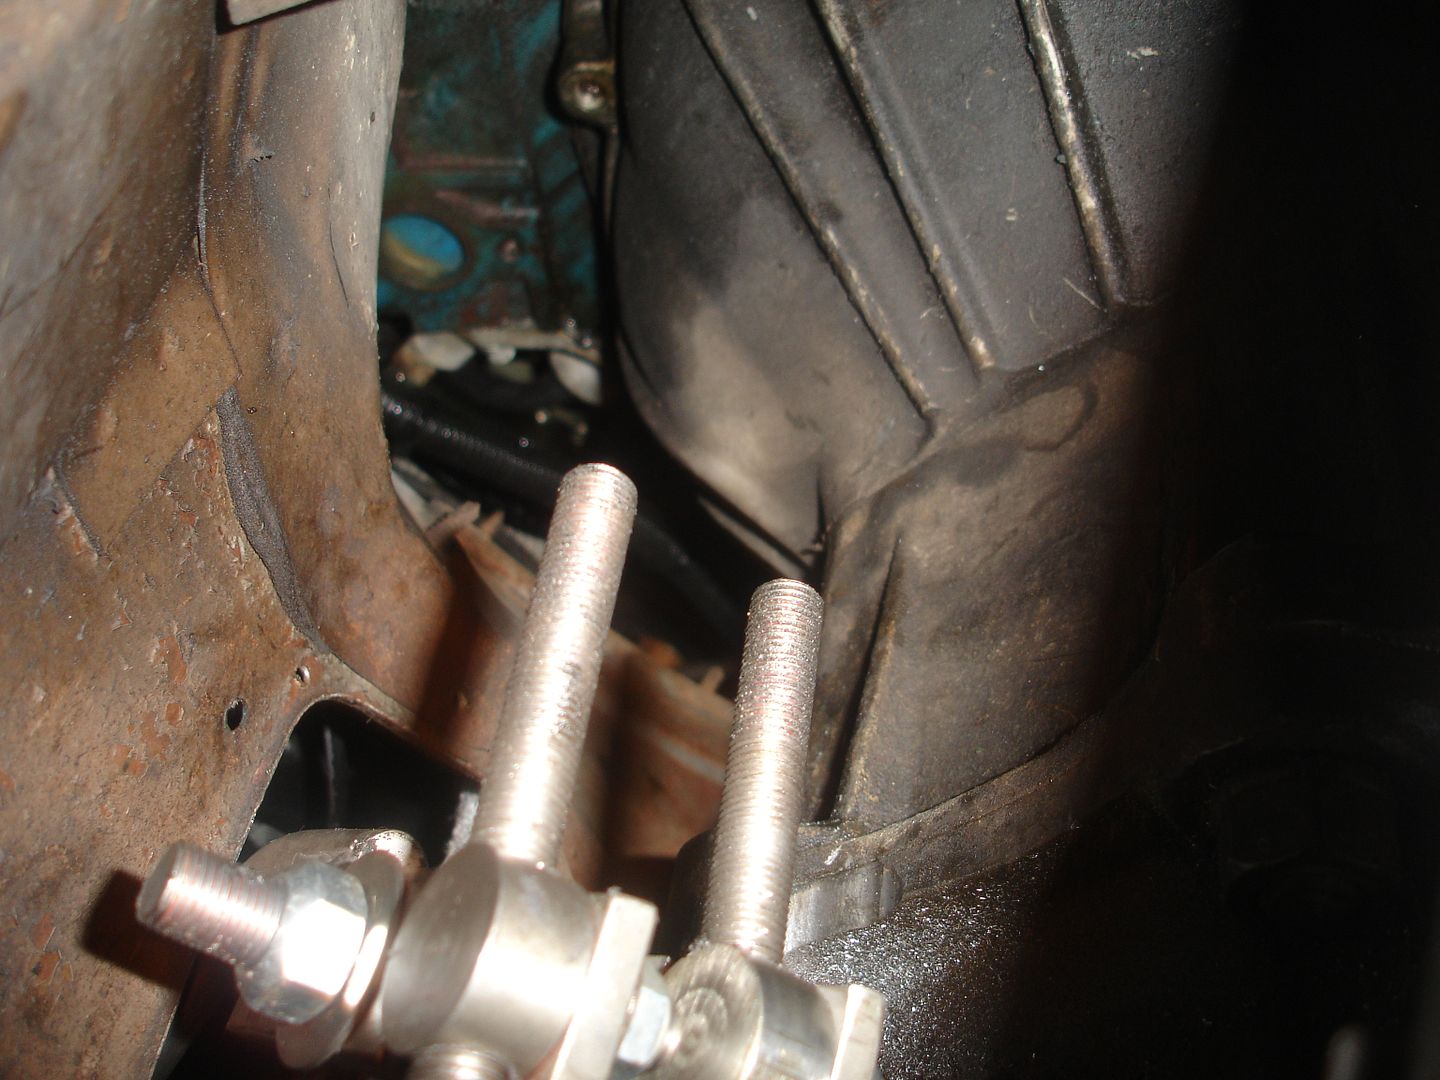
I also took a tiny bit off the side of the transmission, mainly providing a smooth edge instead of a blunt stopping point for the support rod. This isn't necessary though. You can slightly see what I removed below the bolt hole.

Once enough is ground off, the rod and shifter will slide right out.
Here is how the shaved rod looks in the old shifter. With the small amount removed, there is plenty of structure left.
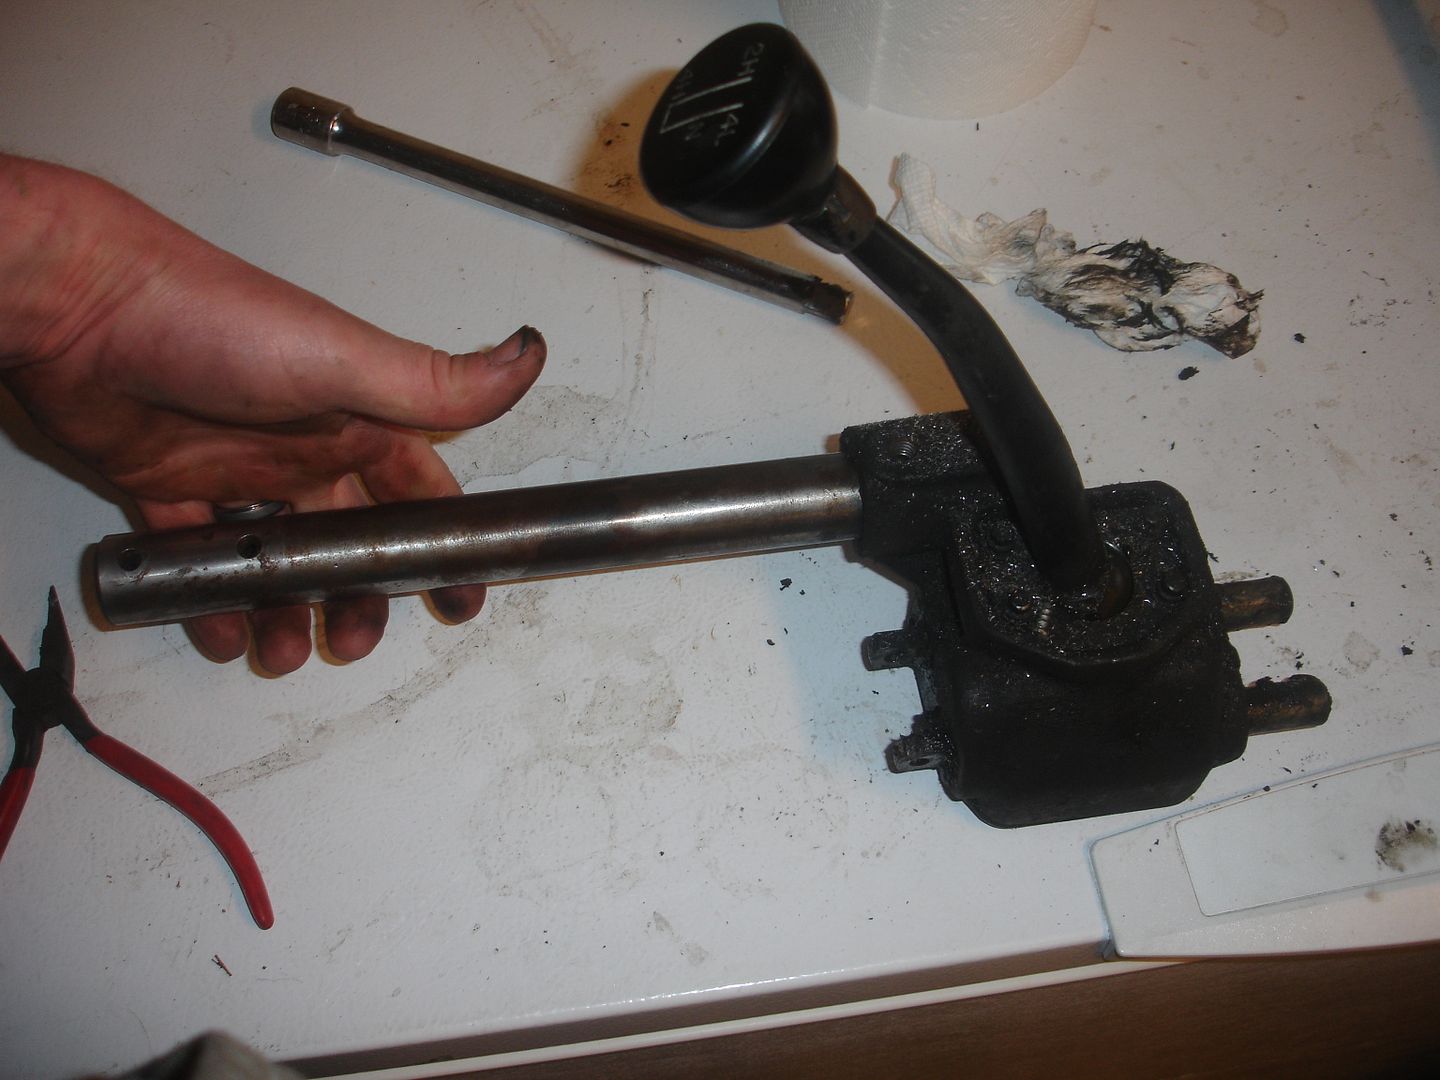
New twin stick assembly:
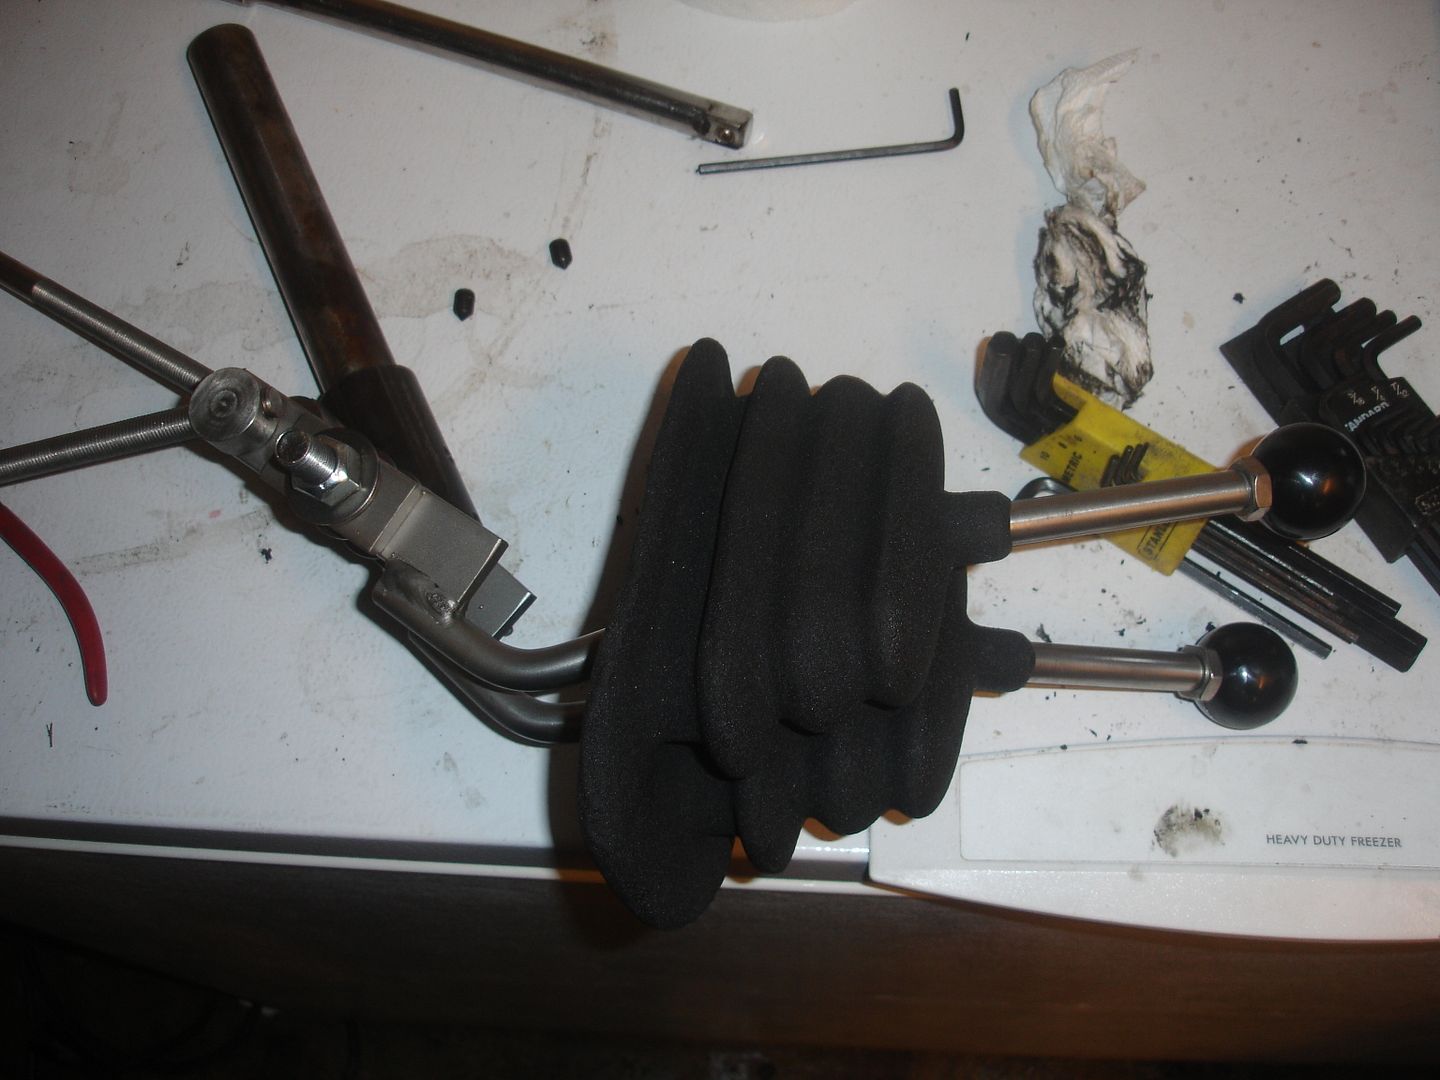
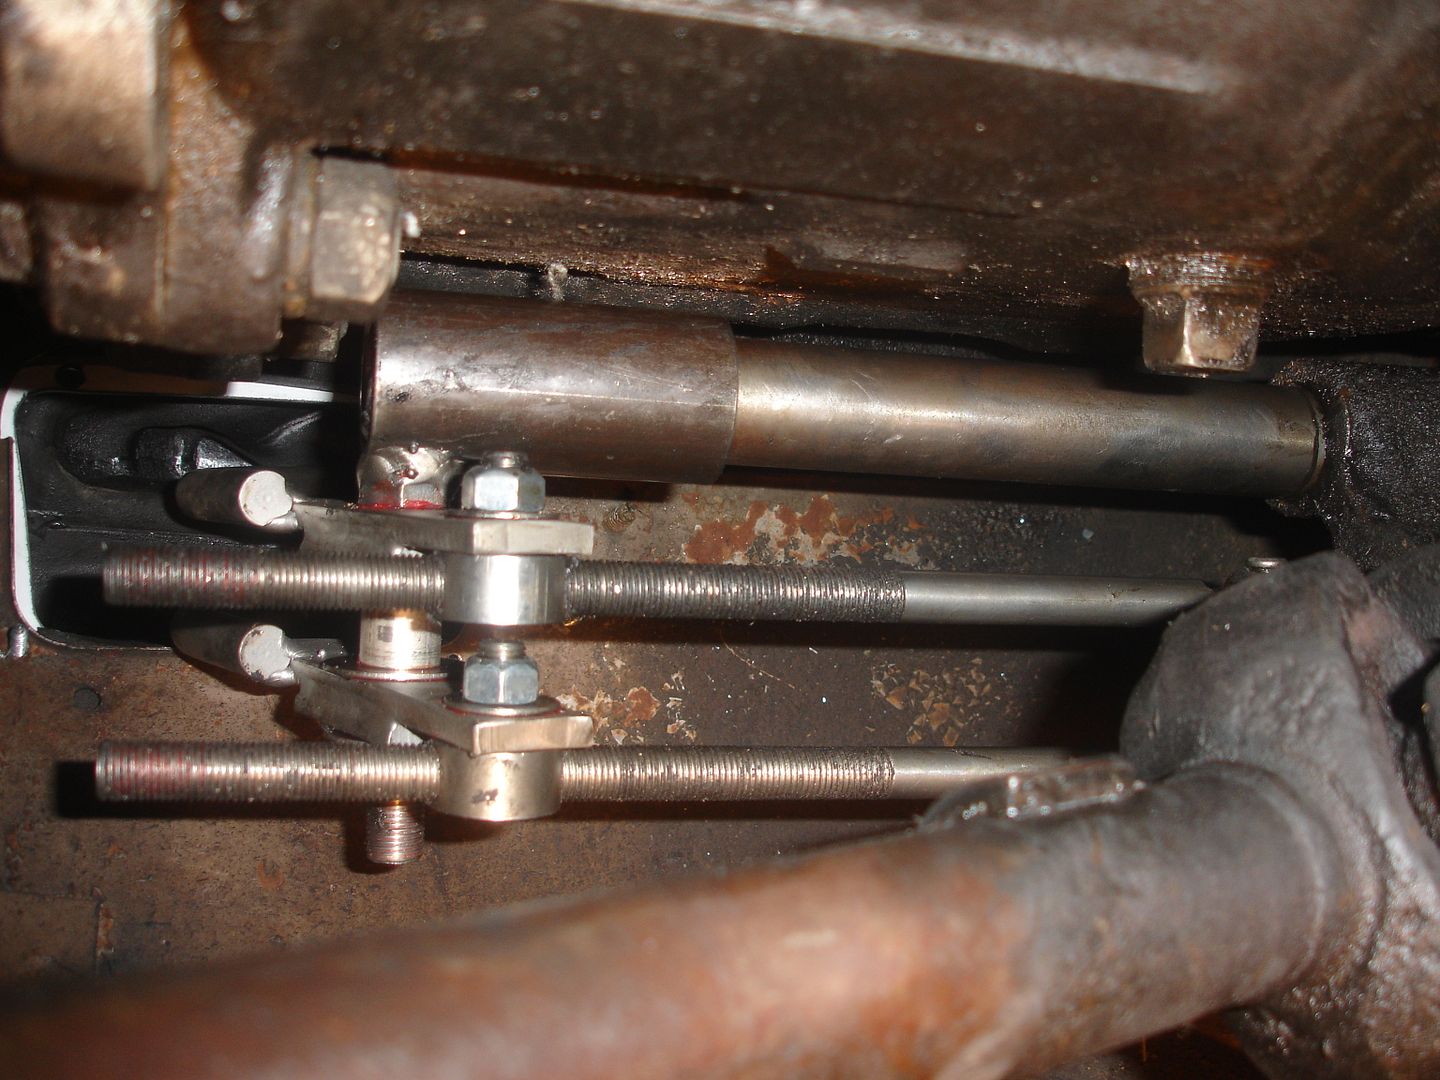
The following picture shows you the two original shift rails that need to be removed as well as the location on the transfer case where the support rod slips in.
Twin stick slipped into place.
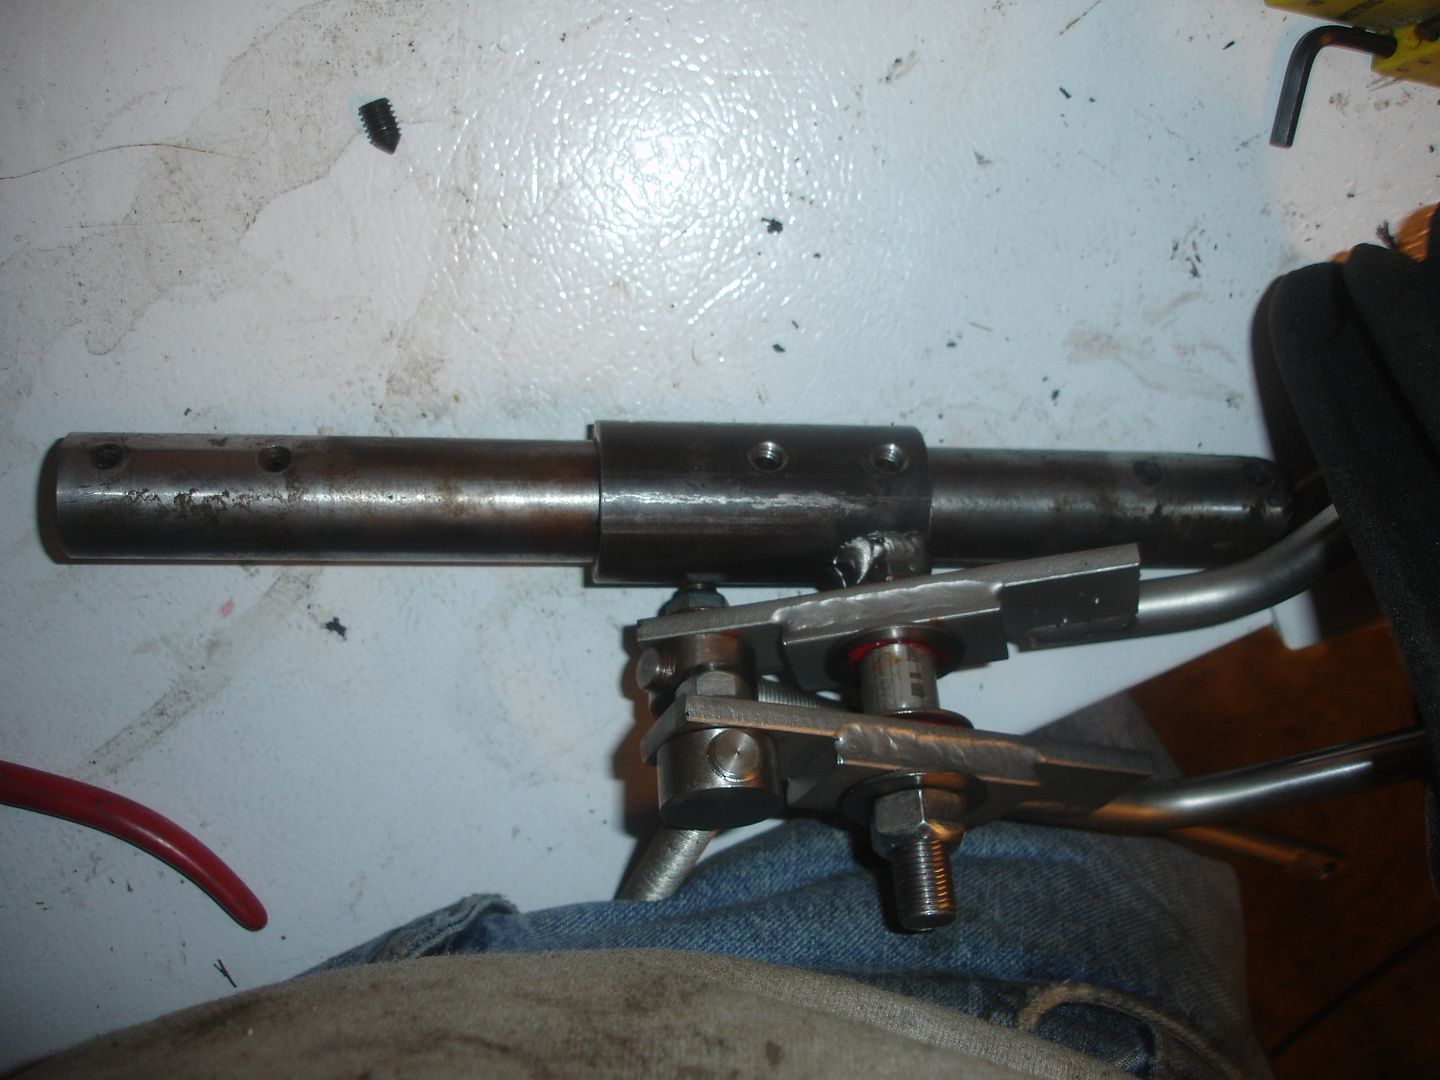
The new twin stick mounts to the support rod with two hex bolts. For reference, these bolts used a #4 allen wrench.
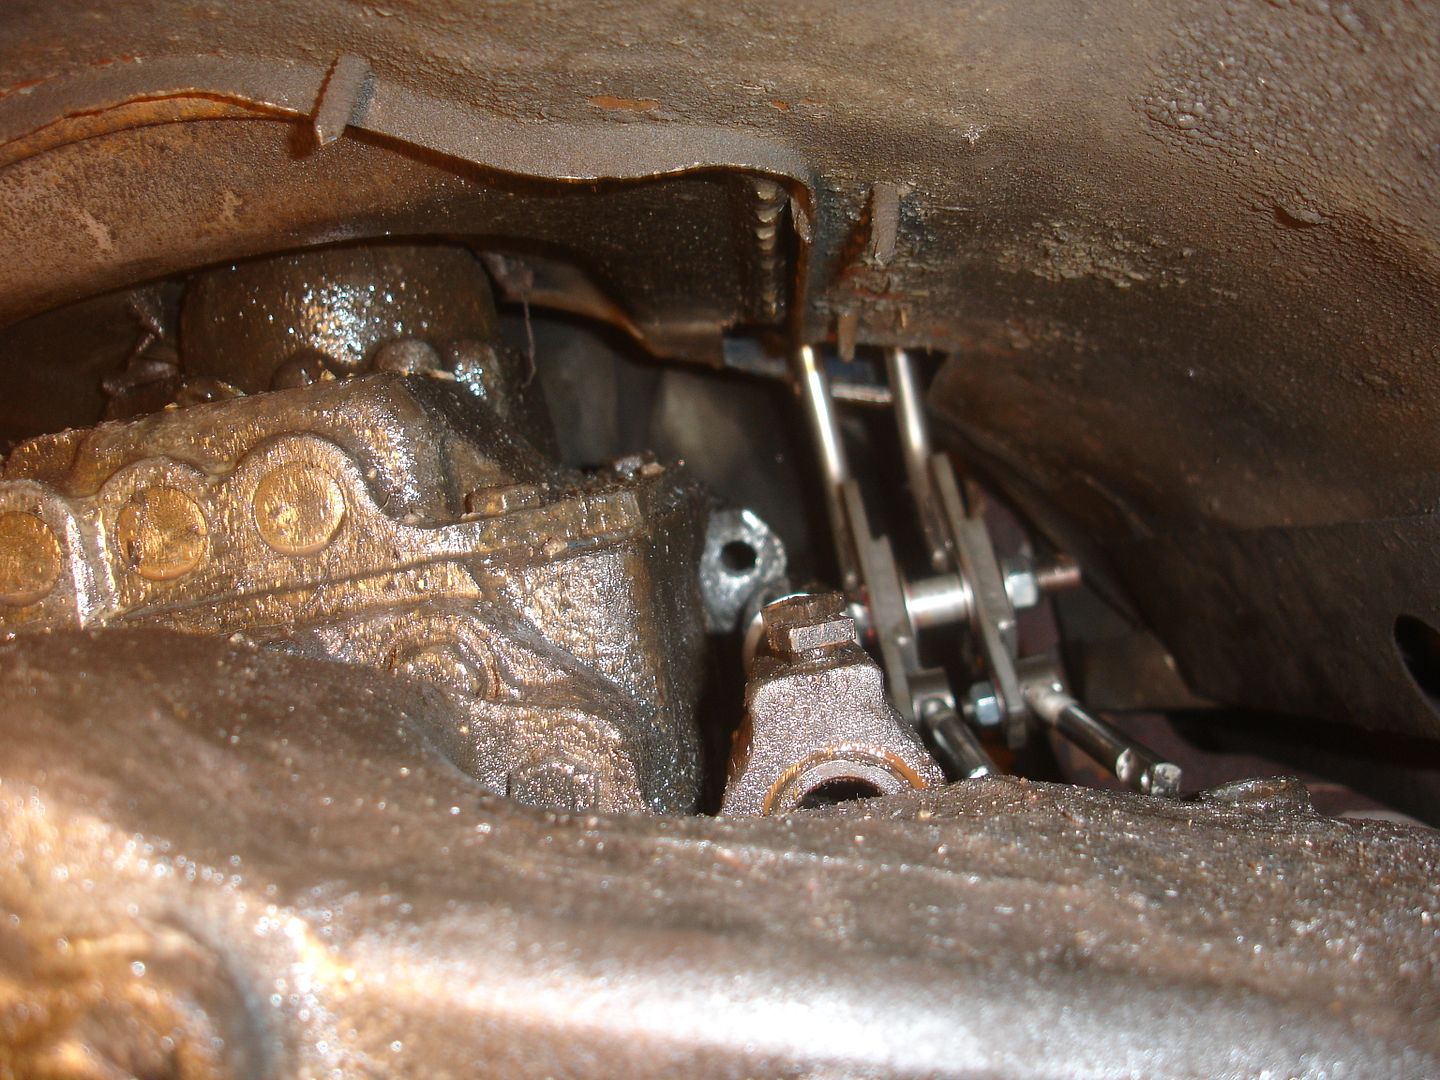
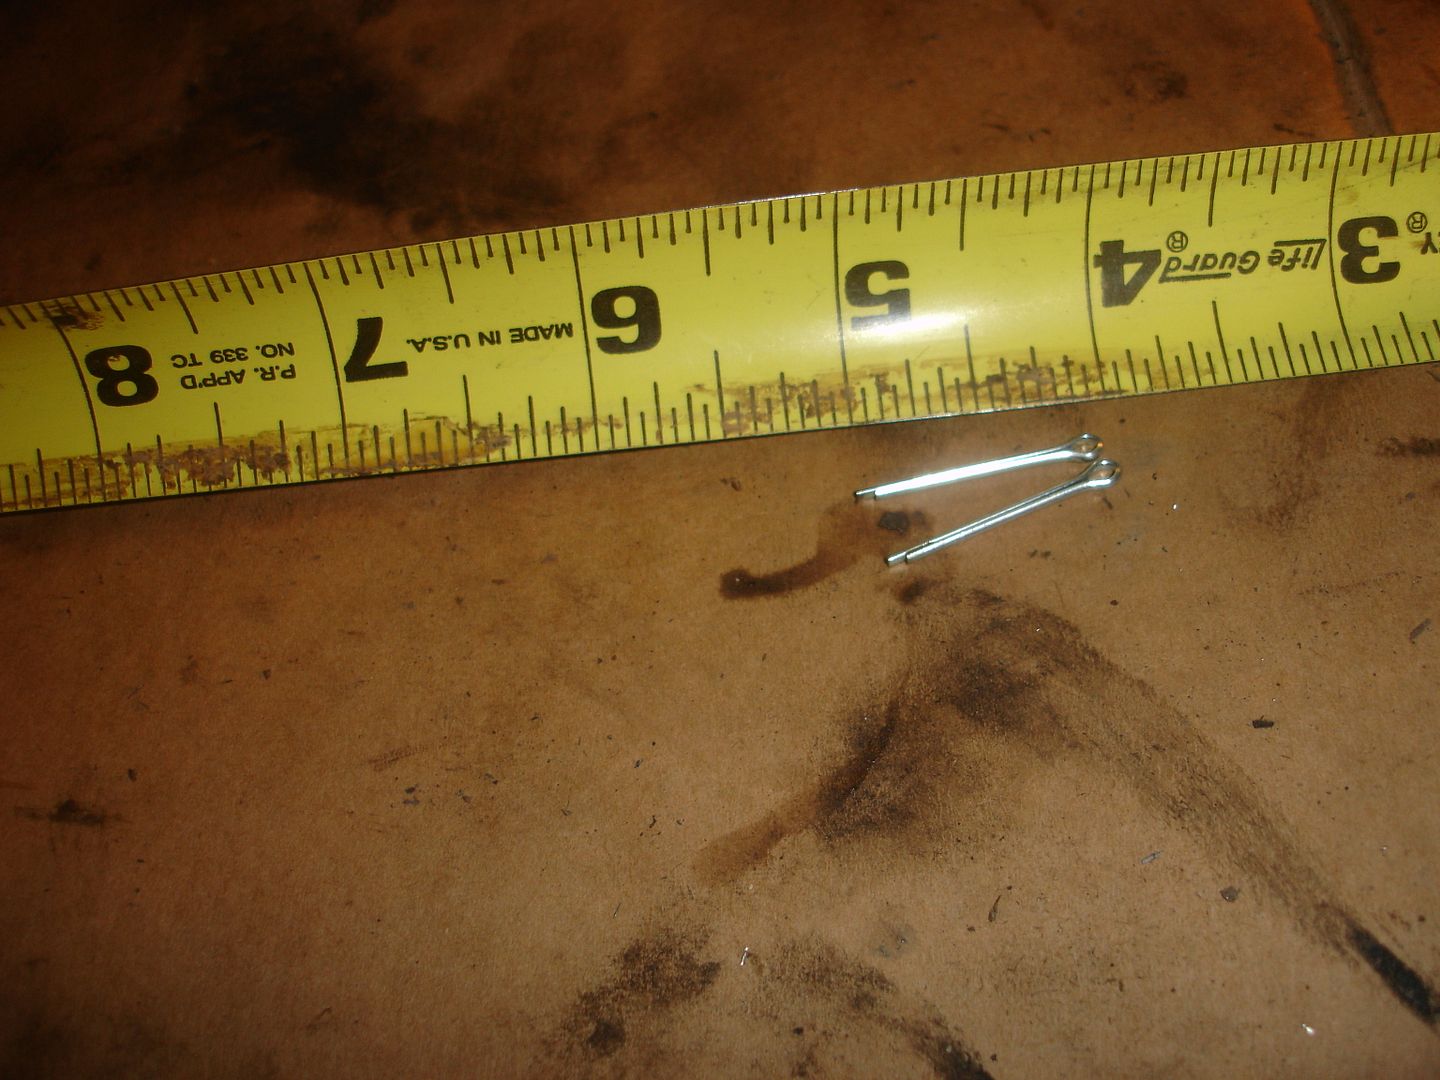
The following pictures are of everything coming together. The cotter pin picture is for size reference for those looking to do the same thing. They hold in the shifter rods.


Plenty of room for the shifter rods to move.

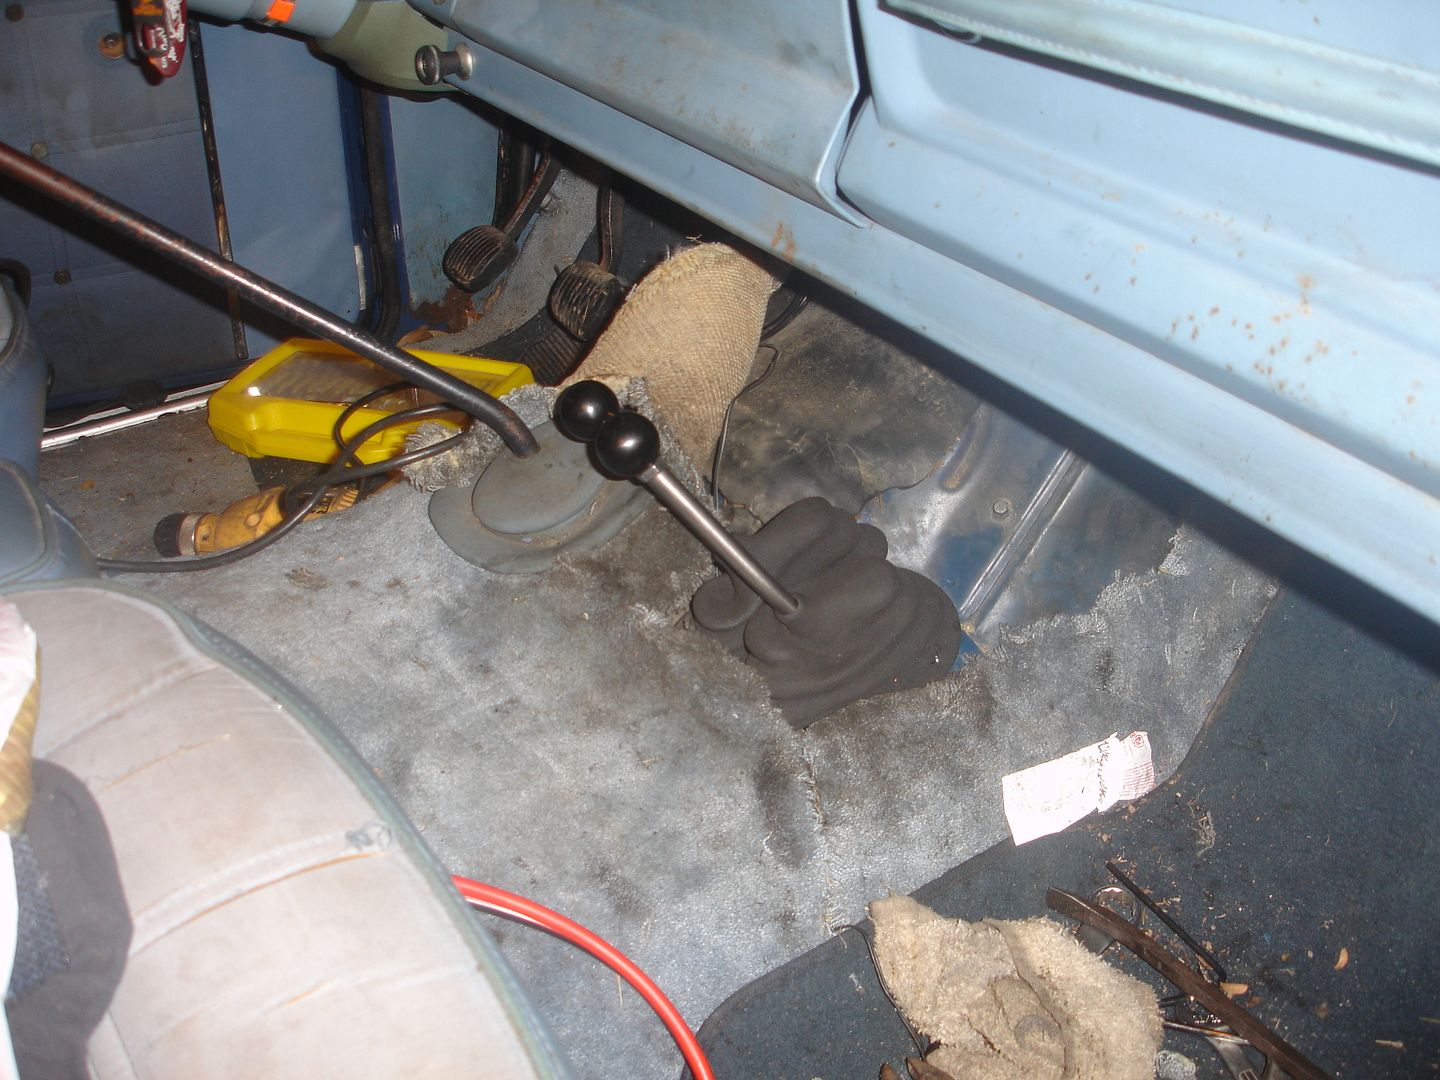
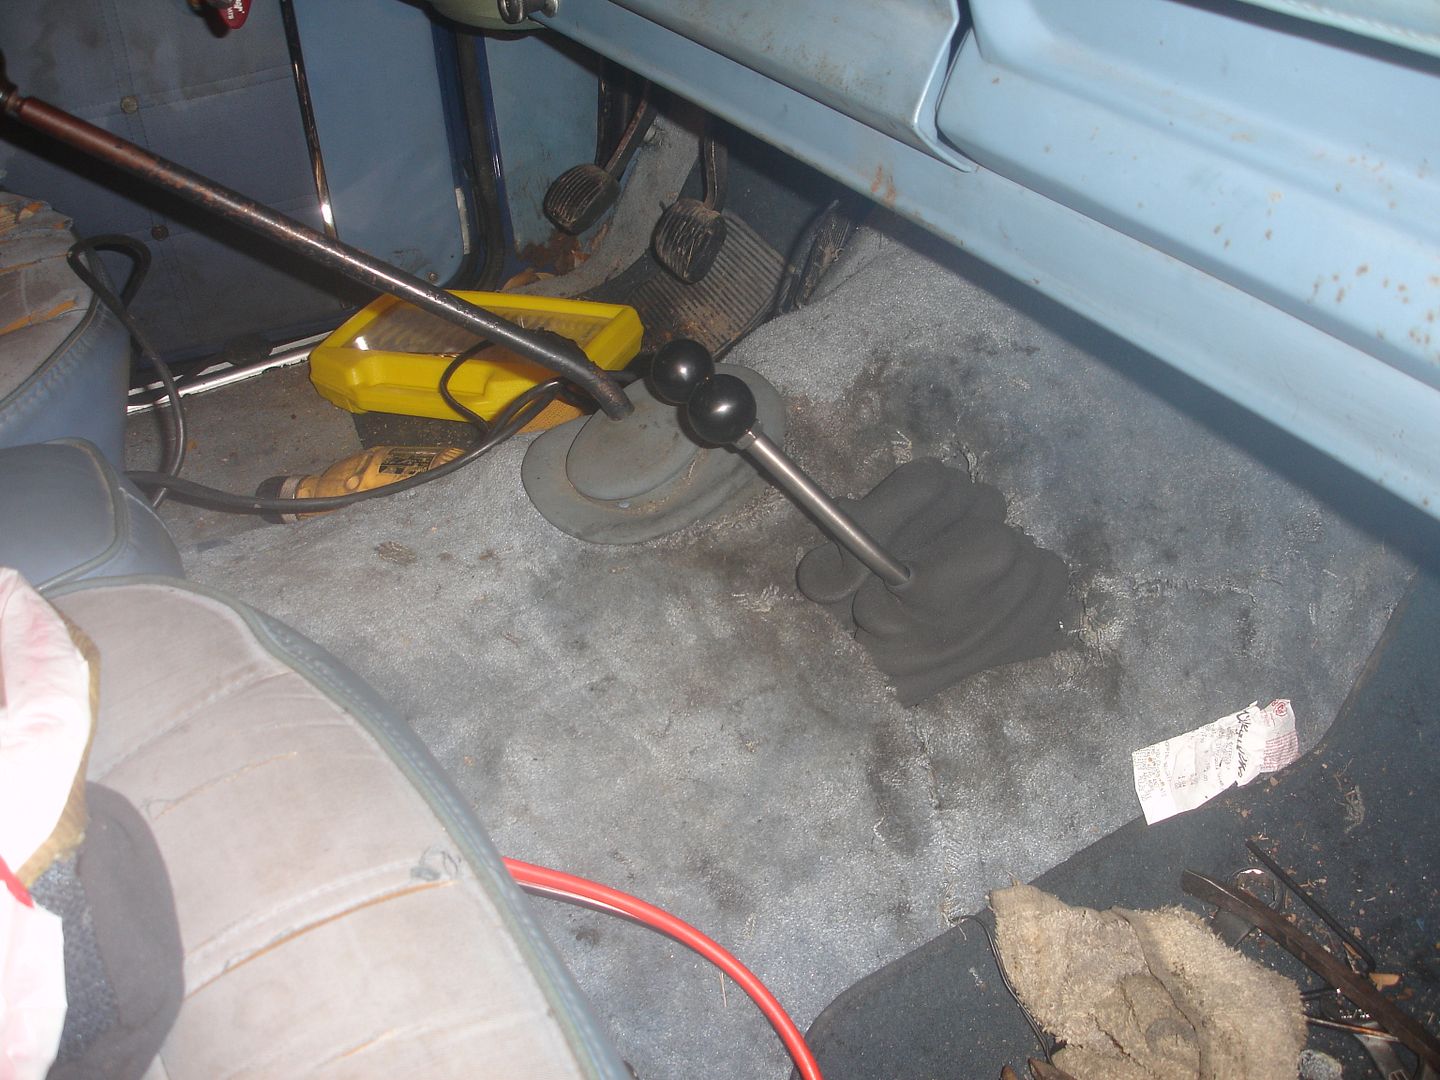
The twin stick works well! I'm excited this project is finished.
Quick question - there is no harm in driving in front wheel drive 2HI, correct? I want to be sure as I can see how that may be handy on slick roads when 4HI is a little too much.

This is the support rail for the shifter.

It mounts to the shifter with two bolts (1/2" square heads).

It also mounts to the transfer case in the same way (twin stick installed in this picture).

First, I removed the two bolts holding the shifter support rod to the transfer case. In the above picture, you can also see the large bolt missing from the transmission. It came out very easily and allows for much more wiggling room. I also removed the two bolts holding the shifter to the support rod. At this point, you'll find how frustrating it is when you realize how close the rod is to coming out yet hits the transmission and ultimately goes nowhere. To remedy, push the rod as far back into the transfer case as possible and slide the shifter on the rod towards the transfer case as well, revealing the front of the support rod. Once you're to this point, get out your handy die grinder and carbide bit and shave off some of the rod (I did this from above through the shifter hole).


I also took a tiny bit off the side of the transmission, mainly providing a smooth edge instead of a blunt stopping point for the support rod. This isn't necessary though. You can slightly see what I removed below the bolt hole.


Once enough is ground off, the rod and shifter will slide right out.
Here is how the shaved rod looks in the old shifter. With the small amount removed, there is plenty of structure left.


New twin stick assembly:


The following picture shows you the two original shift rails that need to be removed as well as the location on the transfer case where the support rod slips in.

Twin stick slipped into place.
The new twin stick mounts to the support rod with two hex bolts. For reference, these bolts used a #4 allen wrench.
The following pictures are of everything coming together. The cotter pin picture is for size reference for those looking to do the same thing. They hold in the shifter rods.


Plenty of room for the shifter rods to move.


The twin stick works well! I'm excited this project is finished.
Quick question - there is no harm in driving in front wheel drive 2HI, correct? I want to be sure as I can see how that may be handy on slick roads when 4HI is a little too much.

ChrisHager's 79 J-10 Build Thread: http://fsjnetwork.com/forum/viewtopic.php?f=12&t=3585
-
jaber
- Vendor
- Posts: 3067
- Joined: Sat Aug 27, 2011 5:24 pm
- Location: Chino Valley, Az.
Re: ChrisHager's 79 J-10 Build Thread
Should be fine. I did something similar using a set of Willys shifters.
Nice write up.
Nice write up.
Jeff
'46 cj3a
'51 Willys p/u
'51 Willys Parkway Conversion
'74 CJ5
'75 J-20 Wrecker
'75 J-20 Cummins service truck
'77 J-10 p/u
'79 Cherokee
'88 Grand Wagoneer
http://s252.photobucket.com/albums/hh14/jeffaber/
'46 cj3a
'51 Willys p/u
'51 Willys Parkway Conversion
'74 CJ5
'75 J-20 Wrecker
'75 J-20 Cummins service truck
'77 J-10 p/u
'79 Cherokee
'88 Grand Wagoneer
http://s252.photobucket.com/albums/hh14/jeffaber/
-
ChrisHager
Topic author - Posts: 182
- Joined: Wed Sep 11, 2013 12:03 pm
Re: ChrisHager's 79 J-10 Build Thread
Thanks Jeff!
Small tid-bit: Though it was difficult to get an exact measurement because of the tires sticking out, it appears from center of the hub to the fender, I measure 22.5" both front and rear. Keep in mind, this is with the 3" Rough Country springs.
Small tid-bit: Though it was difficult to get an exact measurement because of the tires sticking out, it appears from center of the hub to the fender, I measure 22.5" both front and rear. Keep in mind, this is with the 3" Rough Country springs.
ChrisHager's 79 J-10 Build Thread: http://fsjnetwork.com/forum/viewtopic.php?f=12&t=3585
-
ChrisHager
Topic author - Posts: 182
- Joined: Wed Sep 11, 2013 12:03 pm
Re: ChrisHager's 79 J-10 Build Thread
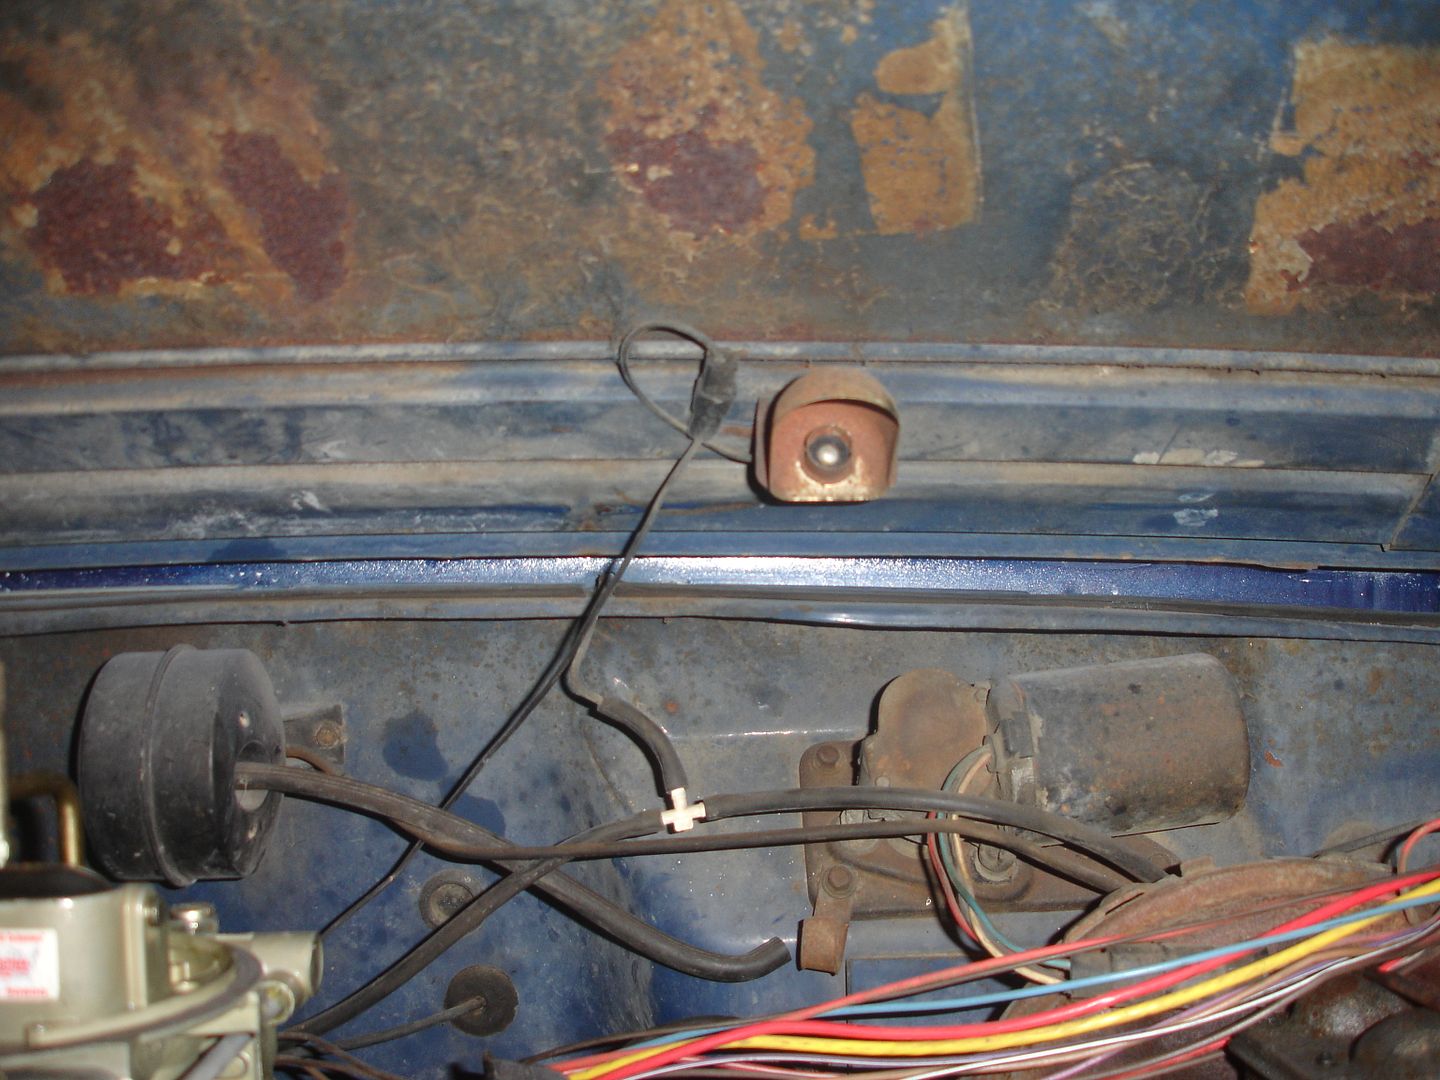
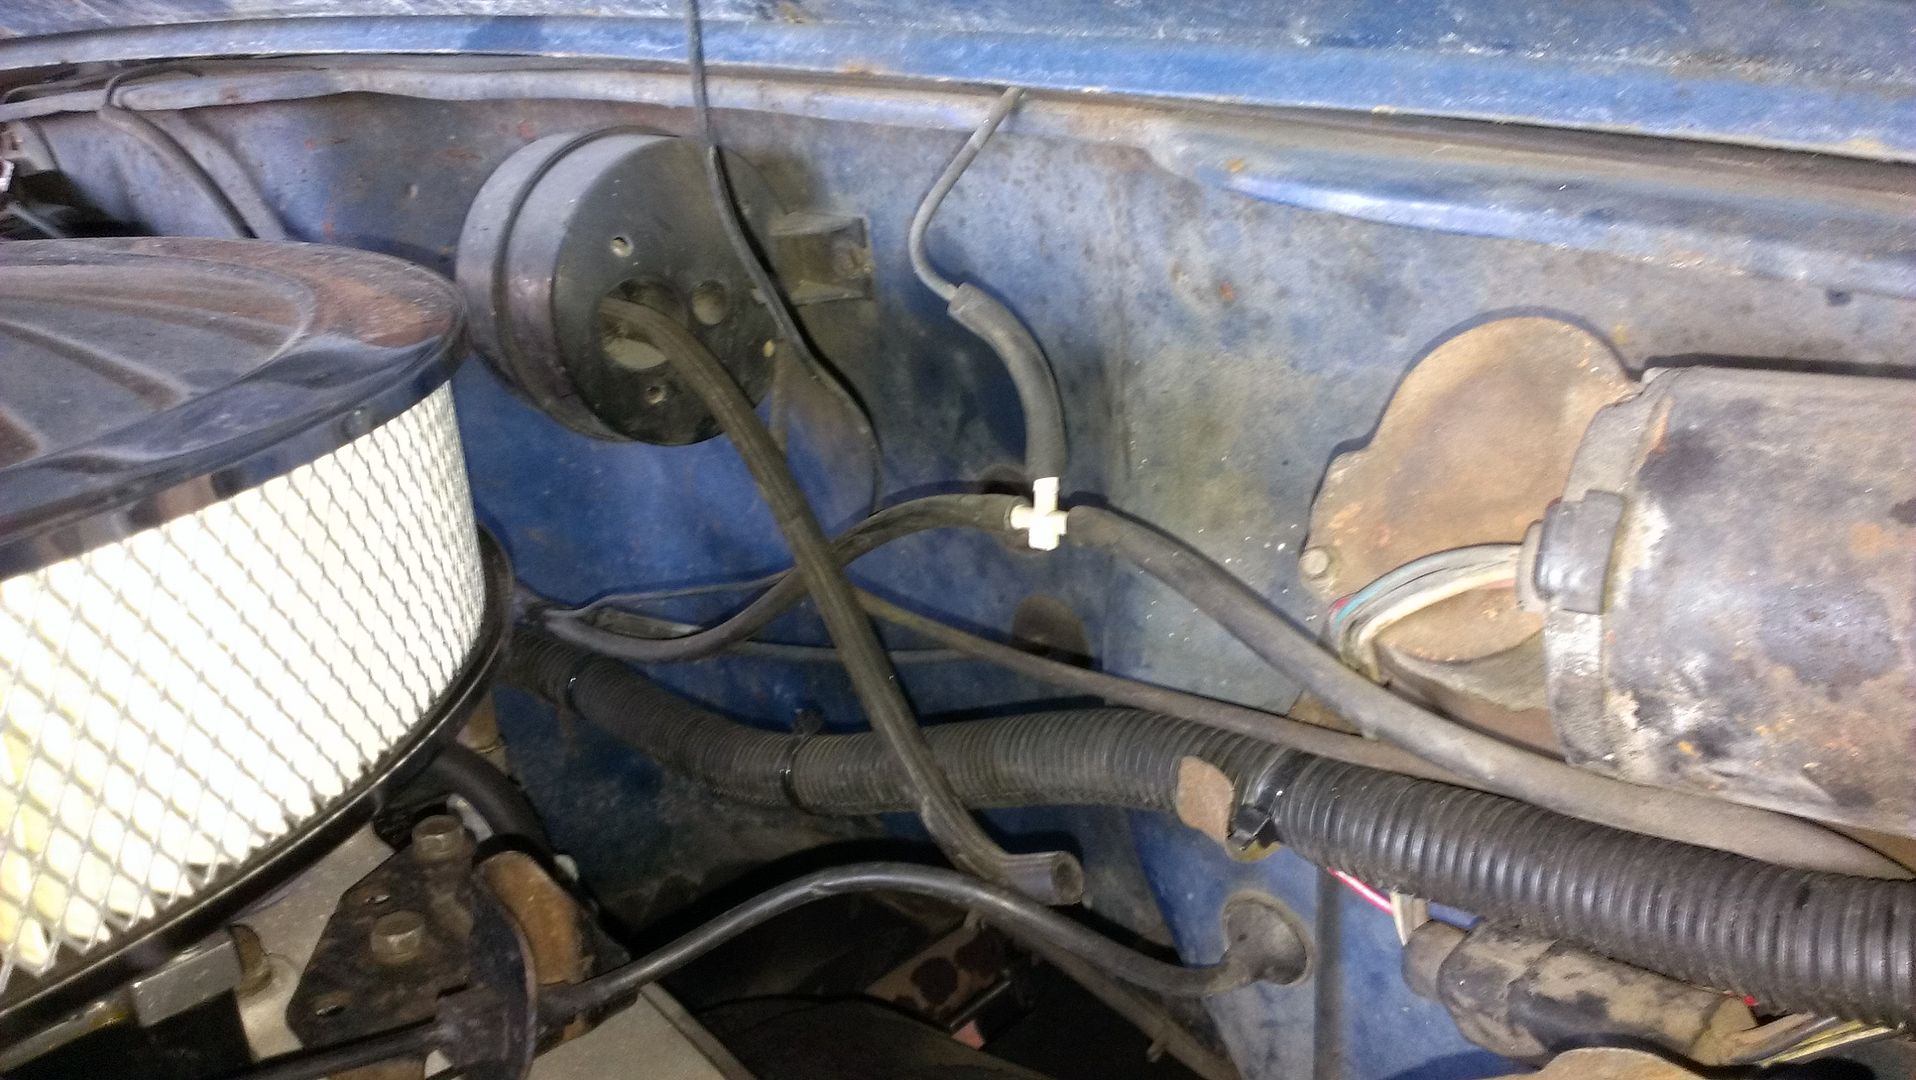
Well, I think this may be an issue with my heat... Does anyone know where this hose goes off of the vacuum ball thing? I read it goes to the drivers side firewall but I can't find a fitting...

ChrisHager's 79 J-10 Build Thread: http://fsjnetwork.com/forum/viewtopic.php?f=12&t=3585