ChrisHager's 79 J-10 Build Thread
-
 jaber
jaber
- Vendor
- Posts: 3067
- Joined: Sat Aug 27, 2011 5:24 pm
- Location: Chino Valley, Az.
Re: ChrisHager's 79 J-10 Build Thread
It goes through the firewall and hooks to the controls on the guage cluster. 
Jeff
'46 cj3a
'51 Willys p/u
'51 Willys Parkway Conversion
'74 CJ5
'75 J-20 Wrecker
'75 J-20 Cummins service truck
'77 J-10 p/u
'79 Cherokee
'88 Grand Wagoneer
http://s252.photobucket.com/albums/hh14/jeffaber/
'46 cj3a
'51 Willys p/u
'51 Willys Parkway Conversion
'74 CJ5
'75 J-20 Wrecker
'75 J-20 Cummins service truck
'77 J-10 p/u
'79 Cherokee
'88 Grand Wagoneer
http://s252.photobucket.com/albums/hh14/jeffaber/
-
ChrisHager
Topic author - Posts: 182
- Joined: Wed Sep 11, 2013 12:03 pm
Re: ChrisHager's 79 J-10 Build Thread
I assume one end goes to the controls and the other end goes to a manifold vacuum port? Thanks!
Sent from my HTC One X using Tapatalk
Sent from my HTC One X using Tapatalk
ChrisHager's 79 J-10 Build Thread: http://fsjnetwork.com/forum/viewtopic.php?f=12&t=3585
-
jaber
- Vendor
- Posts: 3067
- Joined: Sat Aug 27, 2011 5:24 pm
- Location: Chino Valley, Az.
Re: ChrisHager's 79 J-10 Build Thread
The small fitting on the vac ball goes to your heater controls. Manifold Vac and your blend doors will close at WOT.ChrisHager wrote:I assume one end goes to the controls and the other end goes to a manifold vacuum port? Thanks!
Sent from my HTC One X using Tapatalk
Jeff
'46 cj3a
'51 Willys p/u
'51 Willys Parkway Conversion
'74 CJ5
'75 J-20 Wrecker
'75 J-20 Cummins service truck
'77 J-10 p/u
'79 Cherokee
'88 Grand Wagoneer
http://s252.photobucket.com/albums/hh14/jeffaber/
'46 cj3a
'51 Willys p/u
'51 Willys Parkway Conversion
'74 CJ5
'75 J-20 Wrecker
'75 J-20 Cummins service truck
'77 J-10 p/u
'79 Cherokee
'88 Grand Wagoneer
http://s252.photobucket.com/albums/hh14/jeffaber/
-
csuengr
- Posts: 1290
- Joined: Sun Mar 24, 2013 10:24 am
- Location: Sterling, CO
Re: ChrisHager's 79 J-10 Build Thread
That's why I replaced the toilet tank ball with the coffee can. The coffee can has a check valve.
1977 Cherokee S, Ford 5.0, 5 speed, BW 1356, 33 x 10.50 BFG's. No longer my DD.
2007 Mercury Milan, 2.3L, 5-speed, now my DD. 29 mpg average.
2007 Mercury Milan, 2.3L, 5-speed, now my DD. 29 mpg average.
-
jaber
- Vendor
- Posts: 3067
- Joined: Sat Aug 27, 2011 5:24 pm
- Location: Chino Valley, Az.
Re: ChrisHager's 79 J-10 Build Thread
Never had a problem with the ball type.csuengr wrote:That's why I replaced the toilet tank ball with the coffee can. The coffee can has a check valve.
Jeff
'46 cj3a
'51 Willys p/u
'51 Willys Parkway Conversion
'74 CJ5
'75 J-20 Wrecker
'75 J-20 Cummins service truck
'77 J-10 p/u
'79 Cherokee
'88 Grand Wagoneer
http://s252.photobucket.com/albums/hh14/jeffaber/
'46 cj3a
'51 Willys p/u
'51 Willys Parkway Conversion
'74 CJ5
'75 J-20 Wrecker
'75 J-20 Cummins service truck
'77 J-10 p/u
'79 Cherokee
'88 Grand Wagoneer
http://s252.photobucket.com/albums/hh14/jeffaber/
-
ChrisHager
Topic author - Posts: 182
- Joined: Wed Sep 11, 2013 12:03 pm
Re: ChrisHager's 79 J-10 Build Thread
I plugged in the vacuum hose to the manifold and shazam!, moving air in the cab! 
Edit: I should mention the vacuum ball had a small hose running in to the cab, which would be for the heater controls. The one unhooked in the picture above is larger than the hose going to the cab and needed attached to manifold vacuum.
Edit: I should mention the vacuum ball had a small hose running in to the cab, which would be for the heater controls. The one unhooked in the picture above is larger than the hose going to the cab and needed attached to manifold vacuum.
ChrisHager's 79 J-10 Build Thread: http://fsjnetwork.com/forum/viewtopic.php?f=12&t=3585
-
ChrisHager
Topic author - Posts: 182
- Joined: Wed Sep 11, 2013 12:03 pm
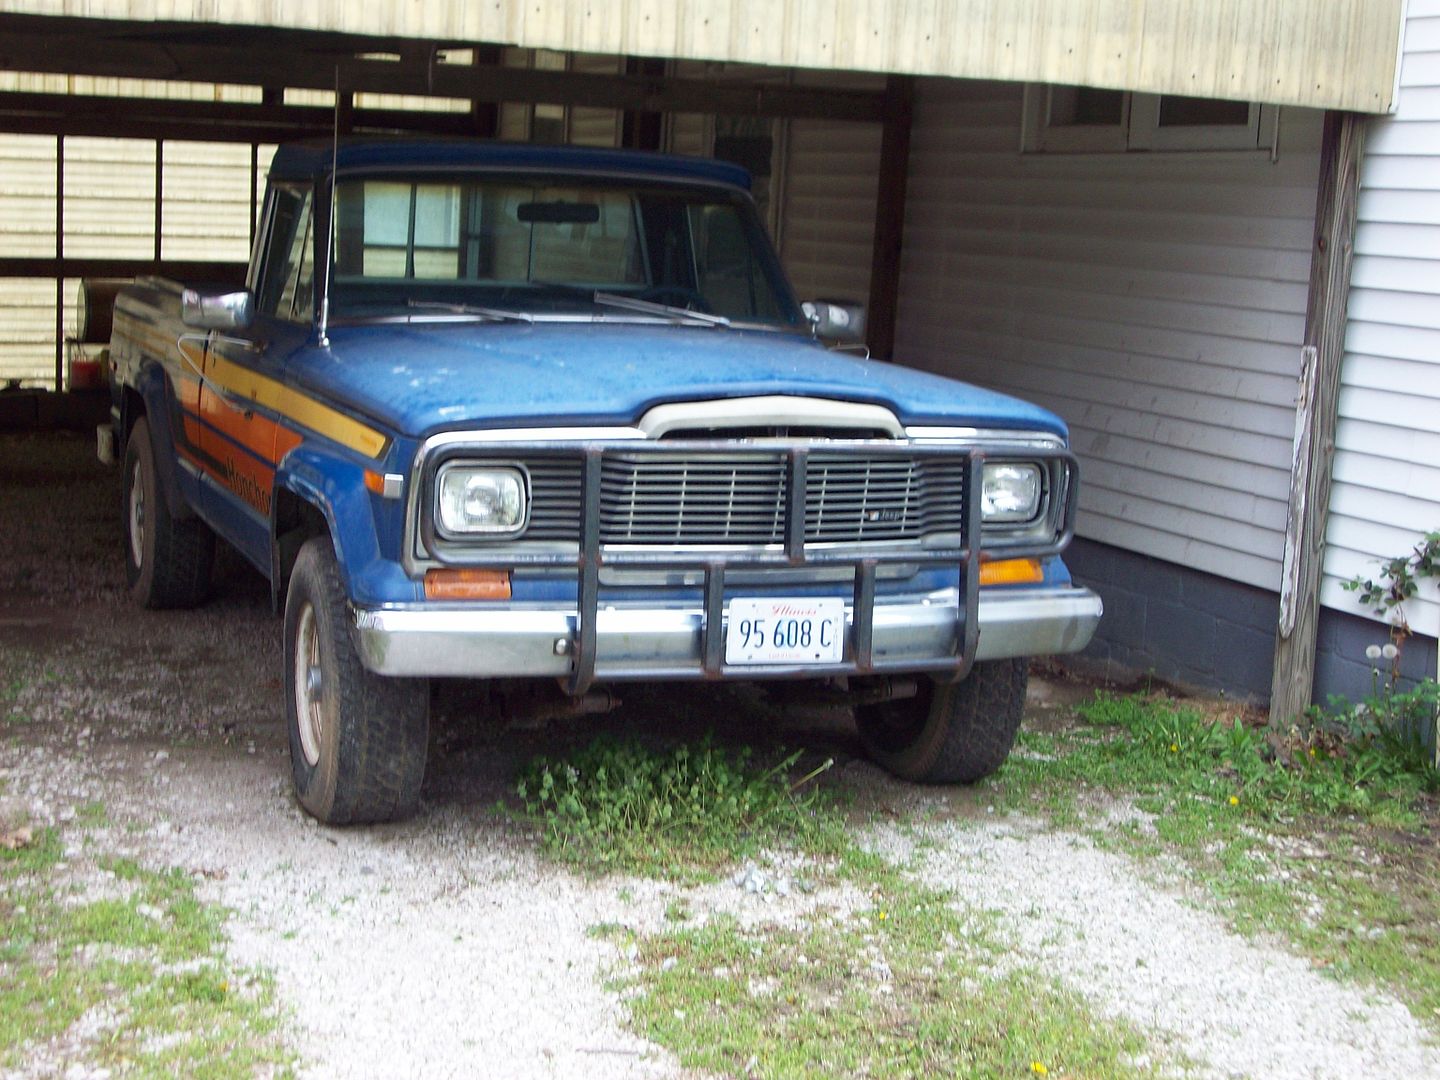
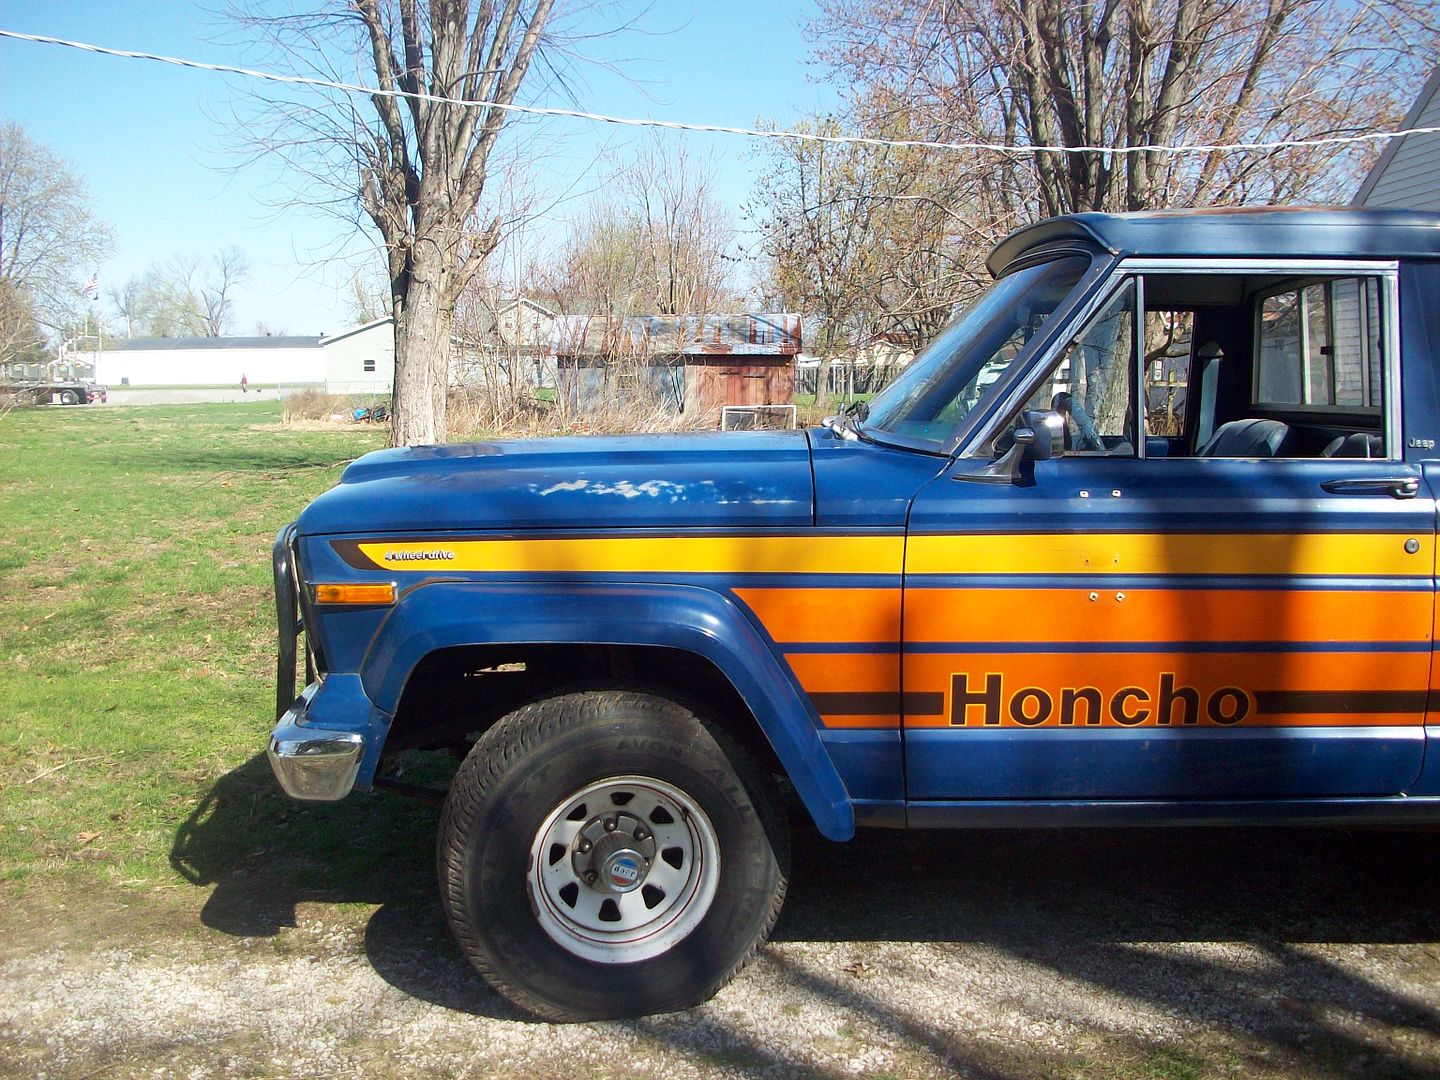
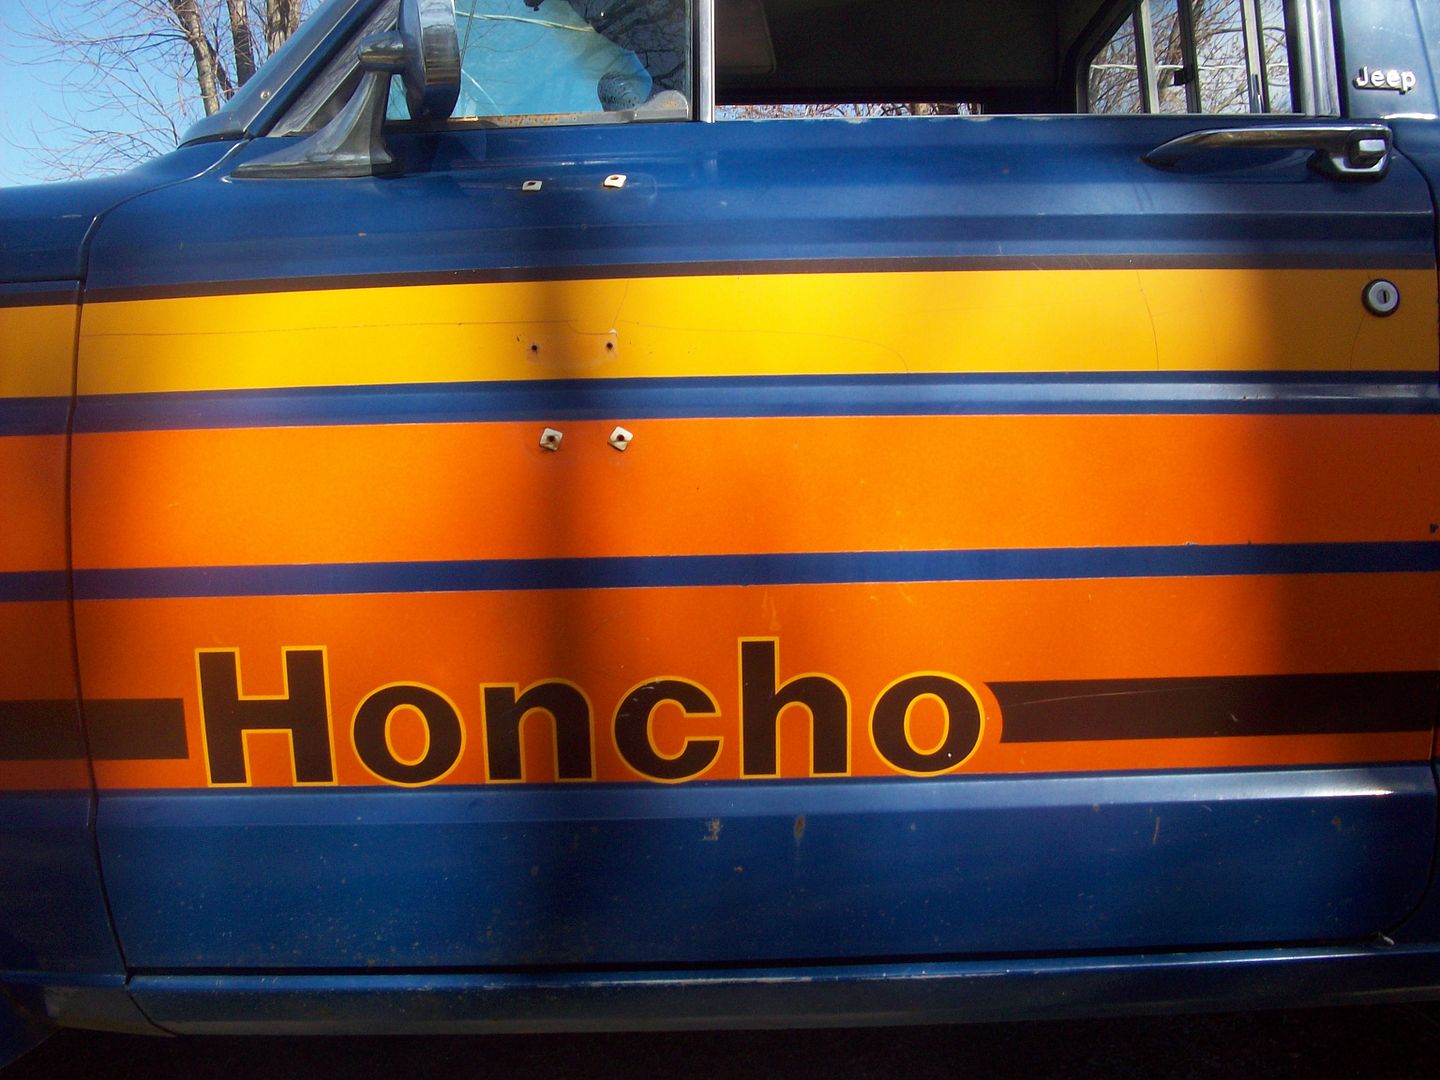
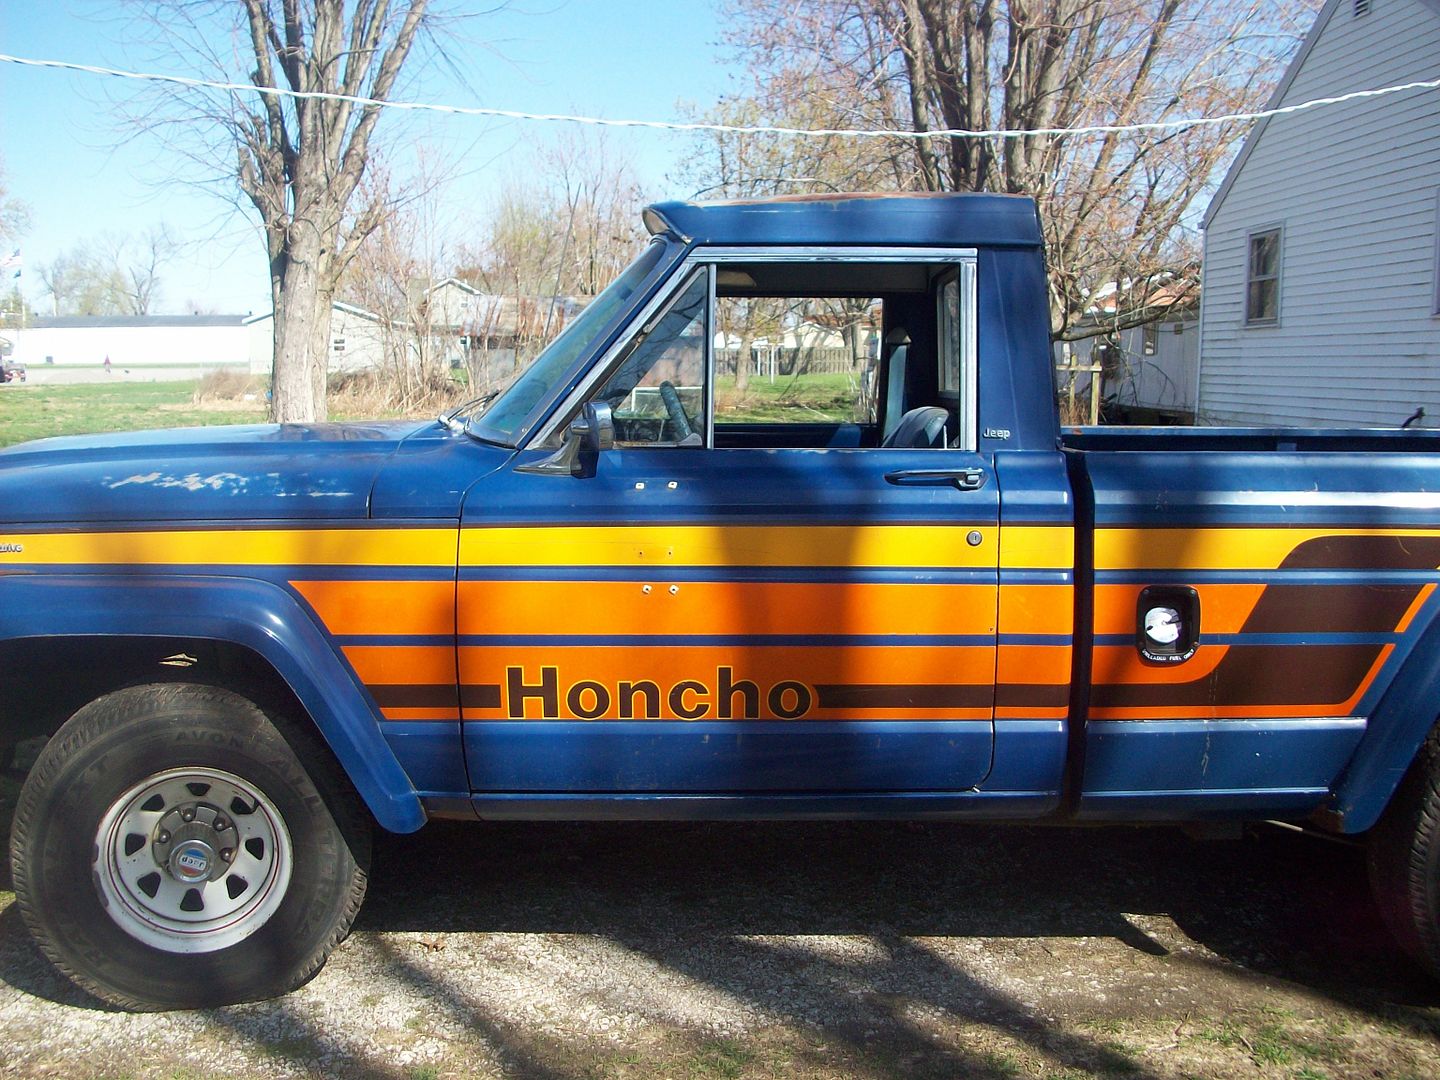
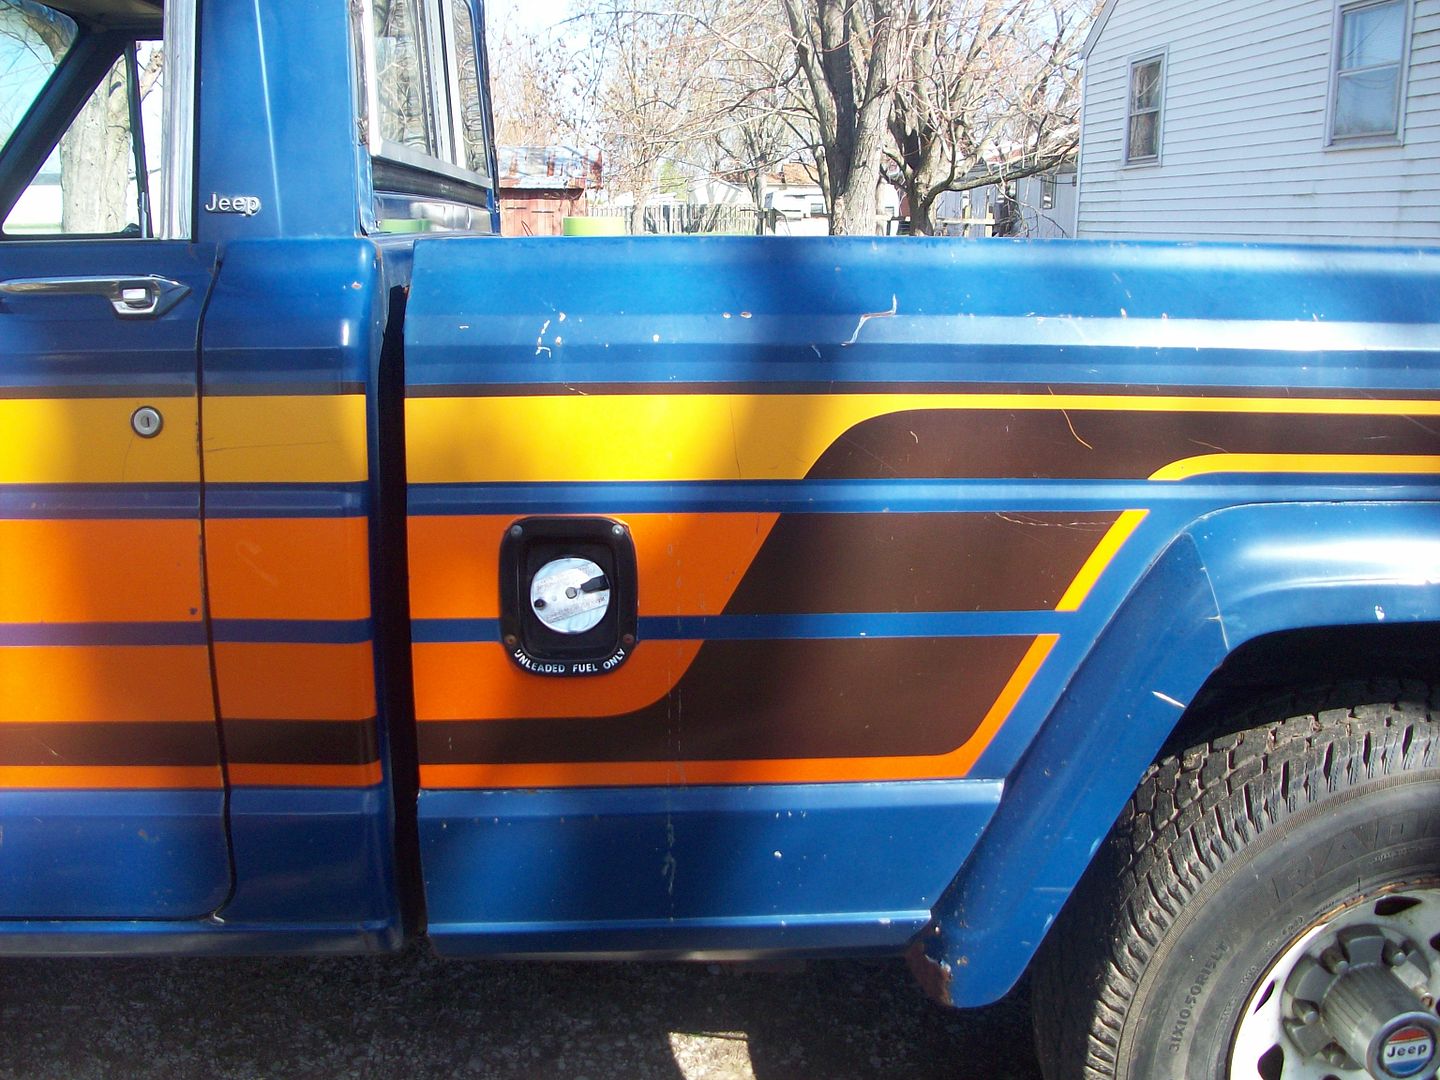
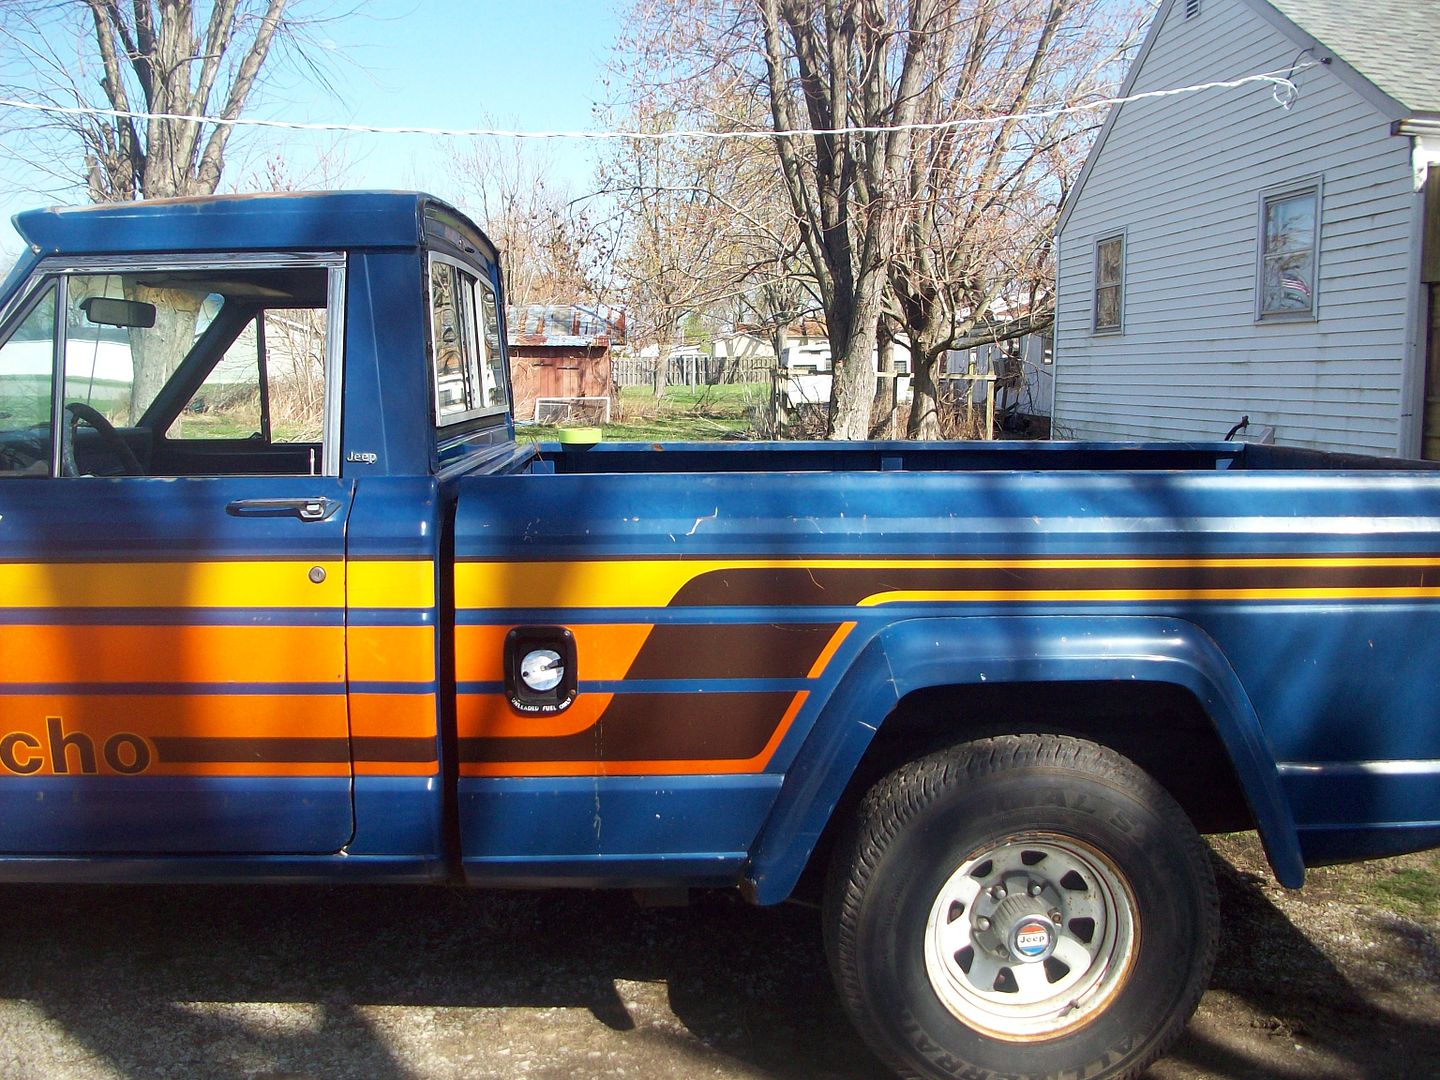
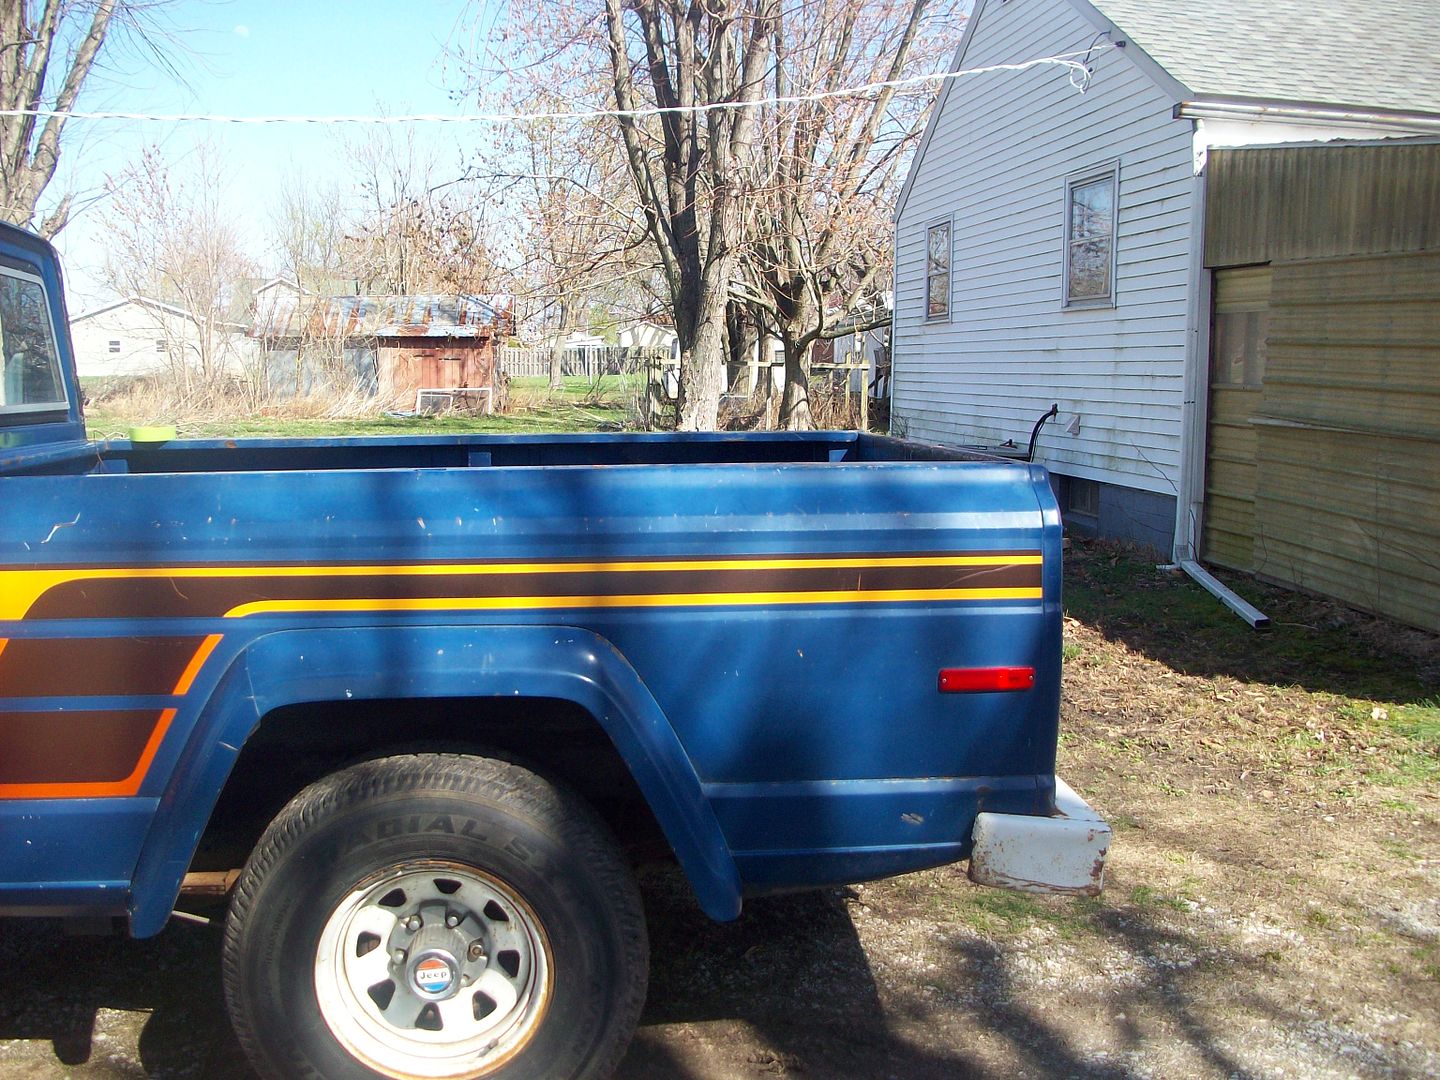
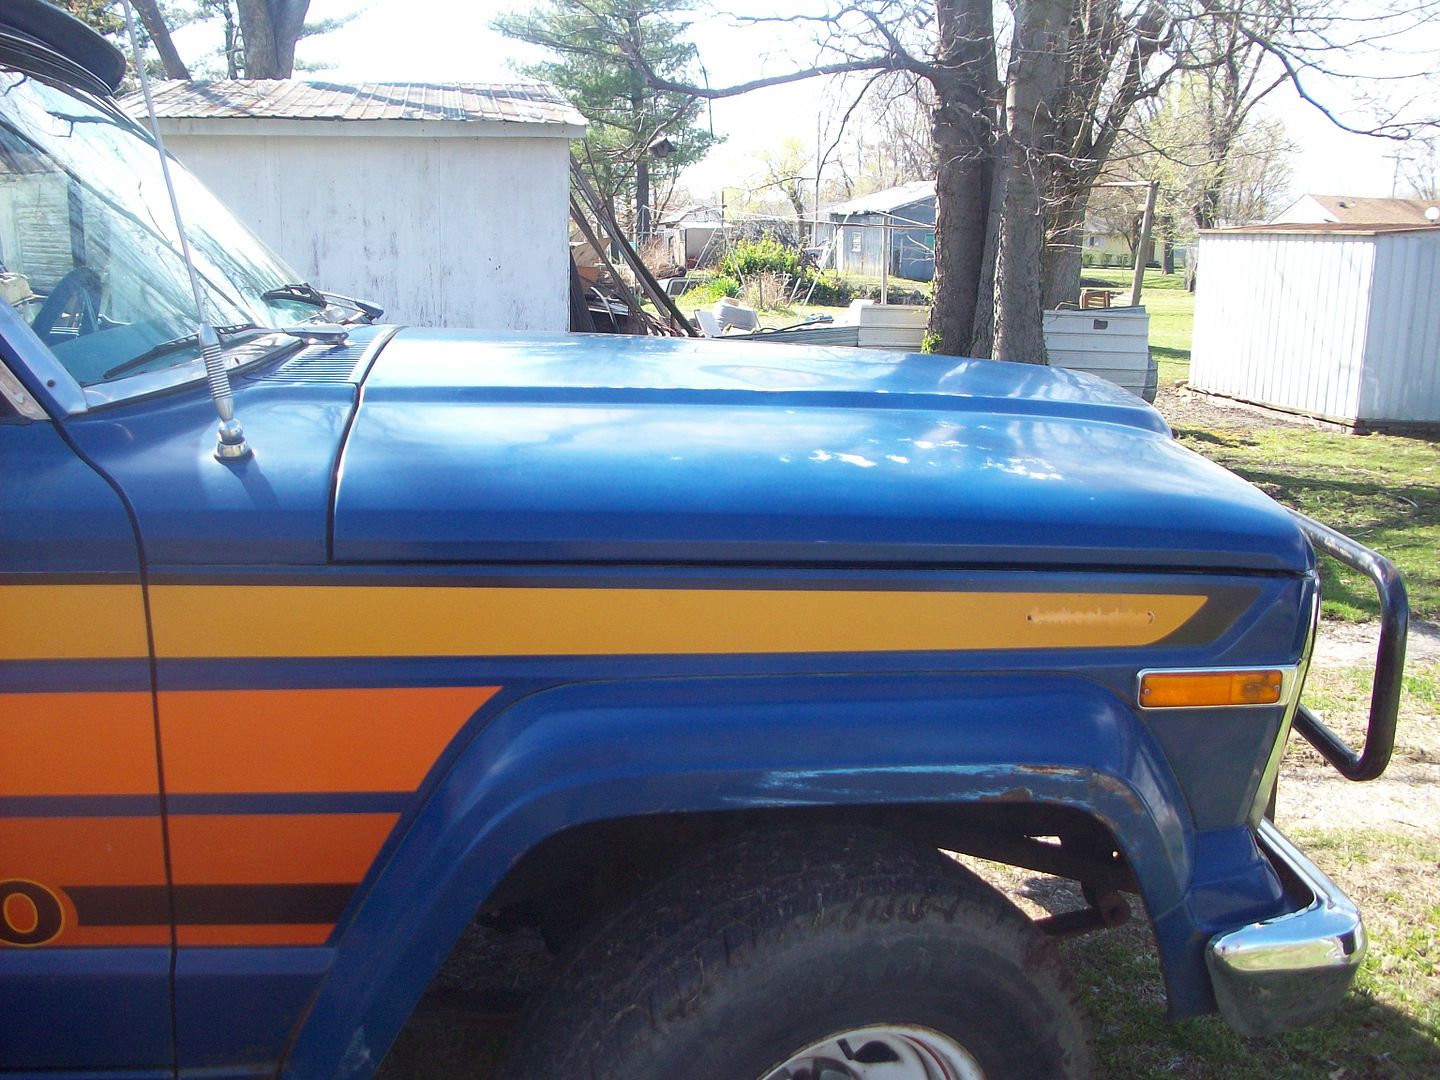
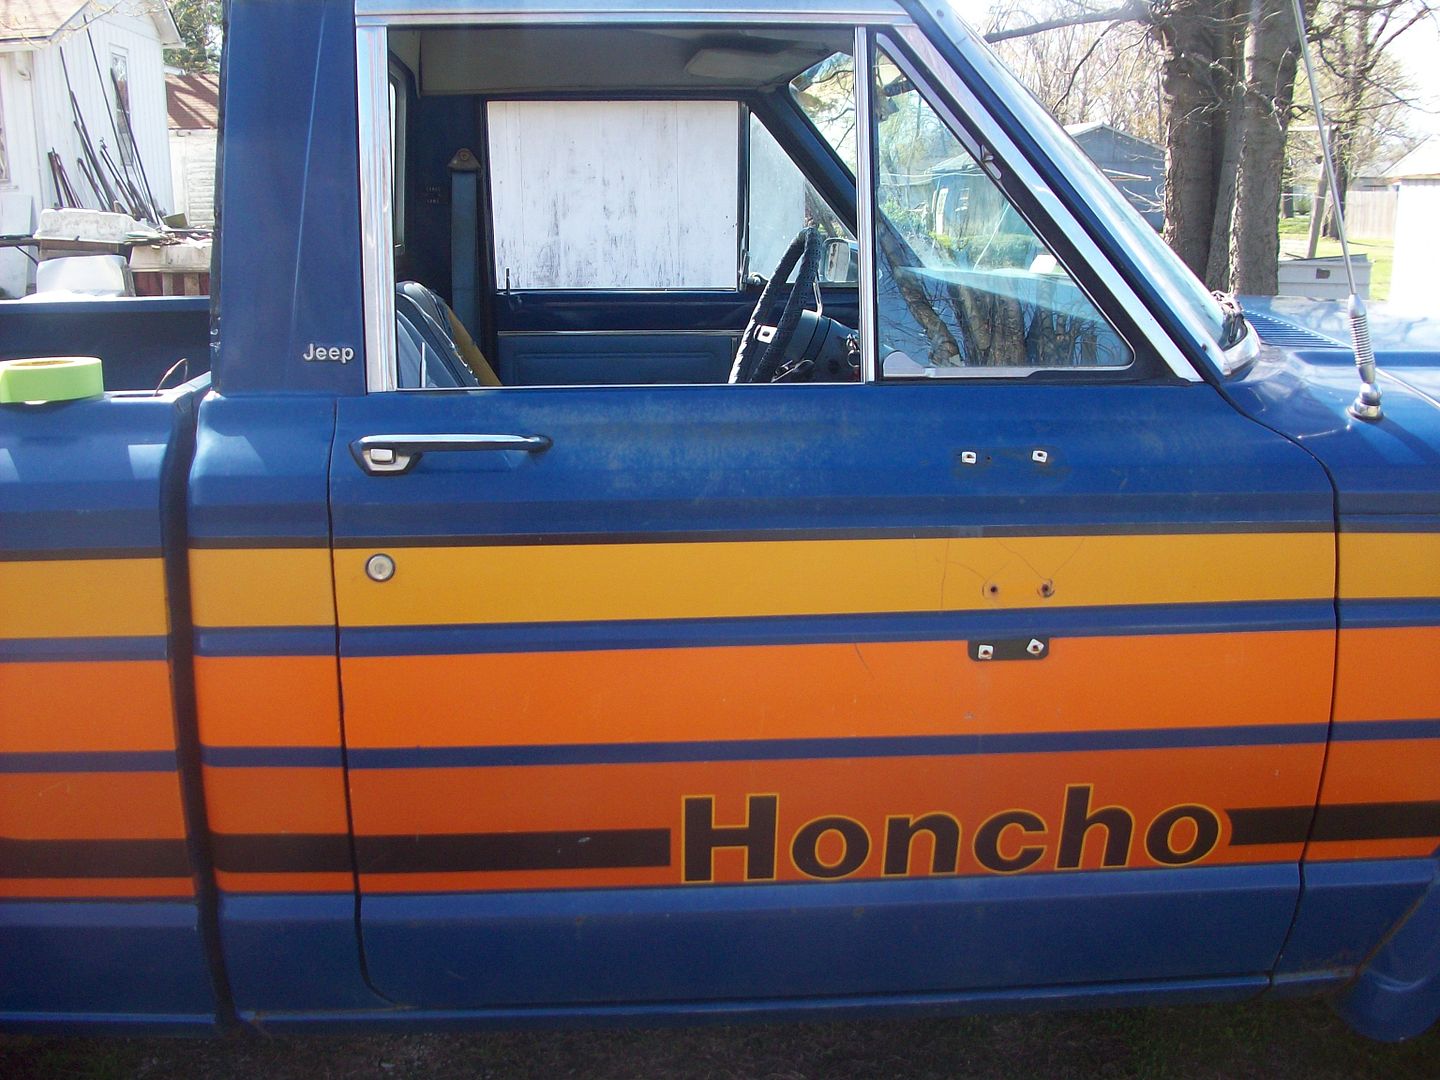
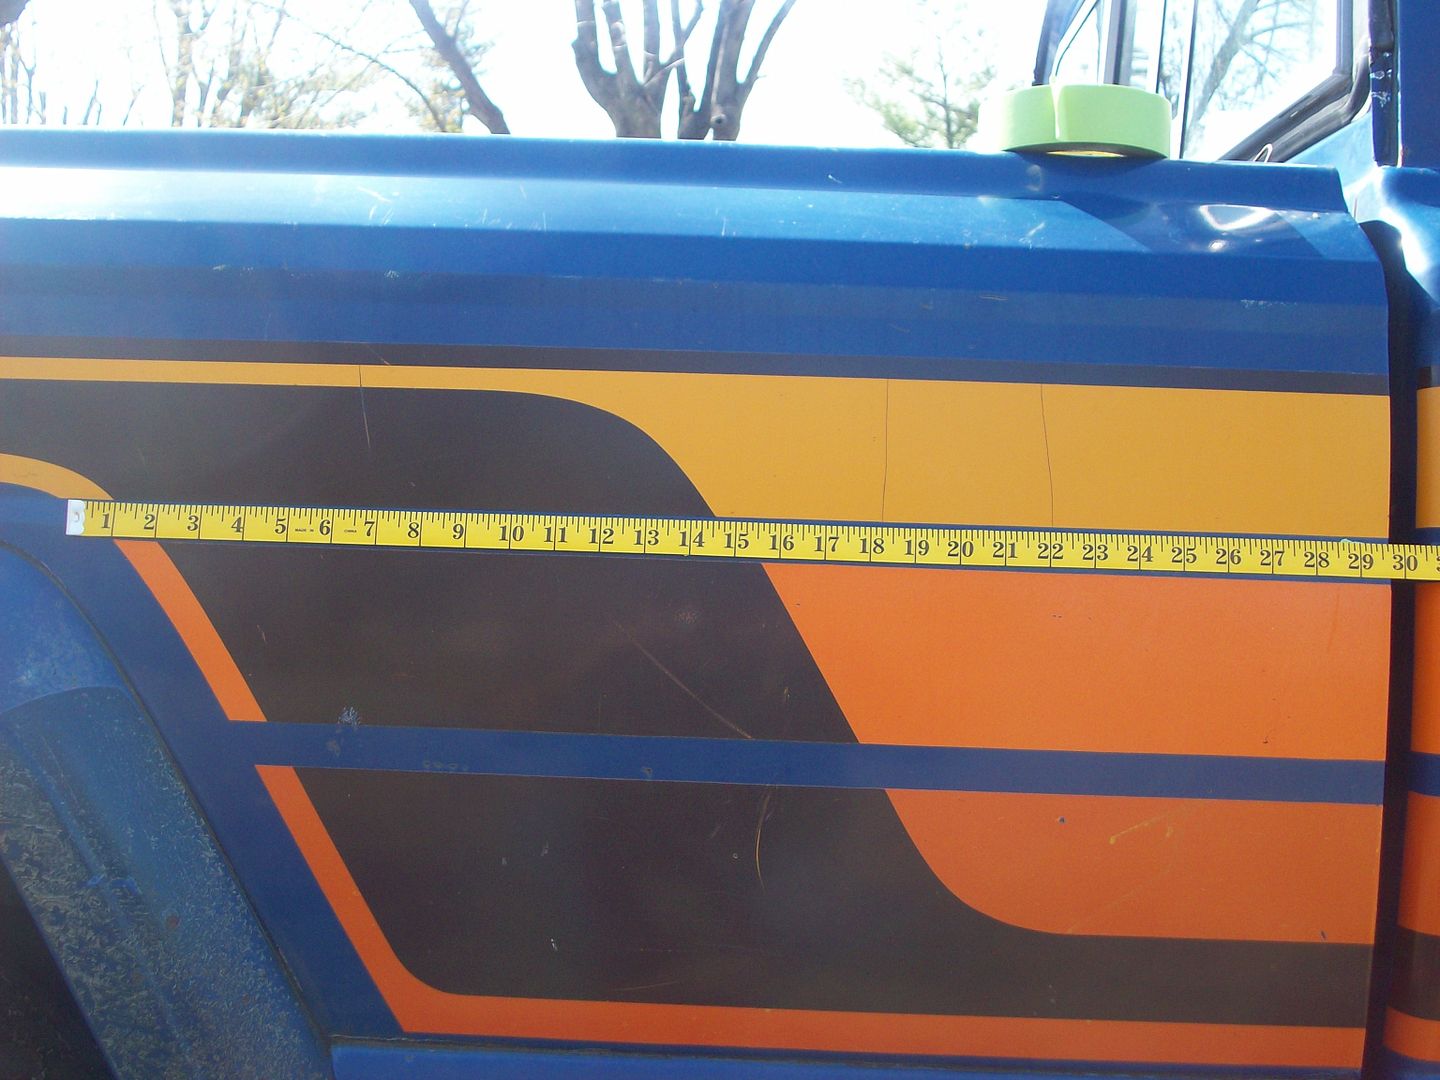
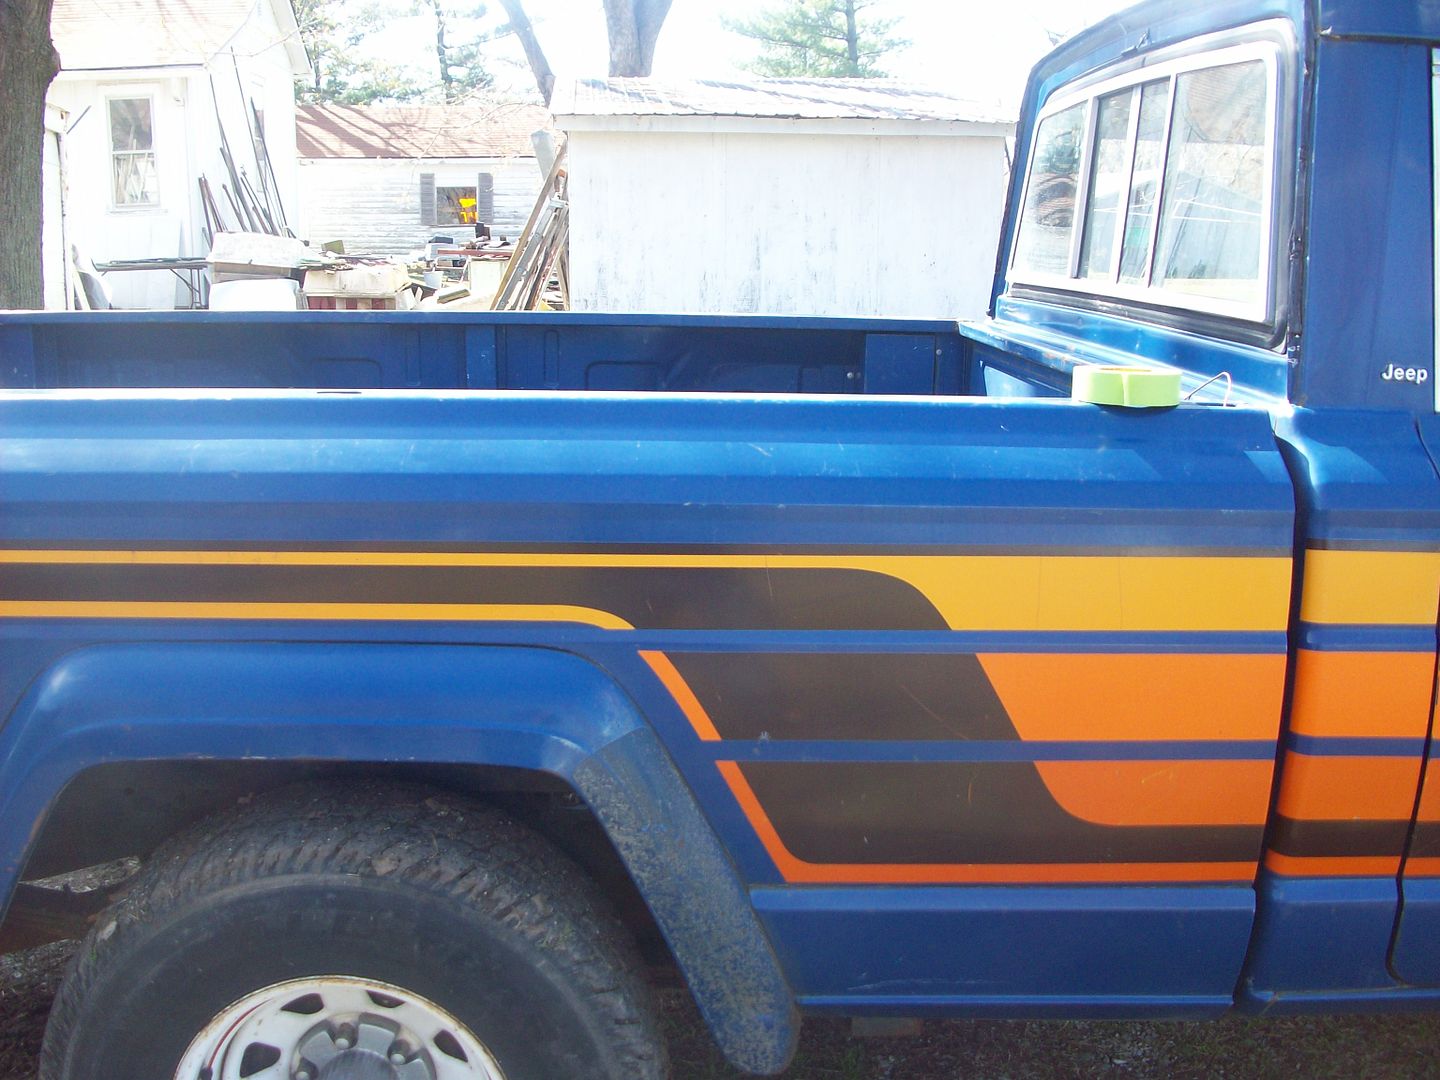
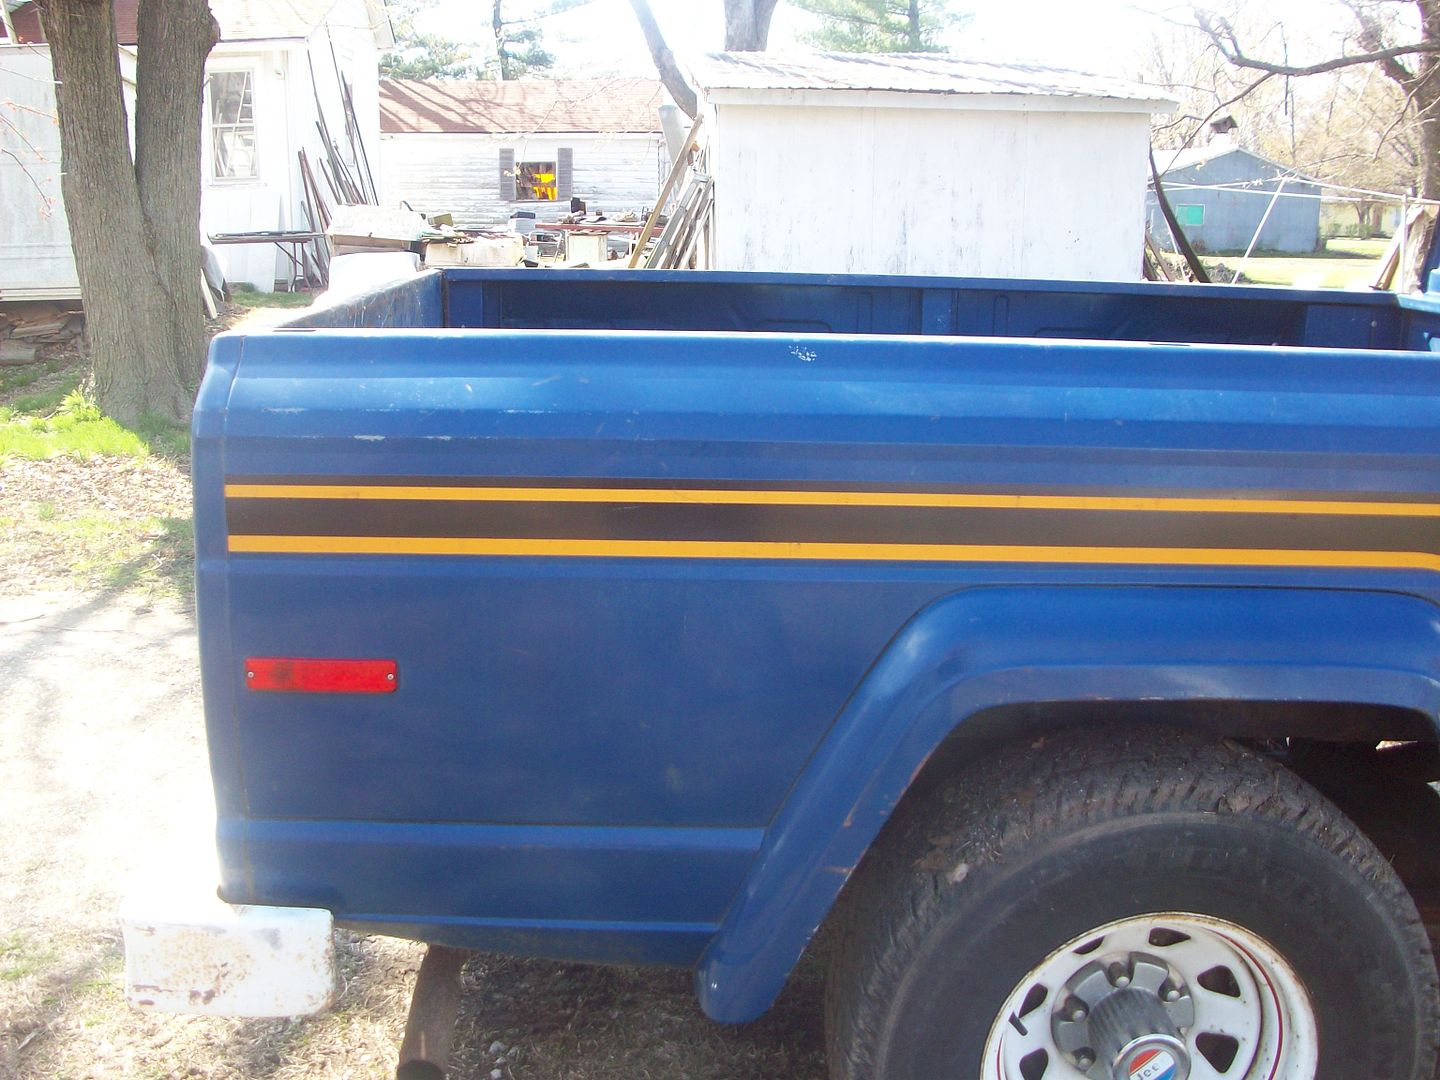
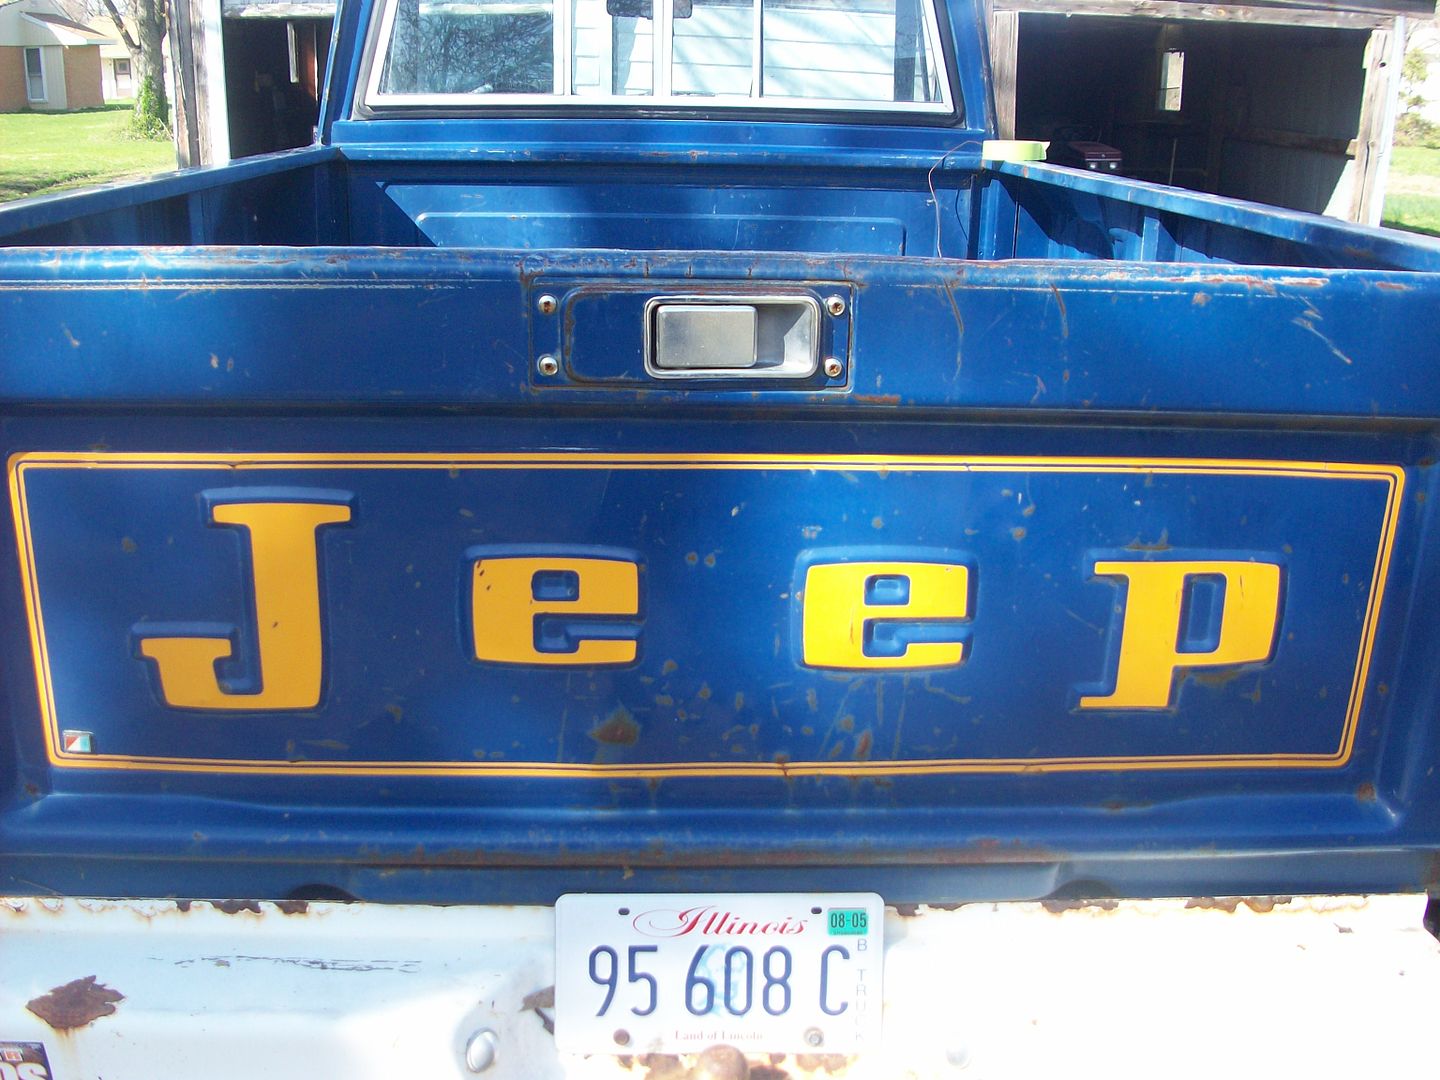
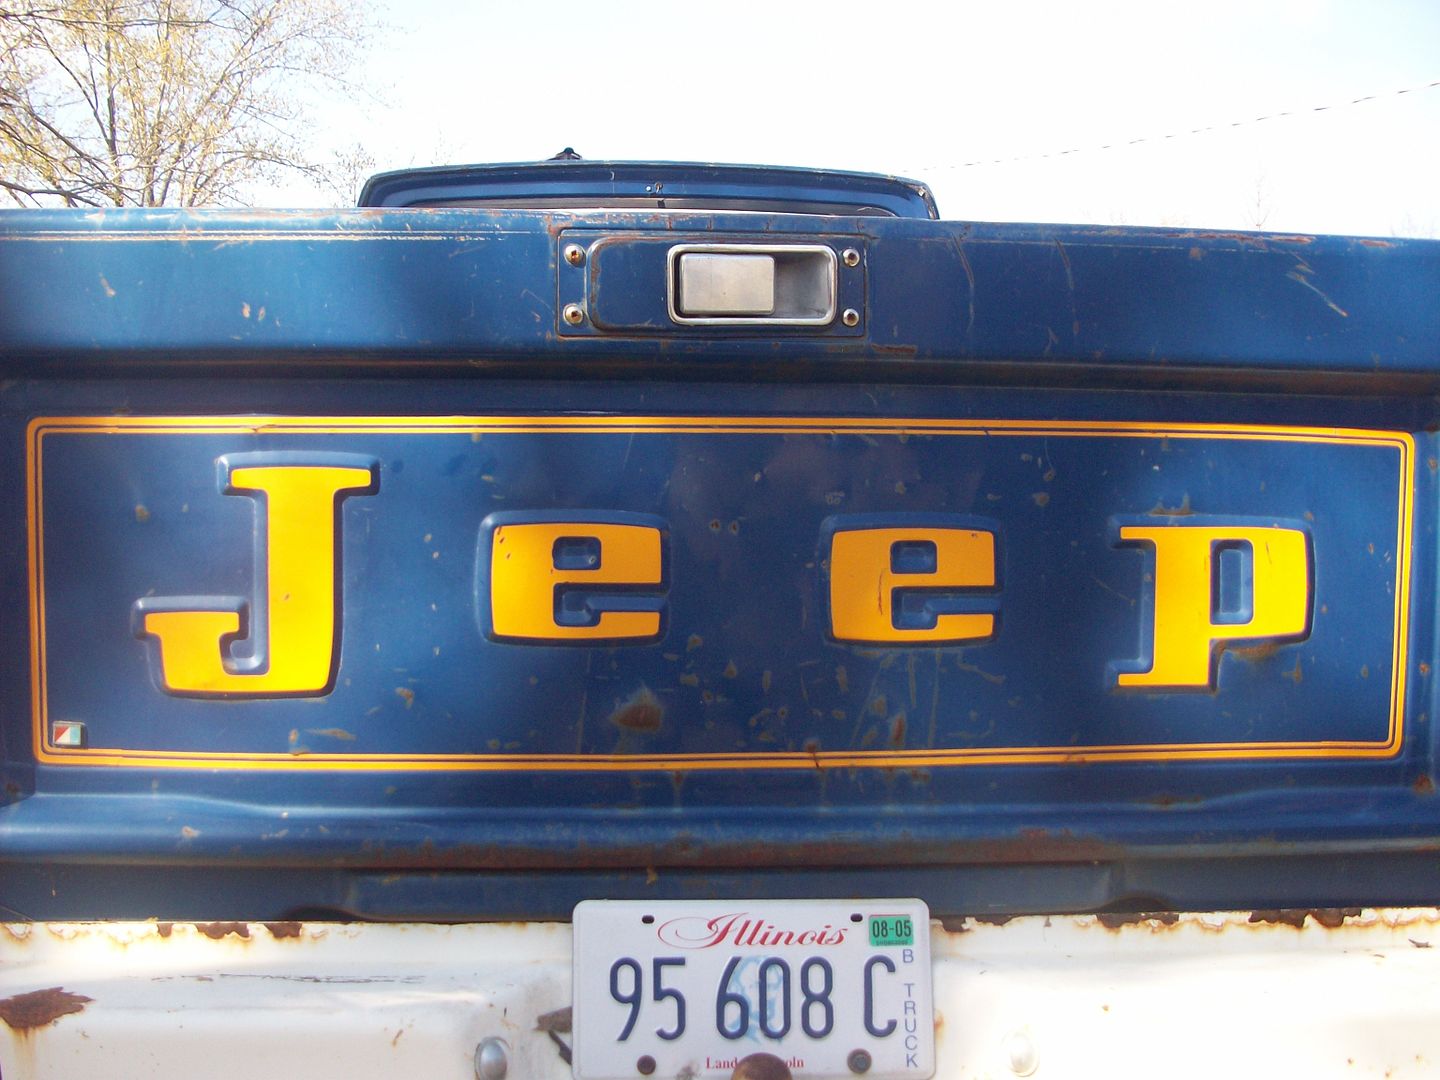
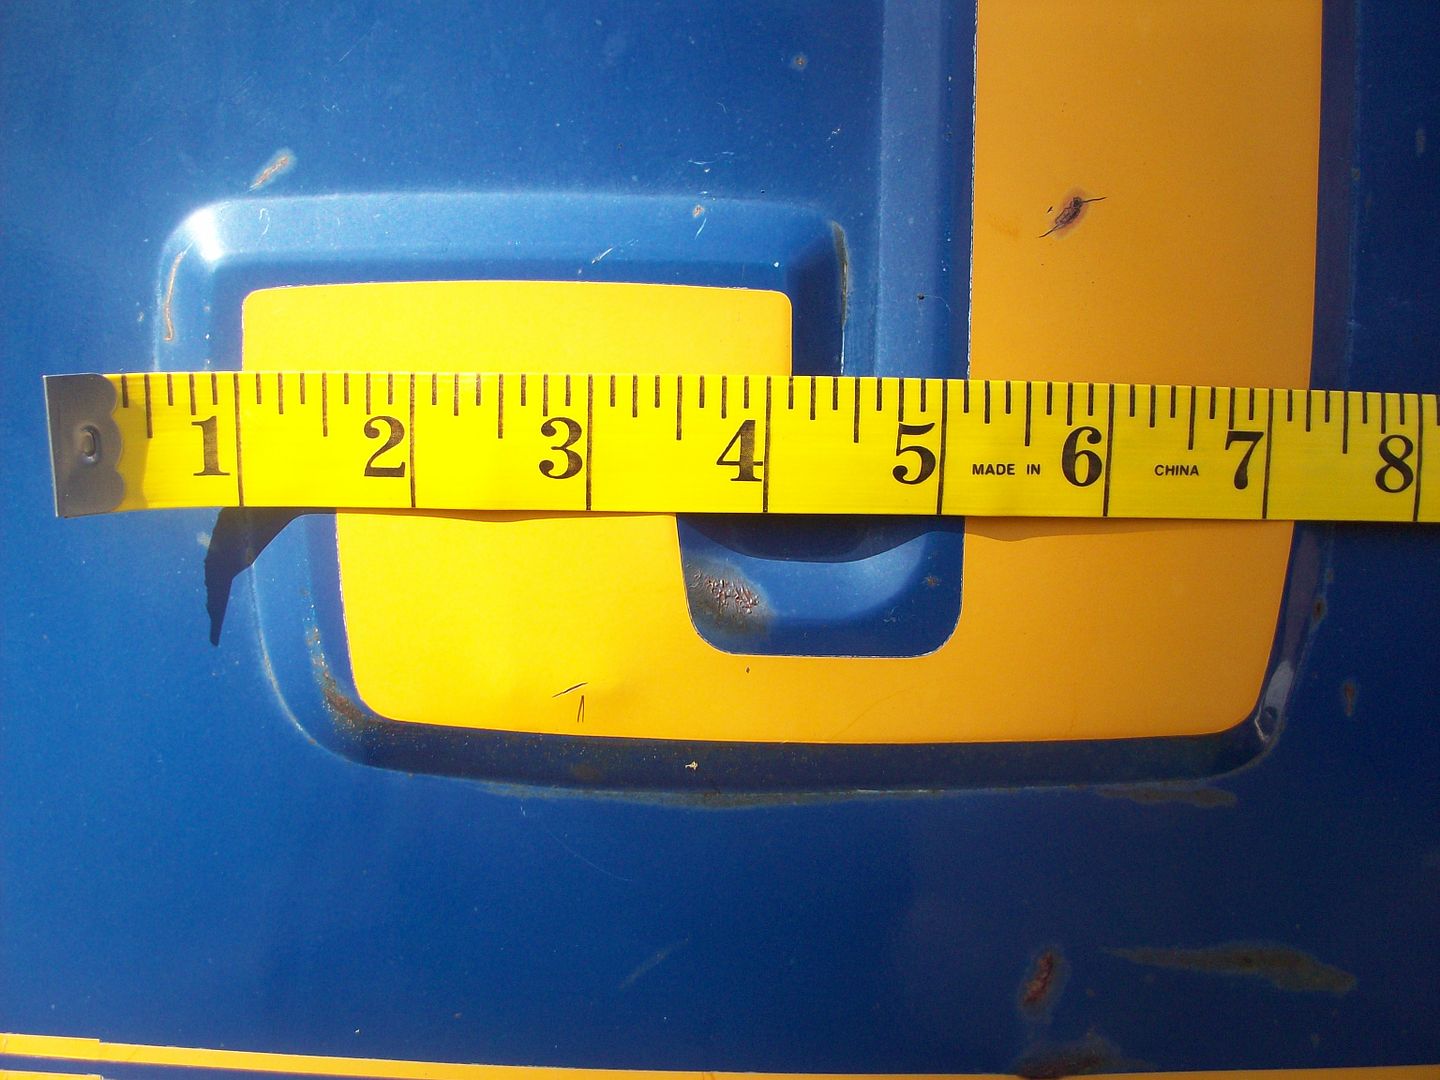
Originals
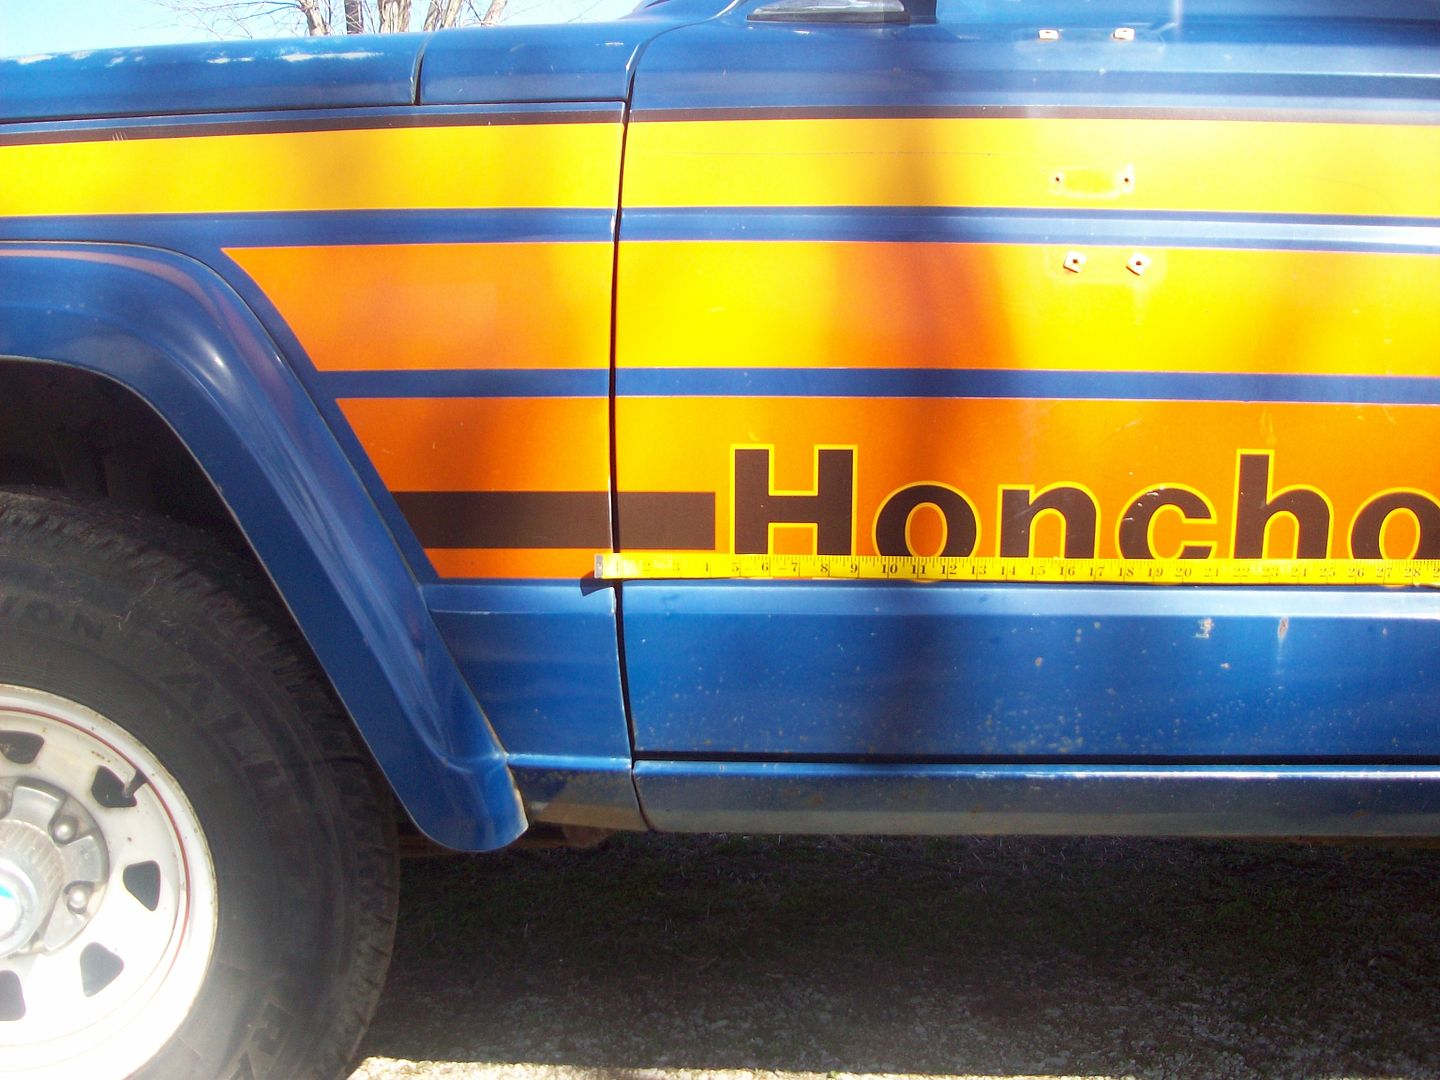
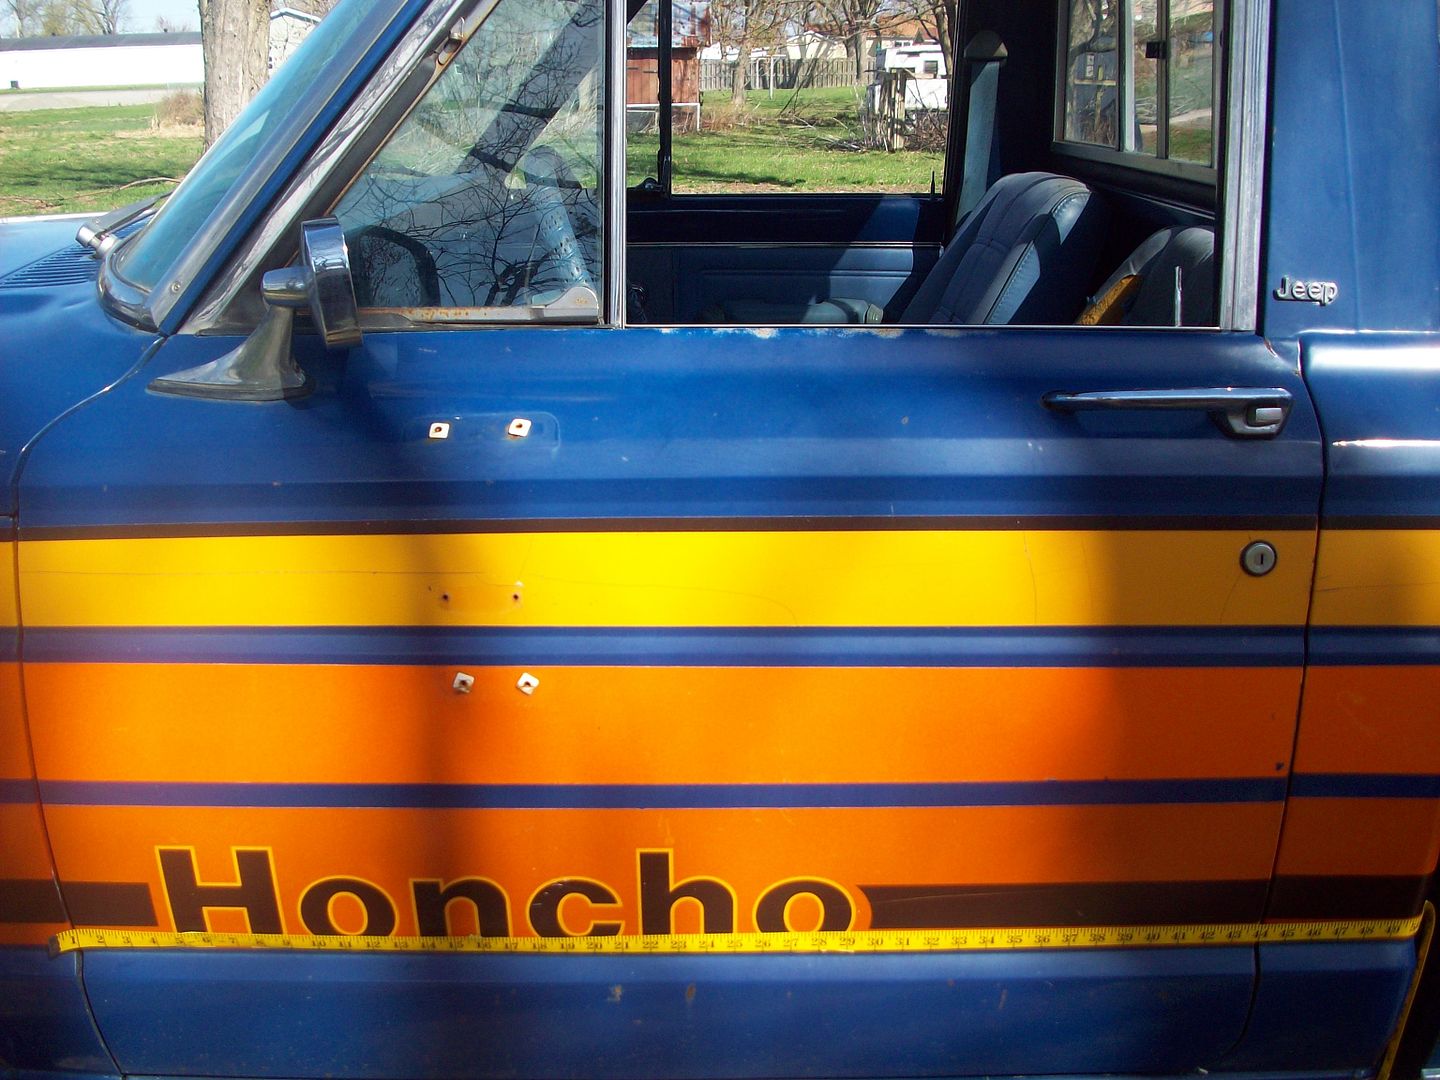
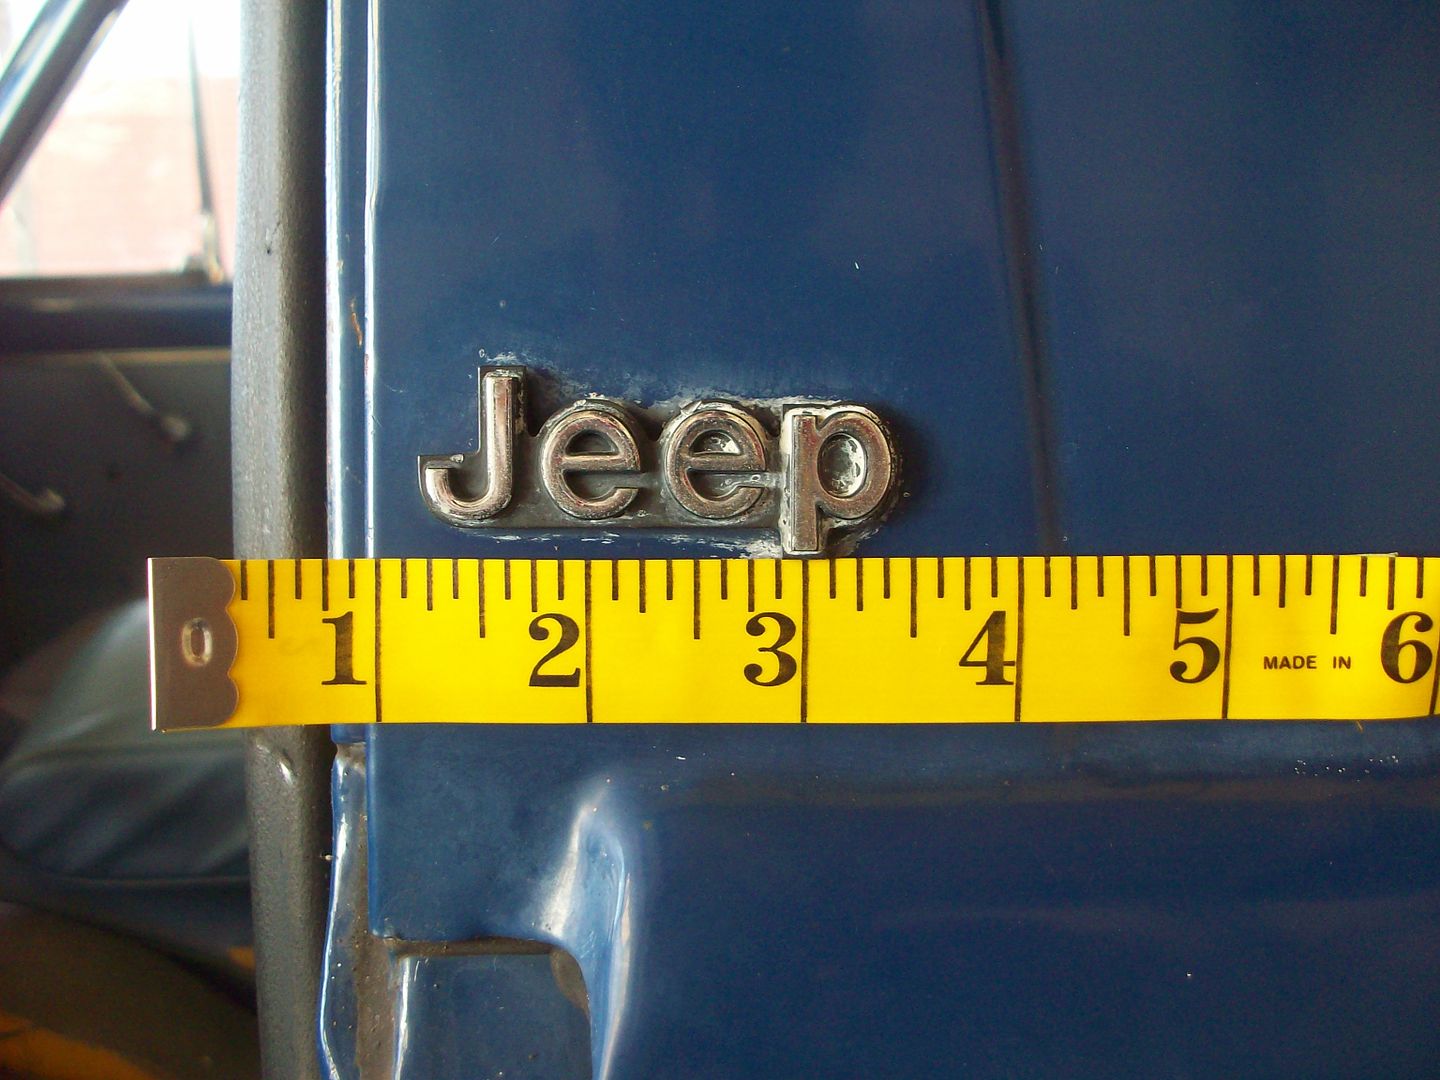
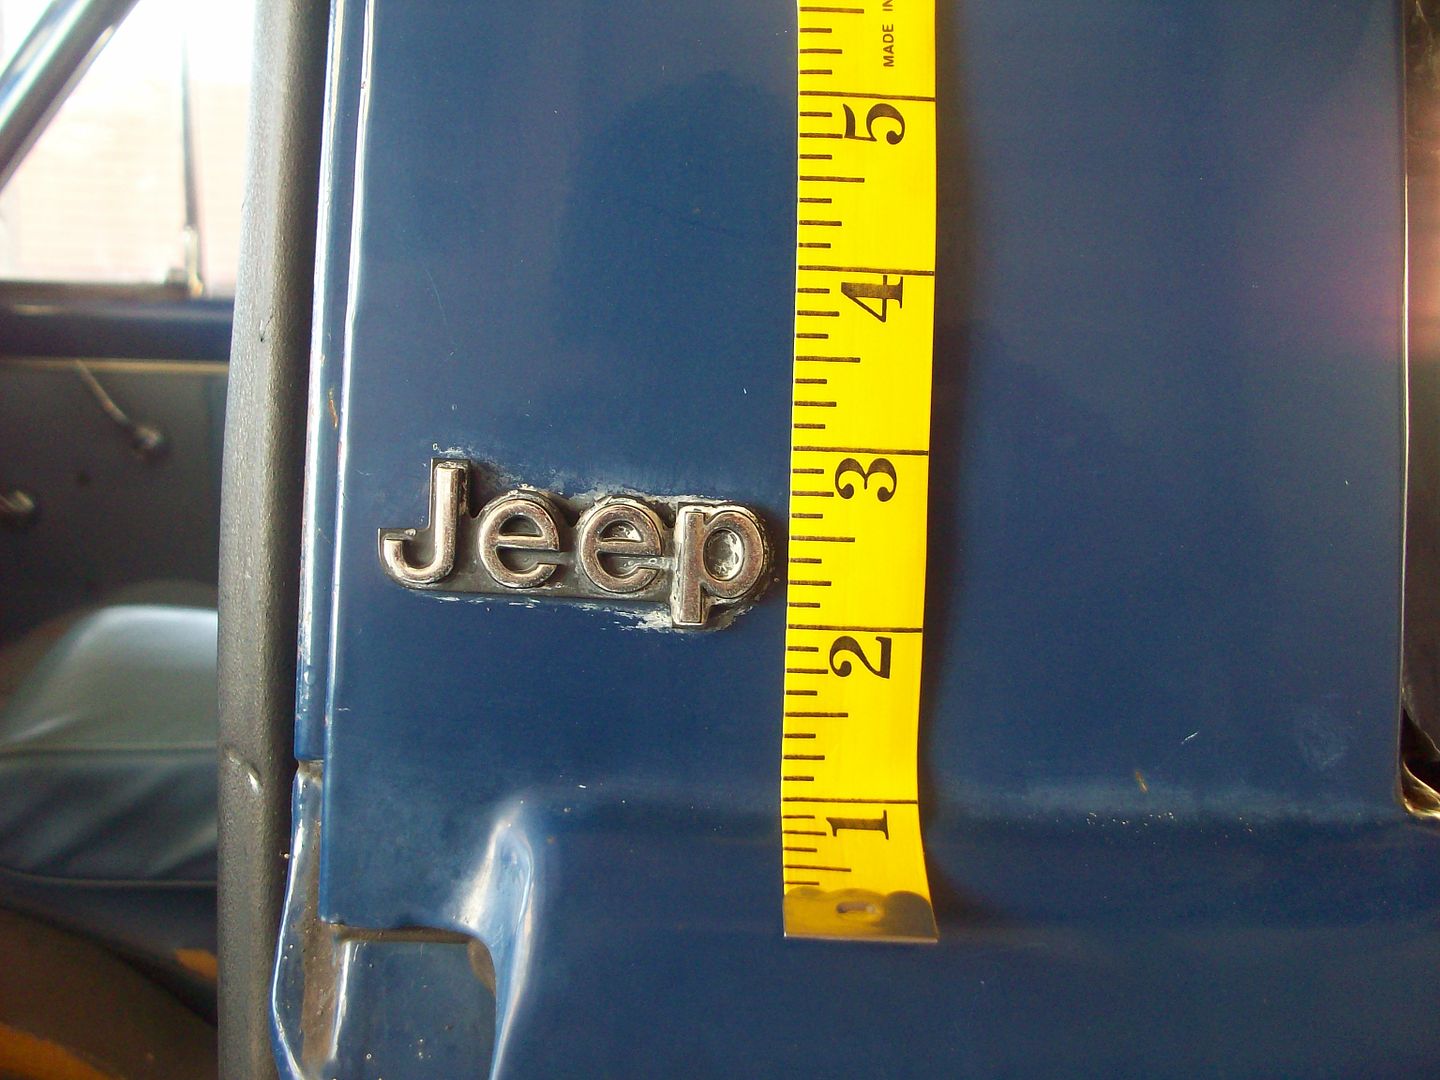
When my father-in-law bought the J-10 years ago, it was in its stock form. Before he spruced it up, he took a bunch of pictures and measurements of the Honcho decals. At the time, he was considering painting the honcho decals back on after repainting the body. Here is a link to the album (I don't want to paste ~130 images in here): http://s1103.photobucket.com/user/Chris ... 0Originals
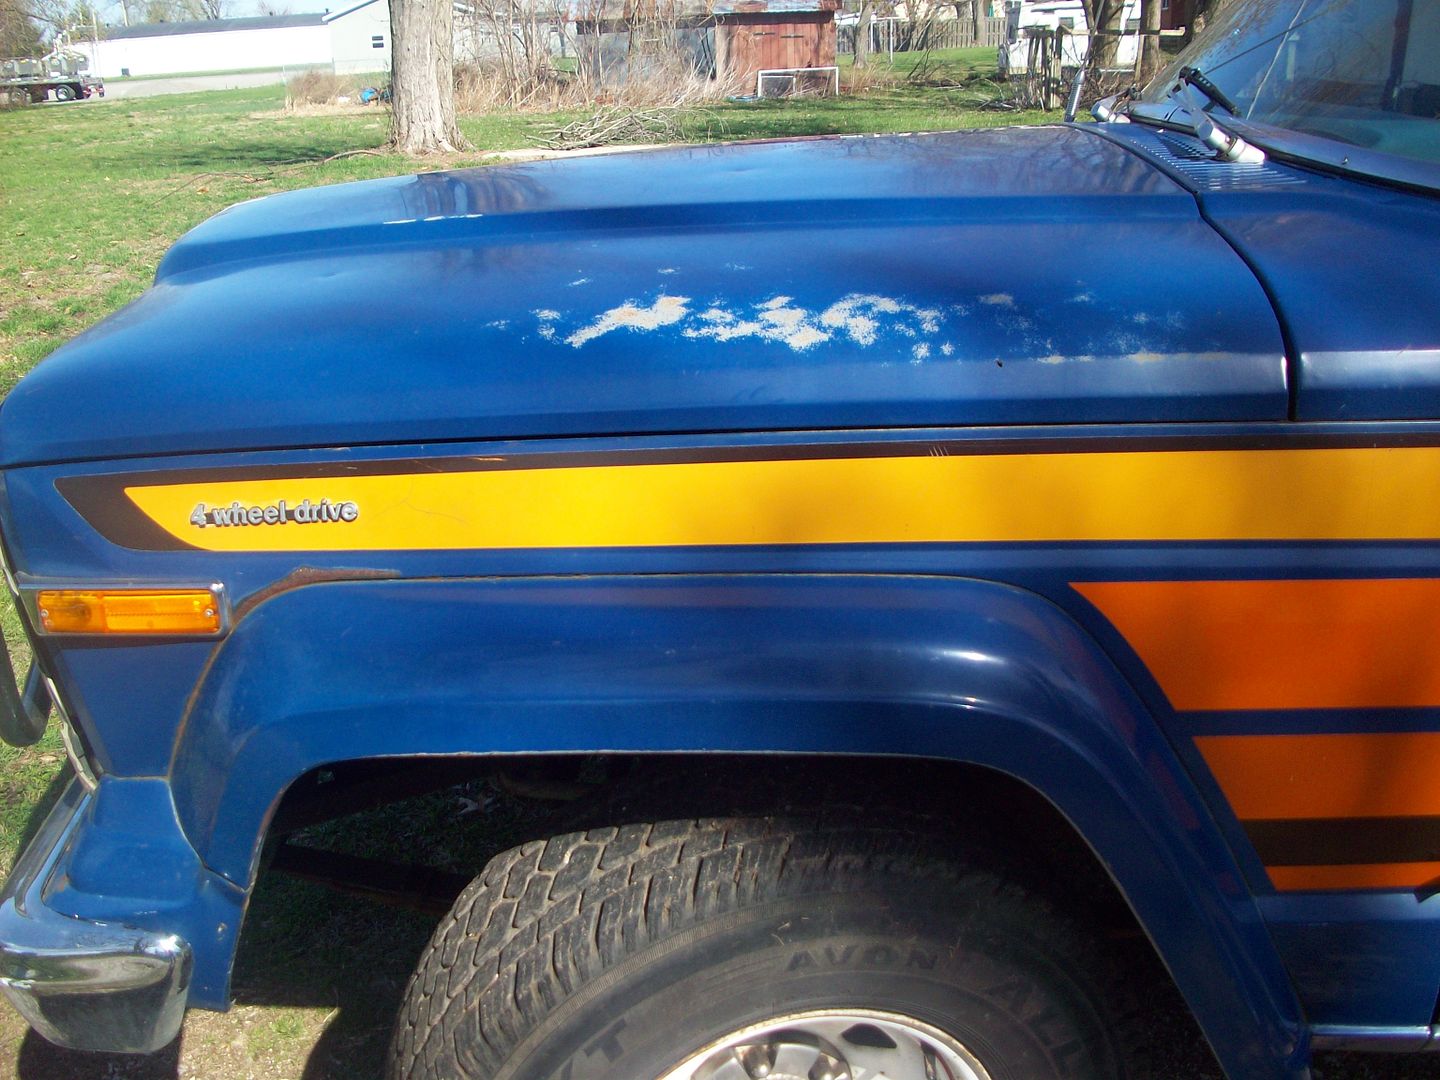
He also wanted to match the original paint color but as you can tell, the new color came out quite a bit darker. Here are some highlight photos of the truck in its original form. I threw in a few measurement pictures to give you an idea of what's in the album. These measurements may be helpful to someone looking for the original placement of everything.
Also, I believe the very first photo may be how he bought it (speculation). You'll notice in the pictures following the first, the mirrors are removed and the drivers side is replaced with the smaller unit. Now if only I can find one for the passenger side!


ChrisHager's 79 J-10 Build Thread: http://fsjnetwork.com/forum/viewtopic.php?f=12&t=3585
-
 Nutz-n-Bolts
- Posts: 313
- Joined: Thu Dec 05, 2013 12:06 pm
- Location: Strattanville,PA
Re: ChrisHager's 79 J-10 Build Thread
Hey Chris, Love your truck. That blue, even though darker does look nice. If you are interested in the factory Honcho decals there is a company that is now making them all. They advertize "any car any decal any year" Here is a link to the bay auction for the set I'm going to get for mine. I know I've seen you scheme out there too. Keep up the good work!
http://www.ebay.com/itm/110996371793?ss ... 2925wt_925
http://www.ebay.com/itm/110996371793?ss ... 2925wt_925
Lover of all Old Iron
60-79 CJ5 The best parts from several years combined to make one tough ALL JEEP CJ
81 J10 Pickup My newest acquisition undergoing a complete restoration
60-79 CJ5 The best parts from several years combined to make one tough ALL JEEP CJ
81 J10 Pickup My newest acquisition undergoing a complete restoration
-
ChrisHager
Topic author - Posts: 182
- Joined: Wed Sep 11, 2013 12:03 pm
Re: ChrisHager's 79 J-10 Build Thread
I was almost positive that BJ's Offroad made decals for the Honcho but looking again, I can't seem to find them!
I followed your link and sure enough, that company makes the proper decal for mine. Looking at the picture, the paint almost resembles mine. I wonder if my truck was originally as dark as it is now yet it faded that much over time...
http://www.ebay.com/itm/1979-1980-Jeep- ... 6371793%26

I followed your link and sure enough, that company makes the proper decal for mine. Looking at the picture, the paint almost resembles mine. I wonder if my truck was originally as dark as it is now yet it faded that much over time...
http://www.ebay.com/itm/1979-1980-Jeep- ... 6371793%26
ChrisHager's 79 J-10 Build Thread: http://fsjnetwork.com/forum/viewtopic.php?f=12&t=3585
-
ChrisHager
Topic author - Posts: 182
- Joined: Wed Sep 11, 2013 12:03 pm
Re: ChrisHager's 79 J-10 Build Thread
I stopped at the automatic car wash to remove some of the salt. She sure shines up nicely!


ChrisHager's 79 J-10 Build Thread: http://fsjnetwork.com/forum/viewtopic.php?f=12&t=3585
-
 TUDrewser
- Posts: 1306
- Joined: Mon Aug 12, 2013 9:40 pm
- Location: Mesa, AZ
Re: ChrisHager's 79 J-10 Build Thread
Ha, I'm afraid of the automatic car wash. Not only do I feel like my Jeep will fill with water, I'm worried too much will be washed off and something will fall apart
Sent from Tapatalk
Sent from Tapatalk
1990 GW "saved by Jerry" edition
will e wrote:I guess life is better if you are not moving too fast.
-
ChrisHager
Topic author - Posts: 182
- Joined: Wed Sep 11, 2013 12:03 pm
Re: ChrisHager's 79 J-10 Build Thread
Haha! I typically hand wash but figured the automatic car wash was easier for a quick clean up. I will say, plenty of water came in! One of my next 'tinker' projects is to install the seals that are sitting on the work bench.
ChrisHager's 79 J-10 Build Thread: http://fsjnetwork.com/forum/viewtopic.php?f=12&t=3585
-
ChrisHager
Topic author - Posts: 182
- Joined: Wed Sep 11, 2013 12:03 pm
Re: ChrisHager's 79 J-10 Build Thread


ChrisHager's 79 J-10 Build Thread: http://fsjnetwork.com/forum/viewtopic.php?f=12&t=3585
-
ChrisHager
Topic author - Posts: 182
- Joined: Wed Sep 11, 2013 12:03 pm
Re: ChrisHager's 79 J-10 Build Thread
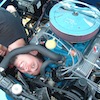
Some things running through my head...
I currently have the distributor advanced to about 15° and haven't had any pinging. It usually starts right up, even in the cold, though I have had a spell or two where it fights me for no reason...
Here in a little while (probably later than sooner), an exhaust upgrade will be in the books. I figured I'd wait to tune the carb until I finish the exhaust since that may change things. To add to that thought, I'll have an O2 bung welded in so I can install a wide band O2 sensor. Once this is all done, I'll properly set up the distributor and carb (after a TON of research and lernin').
Now, I'm a little hesitant to wait that long to at least start tinkering with the carb. Reason being, there's a "dead spot" at the beginning of the throttle. If I baby into the throttle, it's fine. If I jump past the dead spot, it's fine. If I jump right into the spot, it'll want to sputter out. Just for shiggles, I threw in some 93 octane on the last fill up and think it may be a little better. If it is, it's not quite better enough to write home about.
Symptom 2: I feel like I have to rev pretty high off the line to keep it from sputtering out. Once I'm moving, it feels OK, though at times I feel it should have more spunk as I'm increasing the throttle. I'm not talking about 'I thought this thing would burn out at 40 MPH' spunk but more of 'I keep adding throttle and I don't feel much of an increase in acceleration/power' spunk.
Symptom C: I JUST noticed on the last outing that if I get into the throttle too quick, she'll backfire a smidge.
Some of my research a while back led me to think the power valve is off/damaged. My father-in-law said this carb has a power valve check ball and that the valve itself shouldn't be damaged. He was also told that this (rebuilt) carb was tuned to match the 360 with the Edelbrock Performer intake manifold (which is currently installed as well).
Now, I haven't been in this carb (Holley 4160 tweaked into a makeshift Truck Avenger, by the way) at all nor do I know anything about these. The most carb work I've done is on small engines. I don't have a clue what jets/valves are in here so your guess is as good as mine. That said, I'll contribute useless information and tell you Springfield, IL is at an altitude of: 586 ft.
Does anyone have any thoughts on what could be off? Basically, where do I start knowing that I'll probably give the thing a good once over as soon as I do the exhaust and wide band O2, which won't be anytime extremely soon.
Also, I've had plenty of coffee today. When I read through my post, I realized I sound ridiculous.
ChrisHager's 79 J-10 Build Thread: http://fsjnetwork.com/forum/viewtopic.php?f=12&t=3585
-
ChrisHager
Topic author - Posts: 182
- Joined: Wed Sep 11, 2013 12:03 pm
Re: ChrisHager's 79 J-10 Build Thread
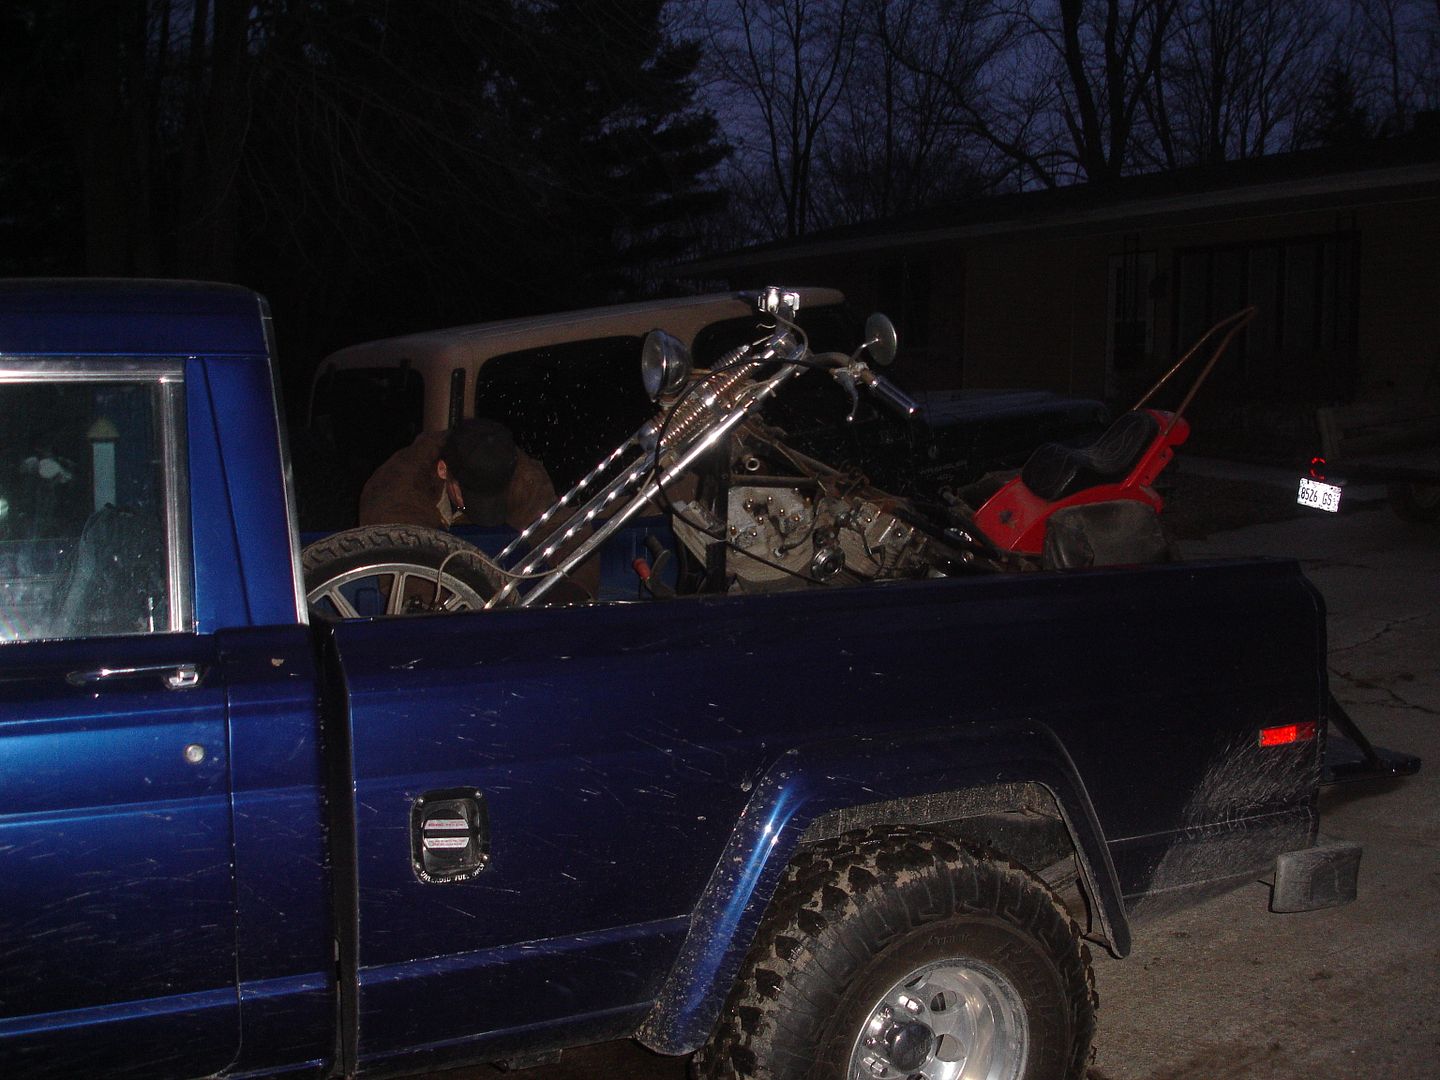
Well, I didn't get a chance to tinker with the truck this weekend. I ended up having problems with the WJ which need my attention more. Because of the WJ issues, the J-10 stepped up to the plate for an afternoon errand - my father-in-law and I took the truck for a drive to pick up a '78 Harley. On the last stretch of the trip, I was pleasantly surprised (and a bit confused) to find that it was running wonderfully. However, after we unloaded the Harley, I noticed a strong fuel smell. I later confirmed I was dripping gas out of the freshly filled tank. I think it stopped but it's hard to tell how much dripped out... maybe 1/4 to 1/2 tank... It looks like I have another task on my hands!
ChrisHager's 79 J-10 Build Thread: http://fsjnetwork.com/forum/viewtopic.php?f=12&t=3585
-
ChrisHager
Topic author - Posts: 182
- Joined: Wed Sep 11, 2013 12:03 pm
Re: ChrisHager's 79 J-10 Build Thread
I still haven't had time to work on the truck. Hopefully soon...
Anyway, here are a few pictures from a little while ago when my brother and I went shooting. I backed into the timber so we didn't have to carry as much. When we were finished, I couldn't help but to drive down to the bottom.
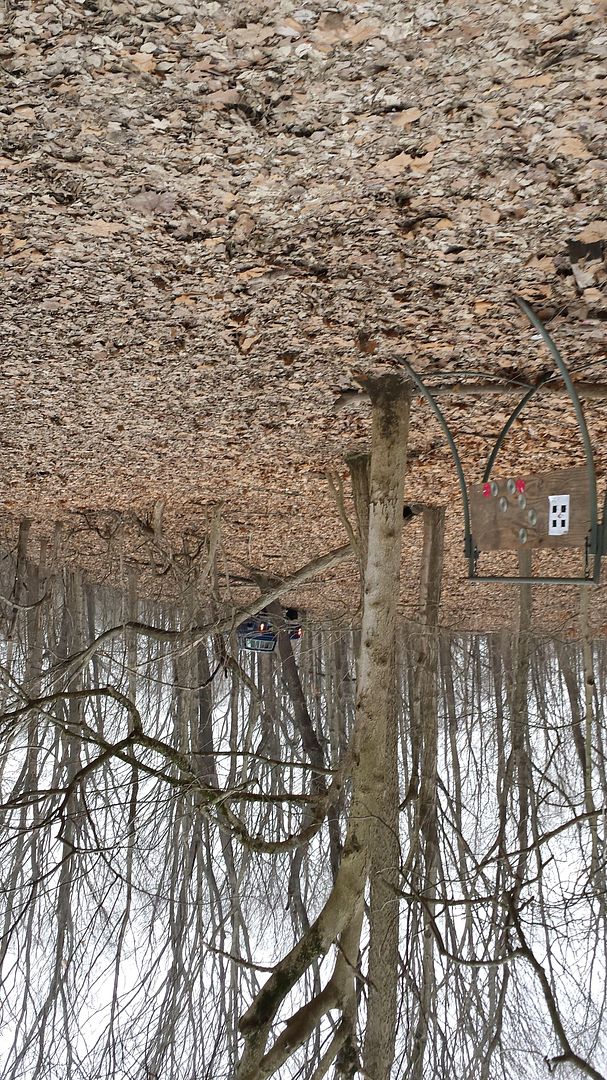
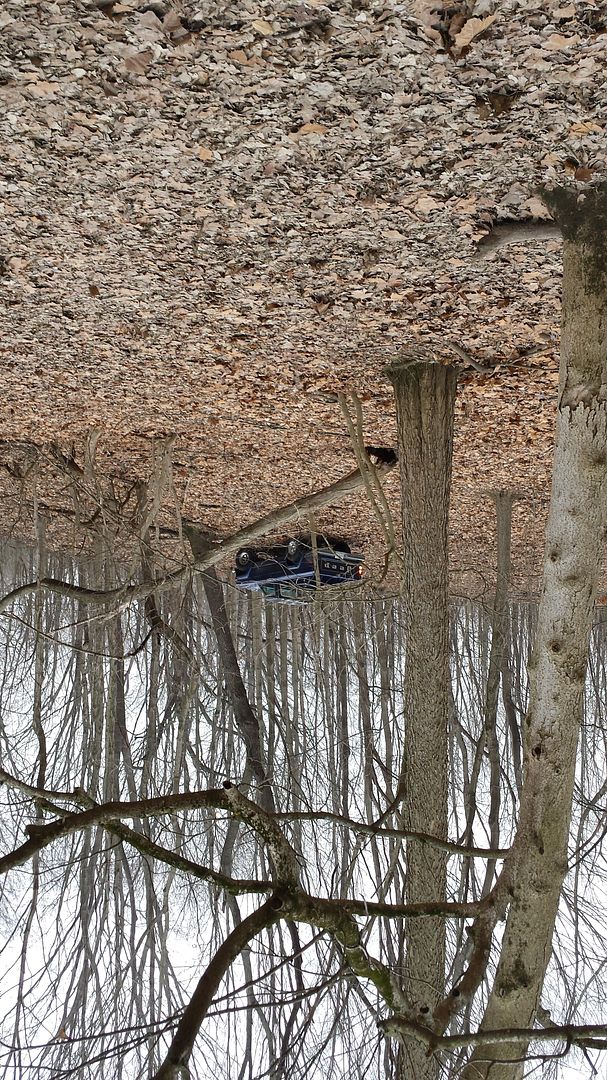
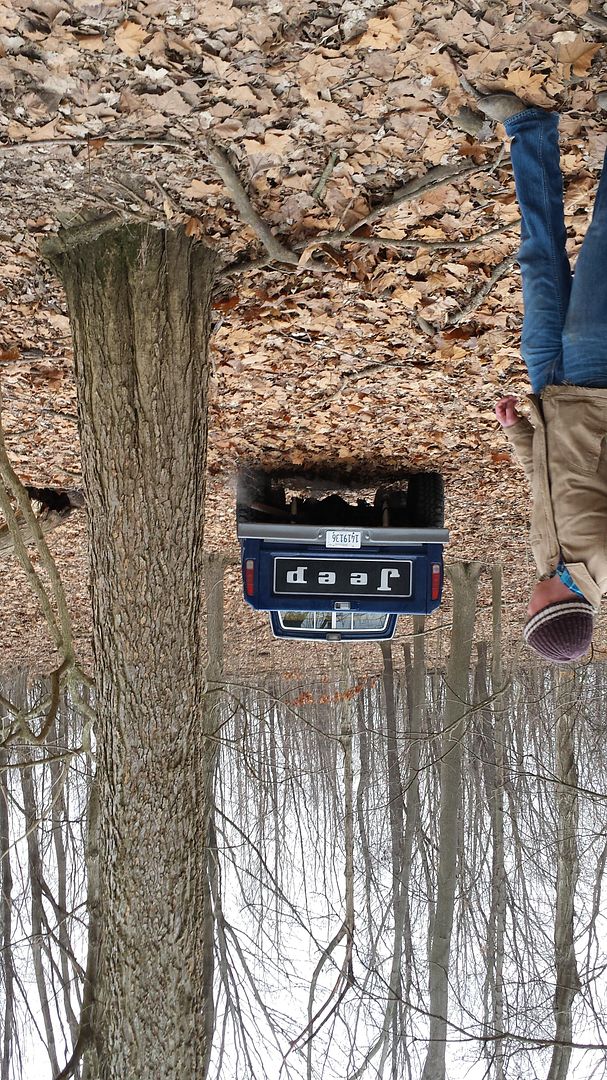
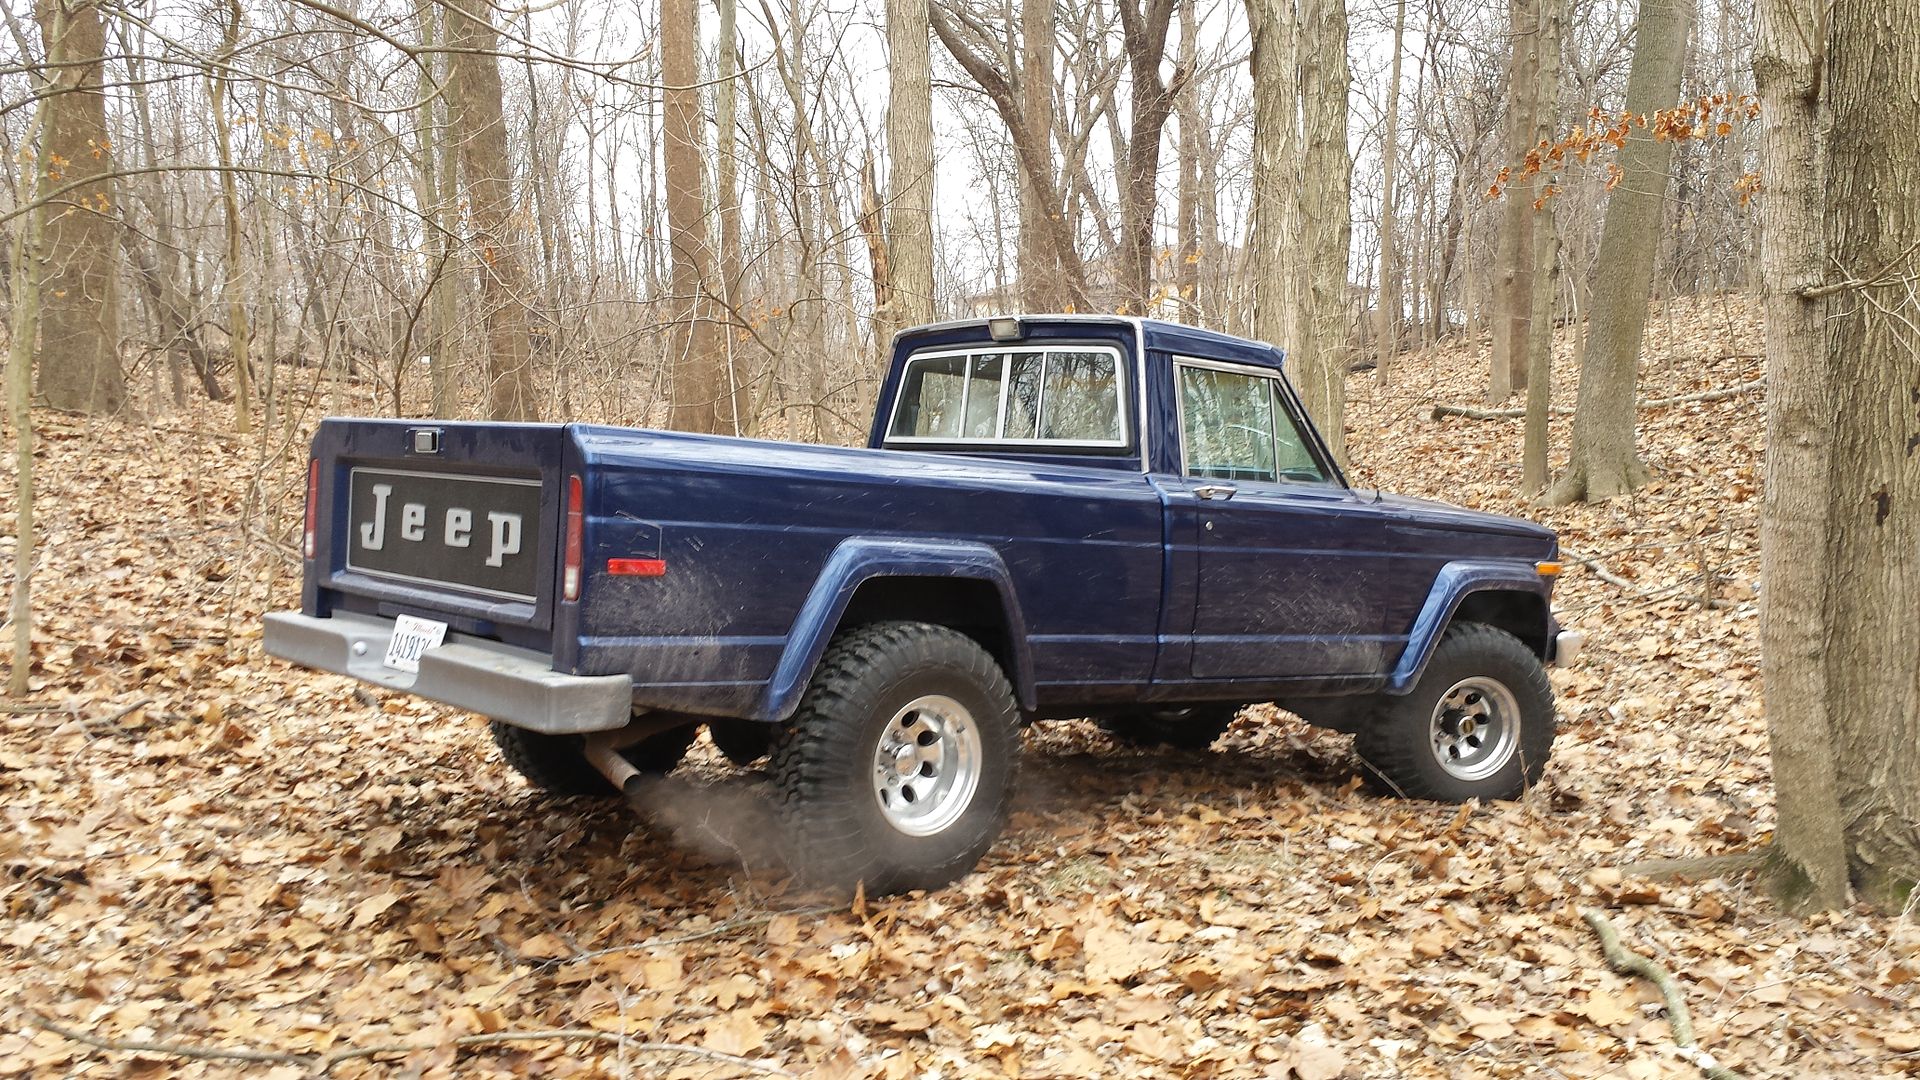
Anyway, here are a few pictures from a little while ago when my brother and I went shooting. I backed into the timber so we didn't have to carry as much. When we were finished, I couldn't help but to drive down to the bottom.


ChrisHager's 79 J-10 Build Thread: http://fsjnetwork.com/forum/viewtopic.php?f=12&t=3585
-
 J10Jeeper
- Posts: 30
- Joined: Wed Mar 26, 2014 8:50 am
- Location: Morrison Colorado
Re: ChrisHager's 79 J-10 Build Thread
Lovin' this truck!!
-
ChrisHager
Topic author - Posts: 182
- Joined: Wed Sep 11, 2013 12:03 pm
Re: ChrisHager's 79 J-10 Build Thread
Thanks! Now that it's getting a bit warmer, I'm looking forward to taking her fishing!J10Jeeper wrote:Lovin' this truck!!
In recent news, I STILL haven't fiddled much with the truck but I hopped in Saturday and noticed a 'tssst, tssst, tssst' noise. I popped the hood and sure enough, the line to the vacuum advance on the distributor was cracked. I chopped off the cracked end and plugged it in before heading out. Ultimately, the drive went well. It still doesn't feel tip top yet but it feels much better than it was in the past. I *think* that dead spot in the pedal is currently better than it was. That being said, it still dies if I hit the brakes too hard which tells me the brake booster is leaking (and has been since I bought it). My father-in-law and I were talking and he pointed out that if it's leaking while braking, it's leaking all the time and tuning on the carb would probably be better warranted AFTER taking care of the brake booster issue.
Queue internet searches: There appear to be two different types of brake boosters - single diaphragm and dual diaphragm. From my research, I think my 79 has a single diaphragm. Do I stick with a single or do I go with a dual? What's the difference? I don't know much about these things and figured I'd ask. School me on boosters!
ChrisHager's 79 J-10 Build Thread: http://fsjnetwork.com/forum/viewtopic.php?f=12&t=3585
-
ChrisHager
Topic author - Posts: 182
- Joined: Wed Sep 11, 2013 12:03 pm
Re: ChrisHager's 79 J-10 Build Thread
I've done more research and it appears a dual diaphragm brake booster will create more pressure applied to the brakes. I'll probably go this route unless someone has a reason not to. I'm still glad to hear any thoughts from anyone!
I also finally dumped my camera pictures and figured I'd throw a couple random ones on here. The first picture shows the concrete under the truck after just parking. The second shows the amount of fuel leaked in about an hour. It turns out, the filler hose on the gas tank wasn't tight enough and was dripping when the tank was full.


Here's the Harley we picked up about a month ago still loaded in the truck. It was neat hauling a '78 with a '79.

ChrisHager's 79 J-10 Build Thread: http://fsjnetwork.com/forum/viewtopic.php?f=12&t=3585
-
ChrisHager
Topic author - Posts: 182
- Joined: Wed Sep 11, 2013 12:03 pm
Re: ChrisHager's 79 J-10 Build Thread
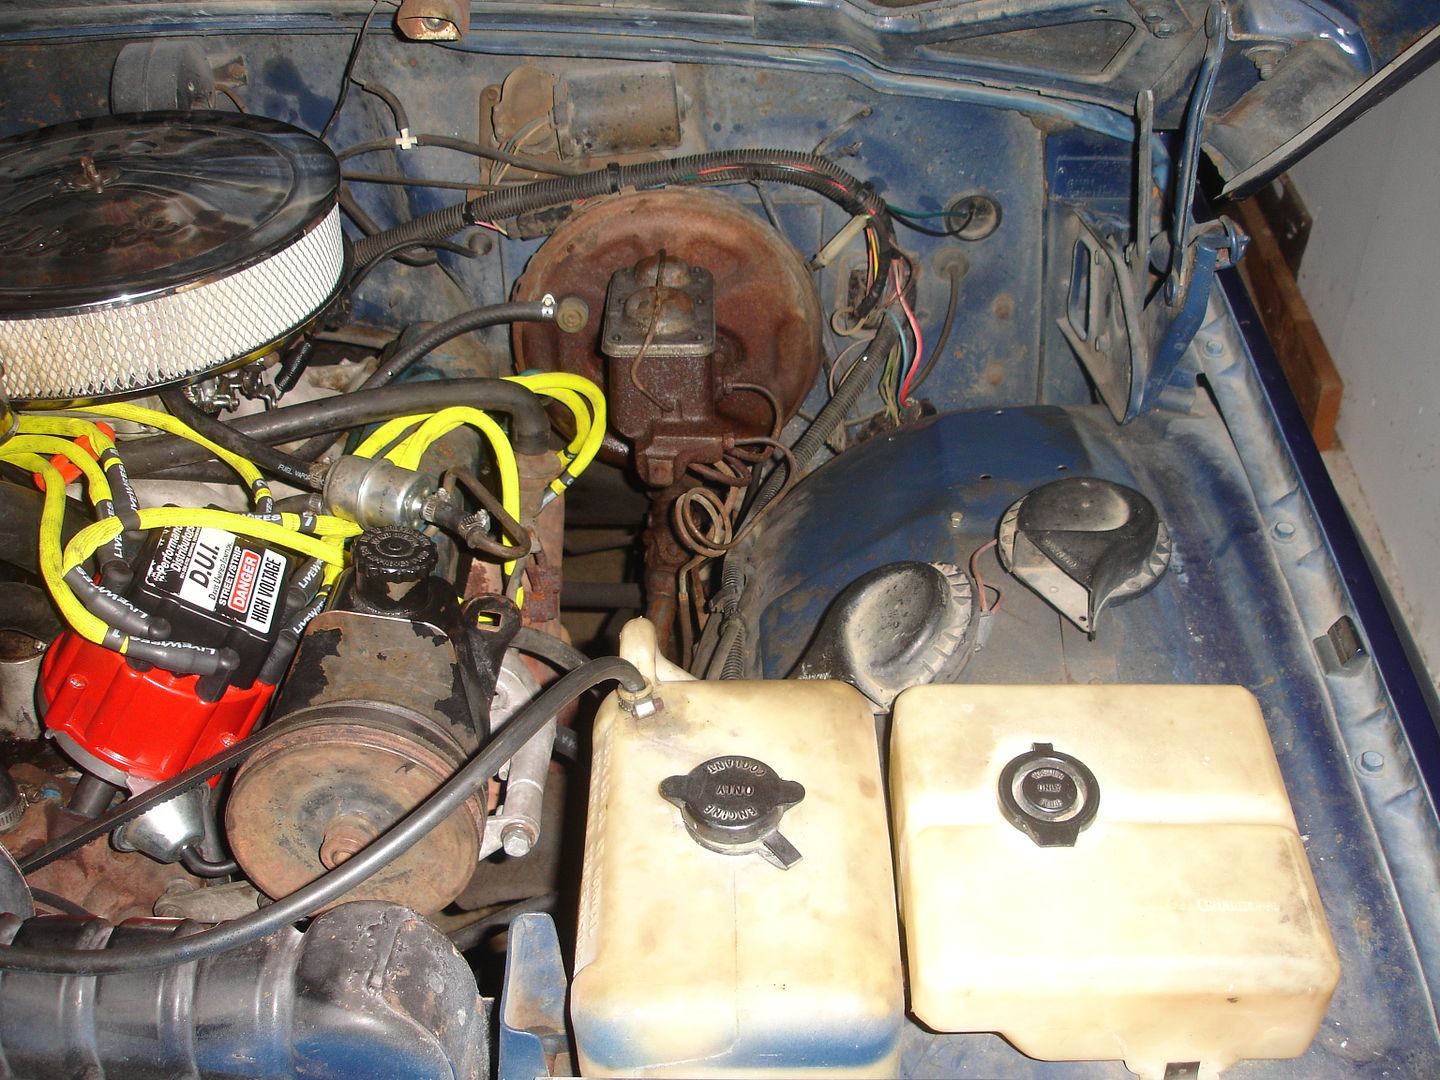
I started (and almost completed) my brake project this weekend. Besides a nasty, rusted master cylinder and brake booster, I noticed when I hit the brakes too hard, the truck would die (vacuum leak). Since the problem progressively became worse, I decided to upgrade the system by purchasing a master cylinder and dual diaphragm brake booster. I had trouble finding what I wanted locally and after talking to Dr. Marneaus, decided to order the set from RockAuto.com. I purchased 501014 (50-1014) which is an A-1 CARDONE product, though they don't list it on their website.
The install went very well, which I imagine soaking everything in Liquid Wrench for the past week helped. Unfortunately, I didn't get many pictures as I didn't want to cover my phone in brake fluid. In short, here's what I did:
1. Bench bleed the master cylinder. *See notes below
2. GENTLY remove the lines from the old master cylinder. You don't want to break these. I removed one at a time and inserted a plug that came with the new master cylinder into the brake line hole in the old master cylinder to stop the flow of fluid.
3. Remove the vacuum hose to the brake booster.
4. Inside the vehicle, remove the rod that's hooked to the brake pedal and the 4 bolts holding the booster on.
5. Remove the entire fixture from the vehicle.
6. Remove the bracket from the old brake booster and install on the new brake booster. I used blue Loctite to prevent these bolts from backing out.
7. Install the brake booster in the vehicle. It helps to start the nuts on the bolts inside the vehicle, attach the rod to the brake pedal, then tighten down the 4 nuts.
8. Attach the master cylinder to the brake booster.
9. Remove the bench bleed plugs/lines one at a time and reattach the brake lines.
10. Bleed the brakes starting at the furthest point and working forward. In the case of our vehicles, you'd bleed RR, RL, FR, FL.
Bracket on old brake booster:

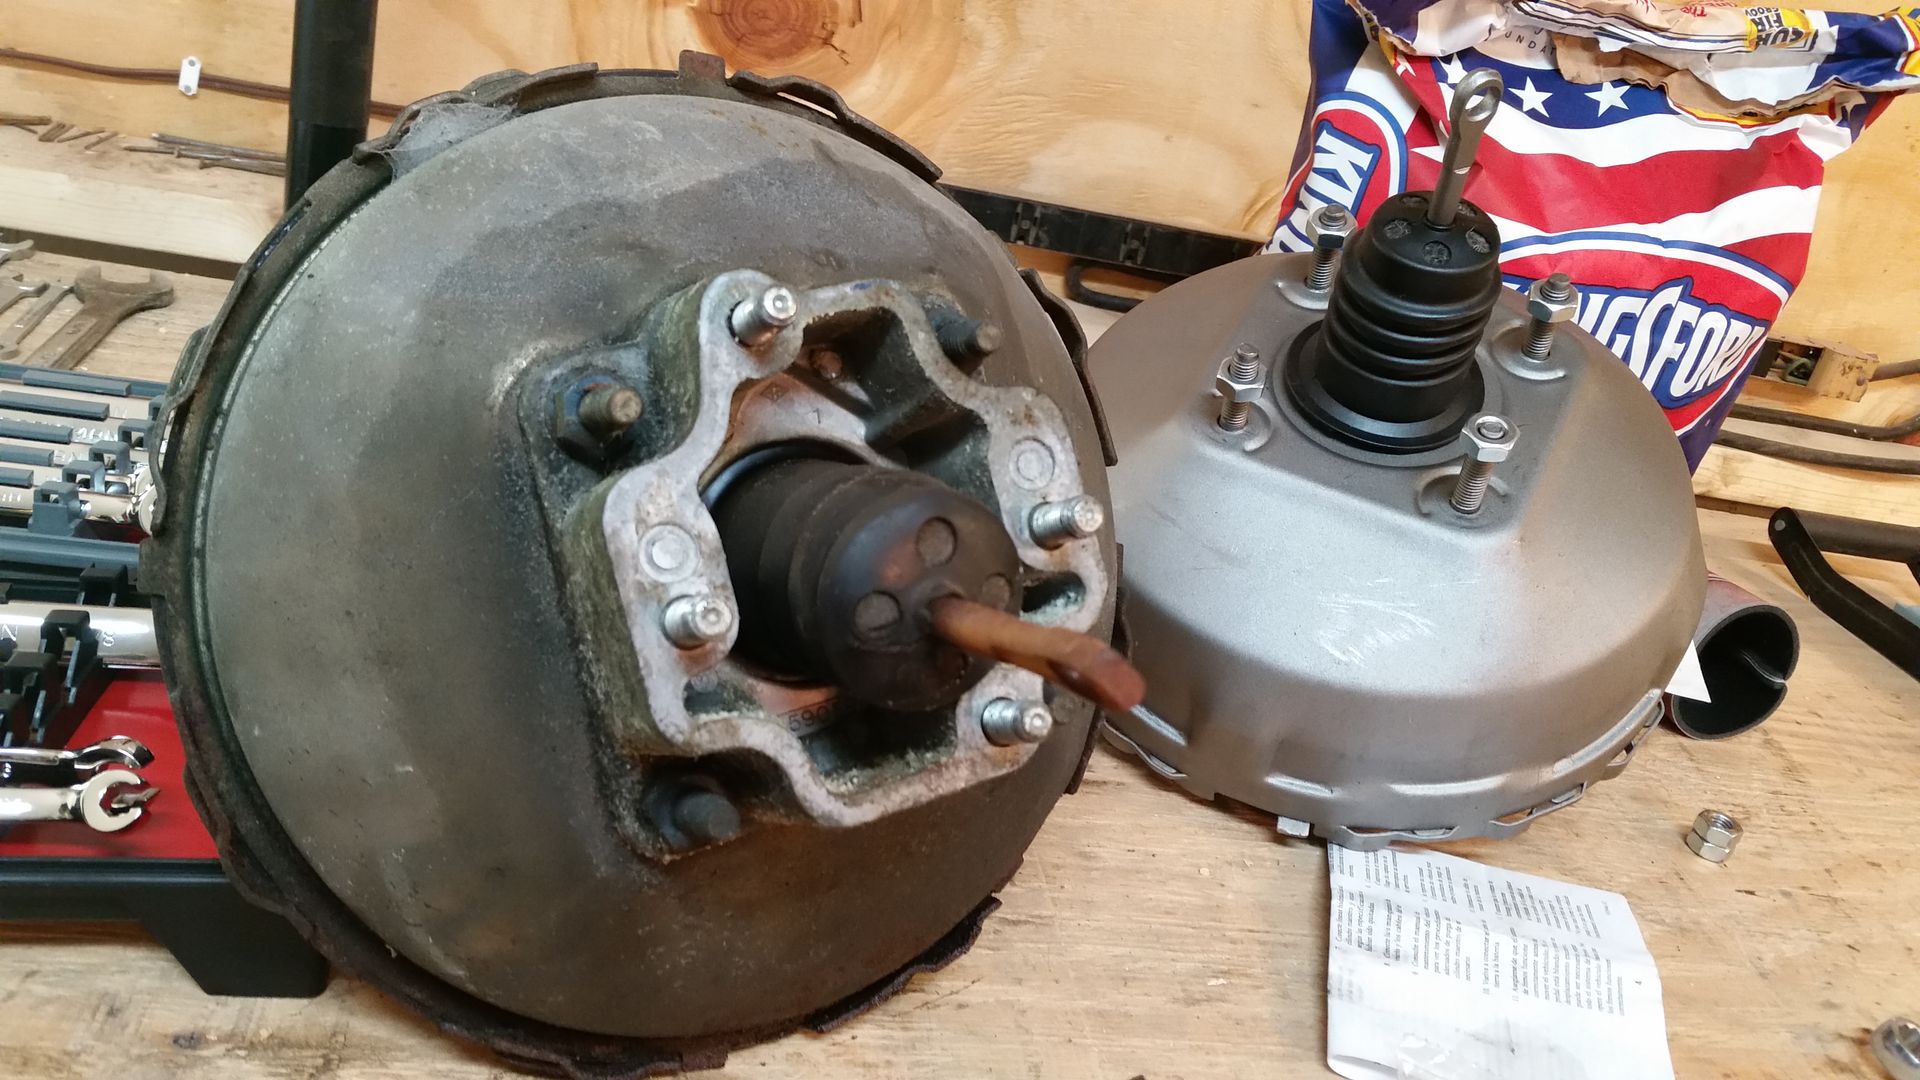
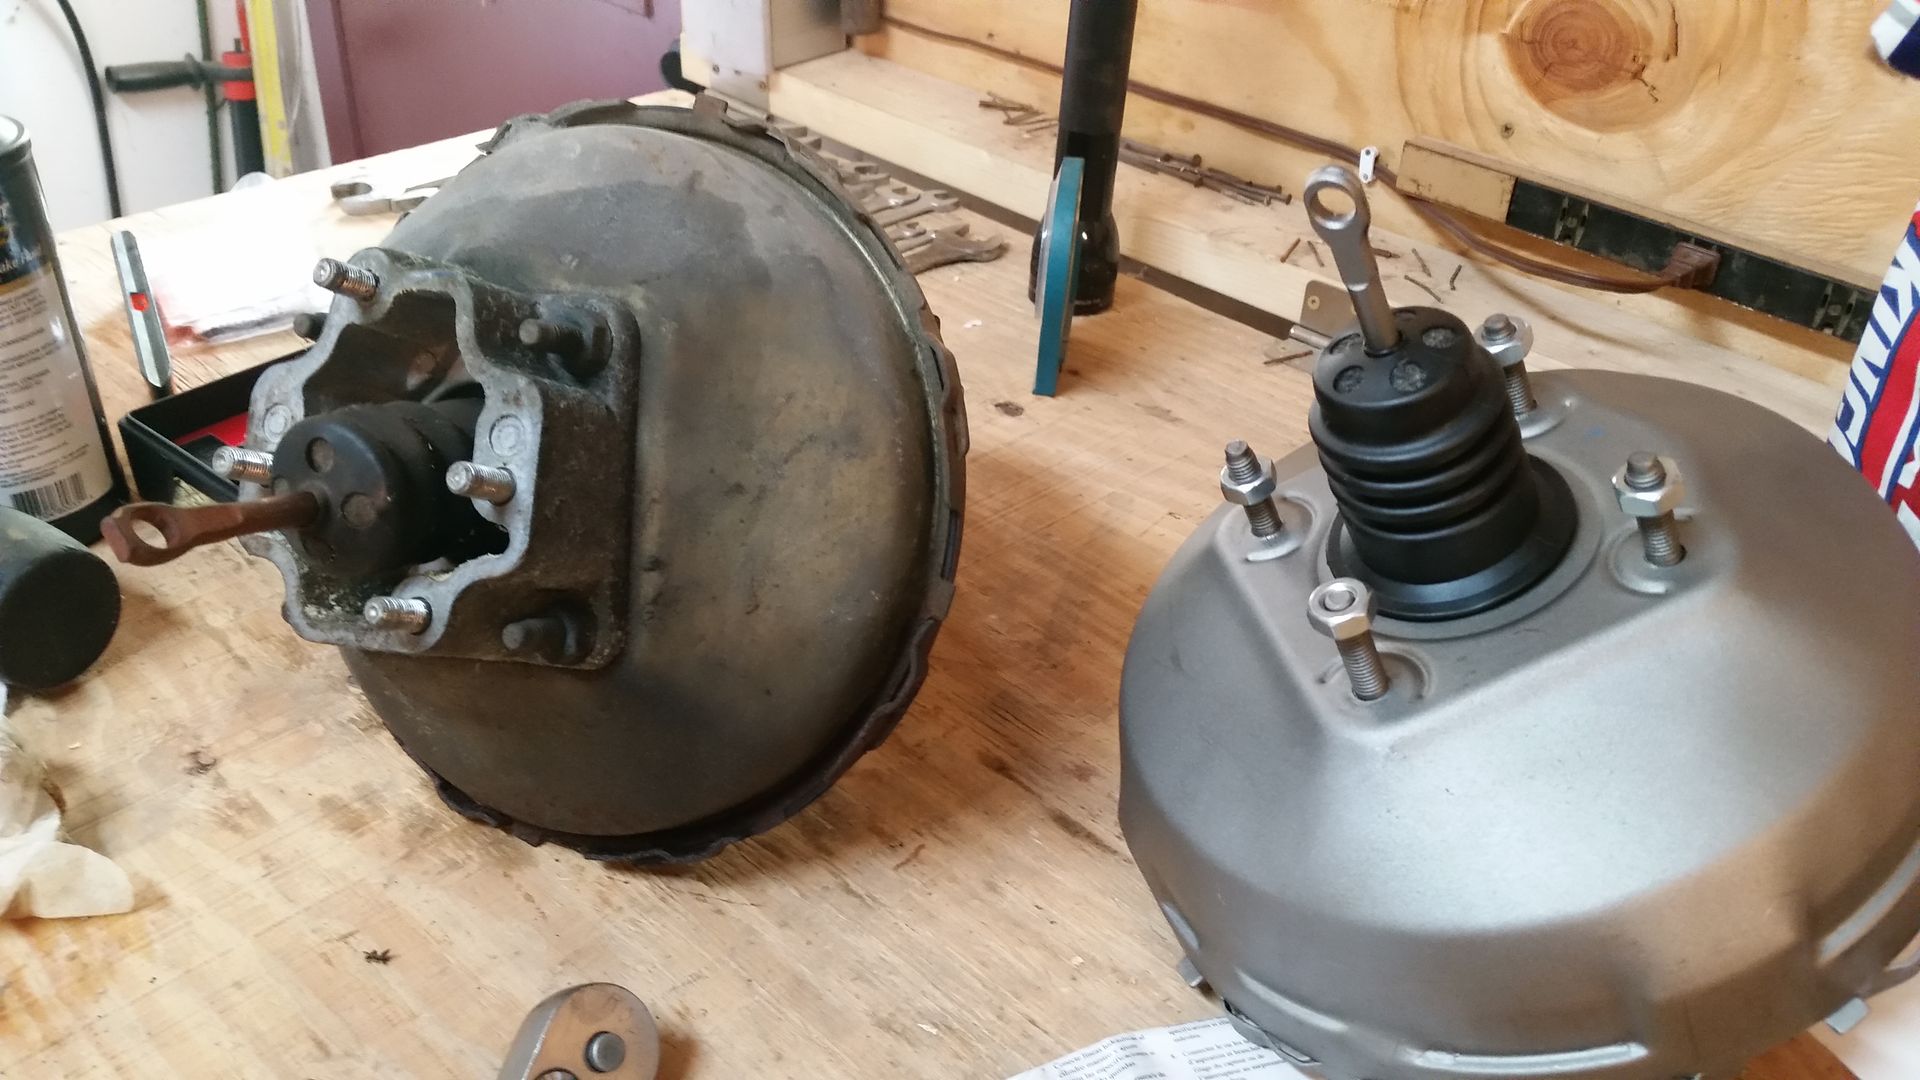
Installed in vehicle:
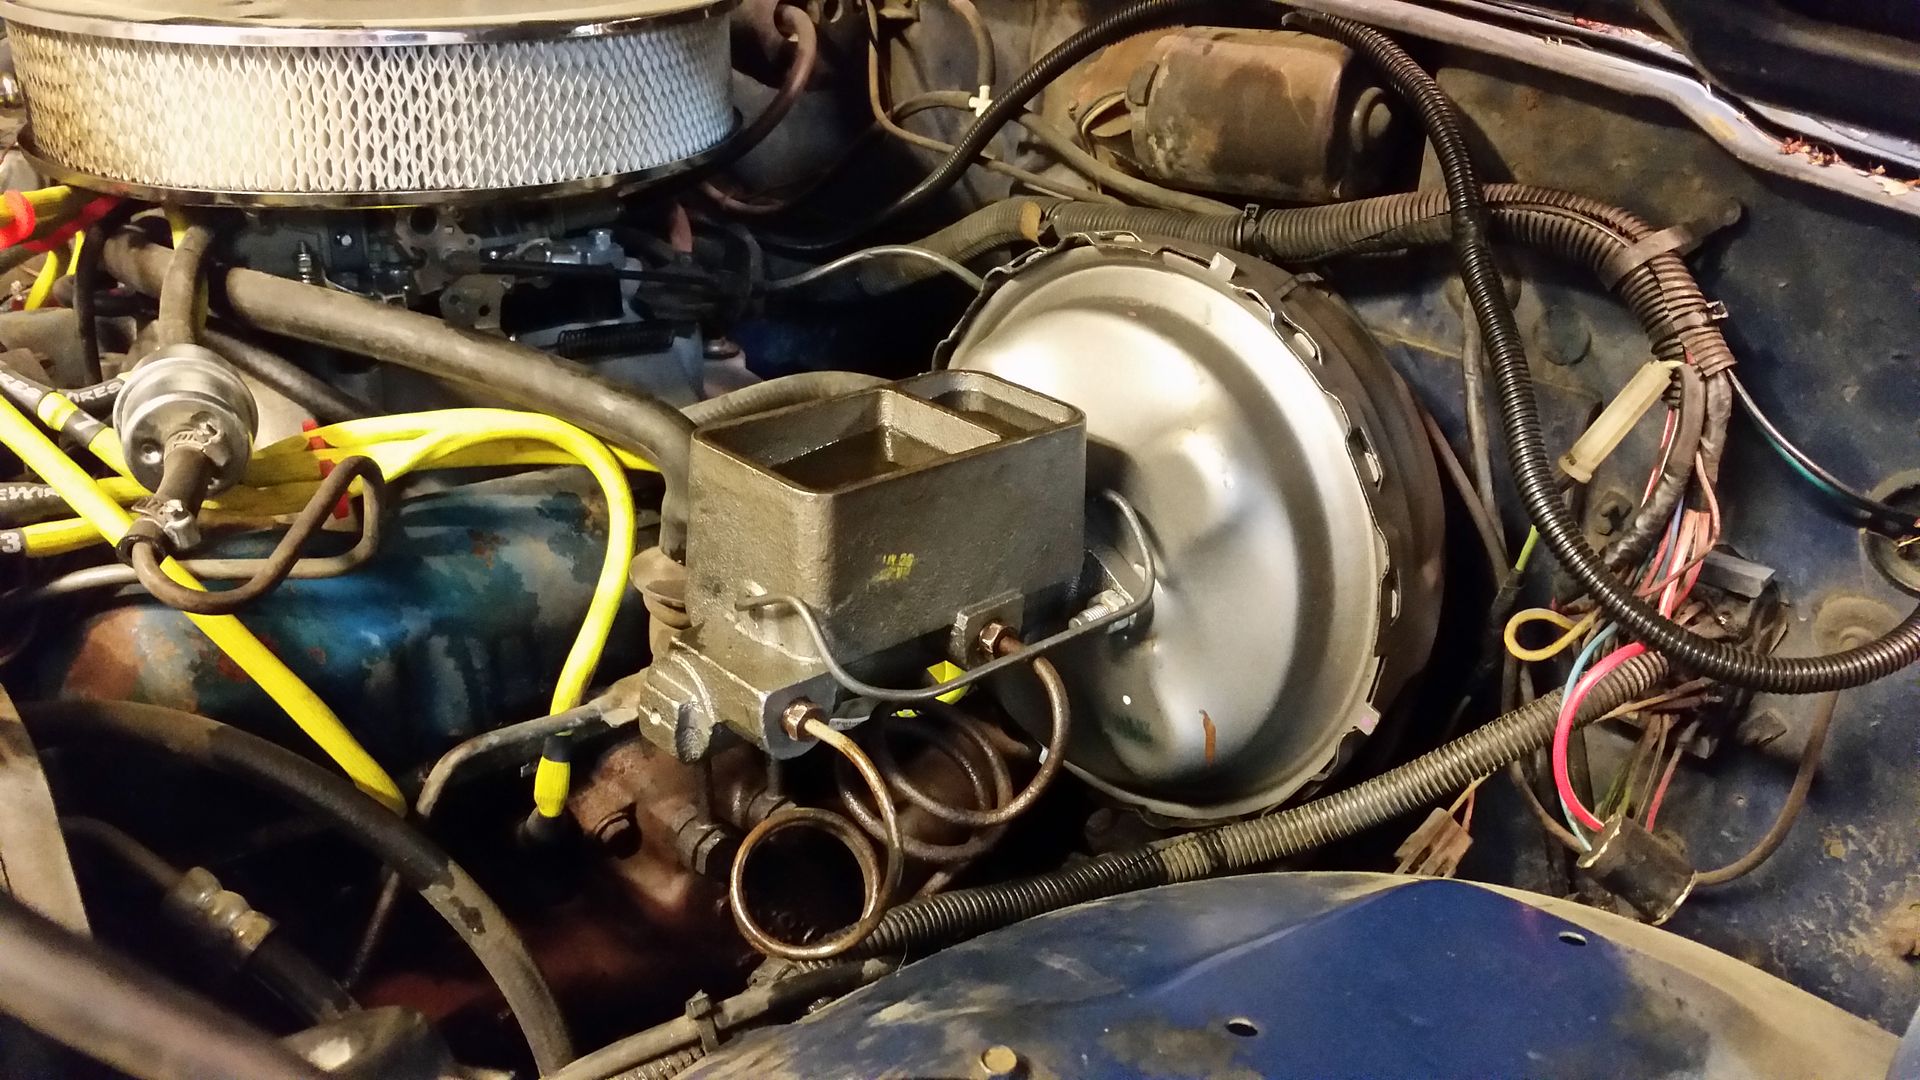
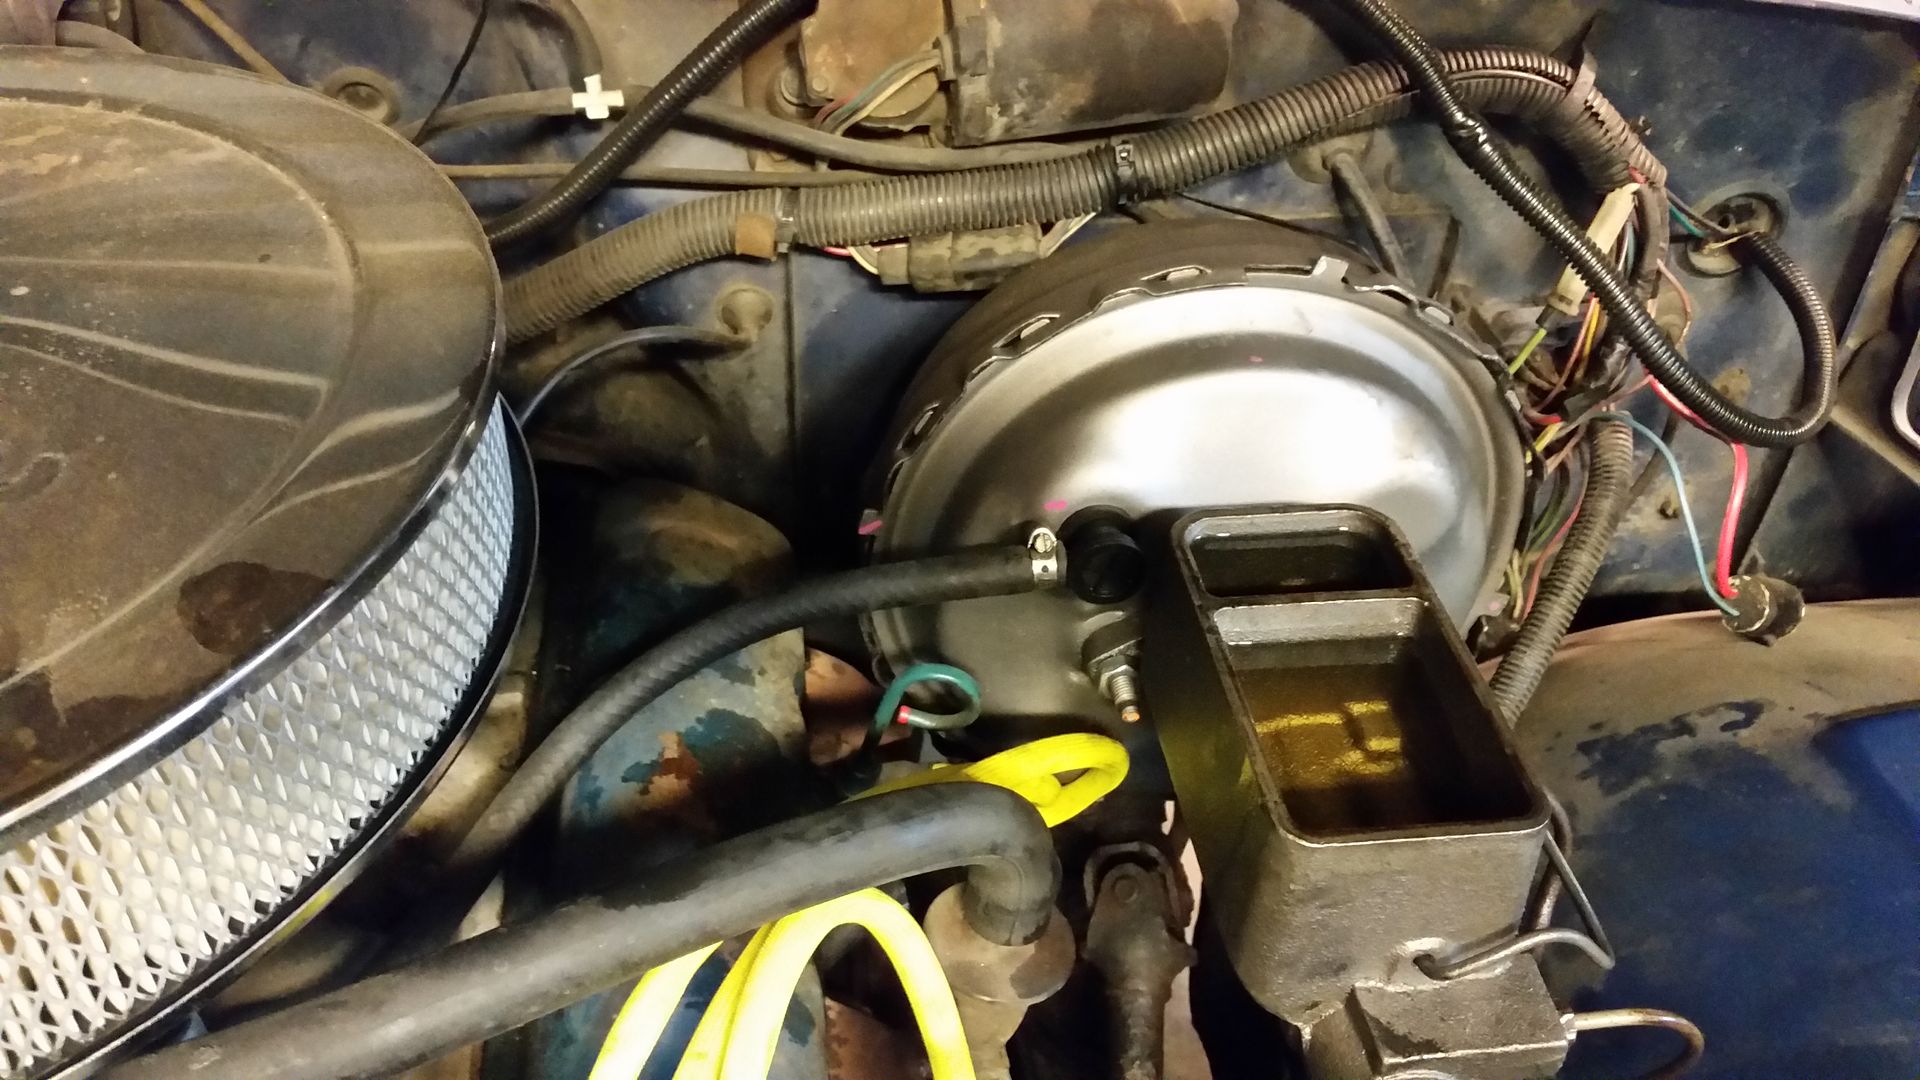
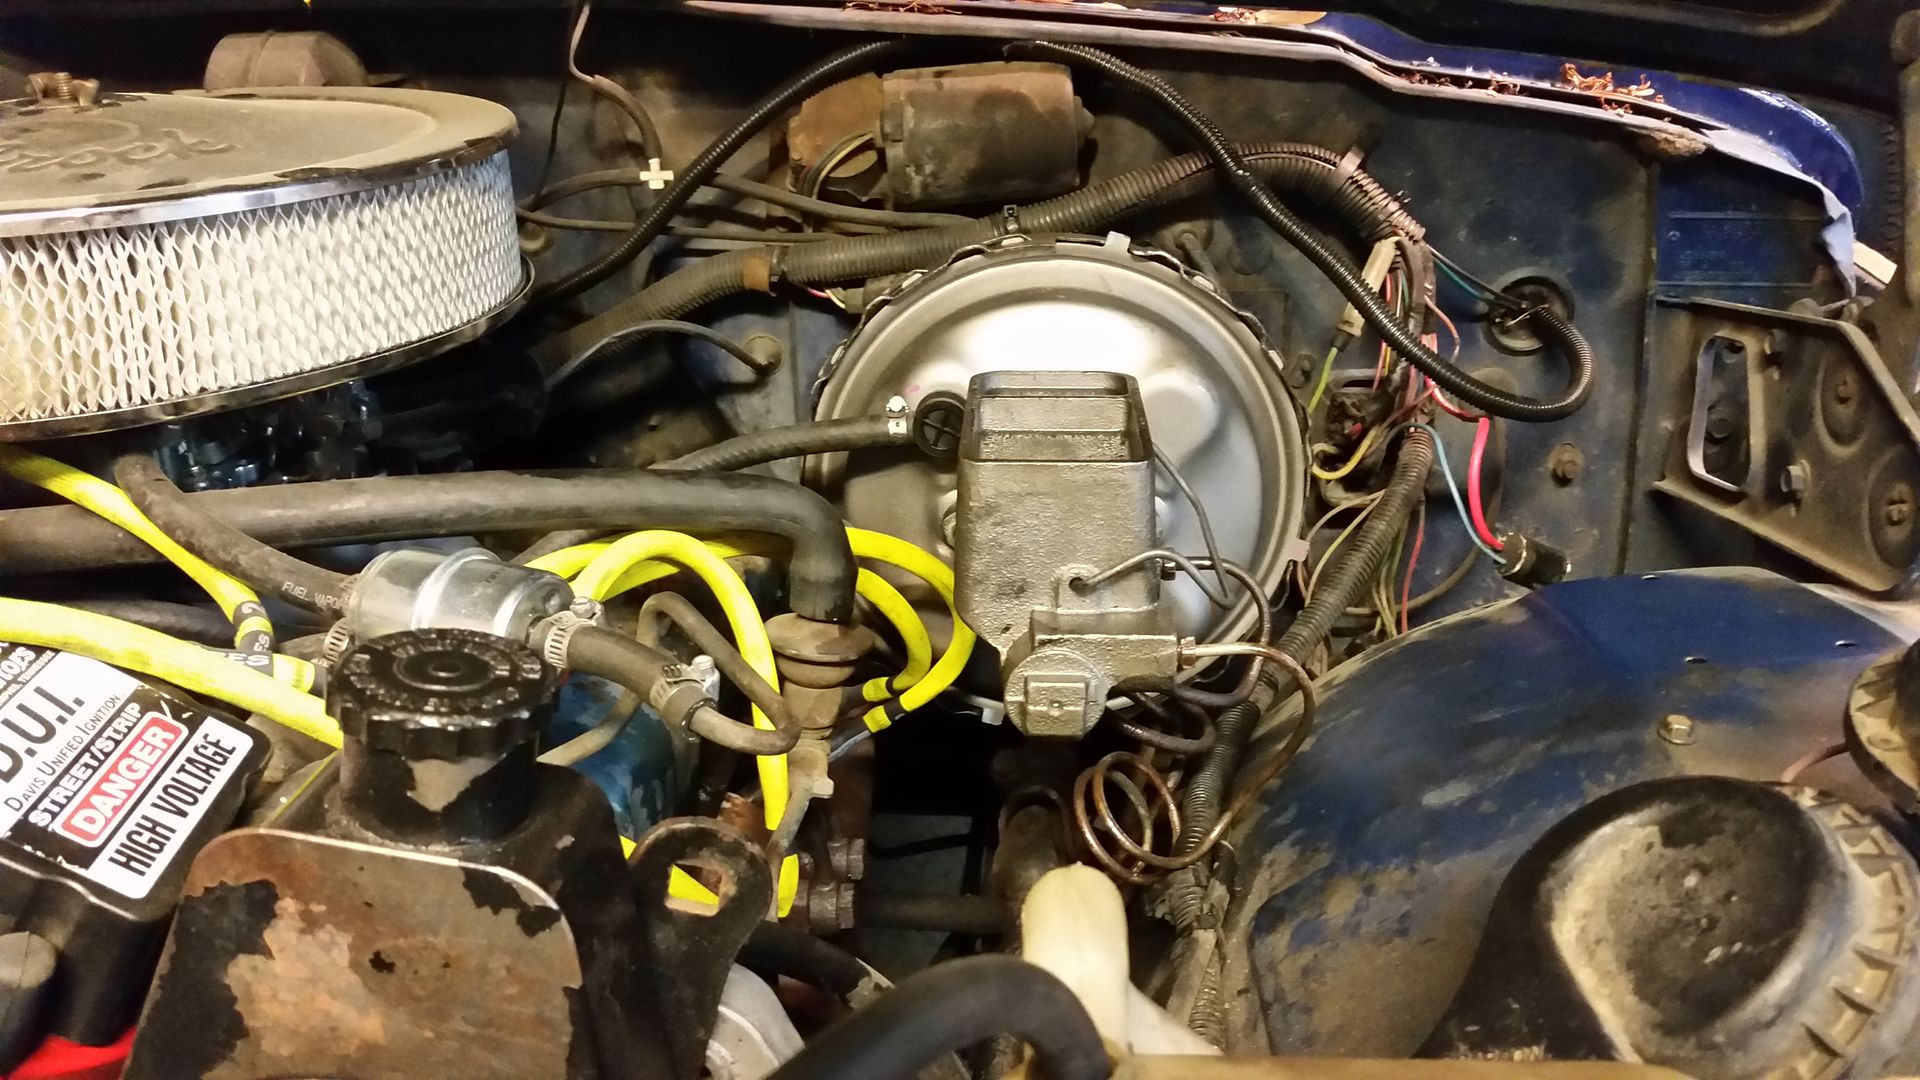
You'll notice in the above pictures that I have plenty of room with the dual diaphragm booster and master cylinder installed. You'll also notice that it looks much better compared to a rusted up beast!
Before:
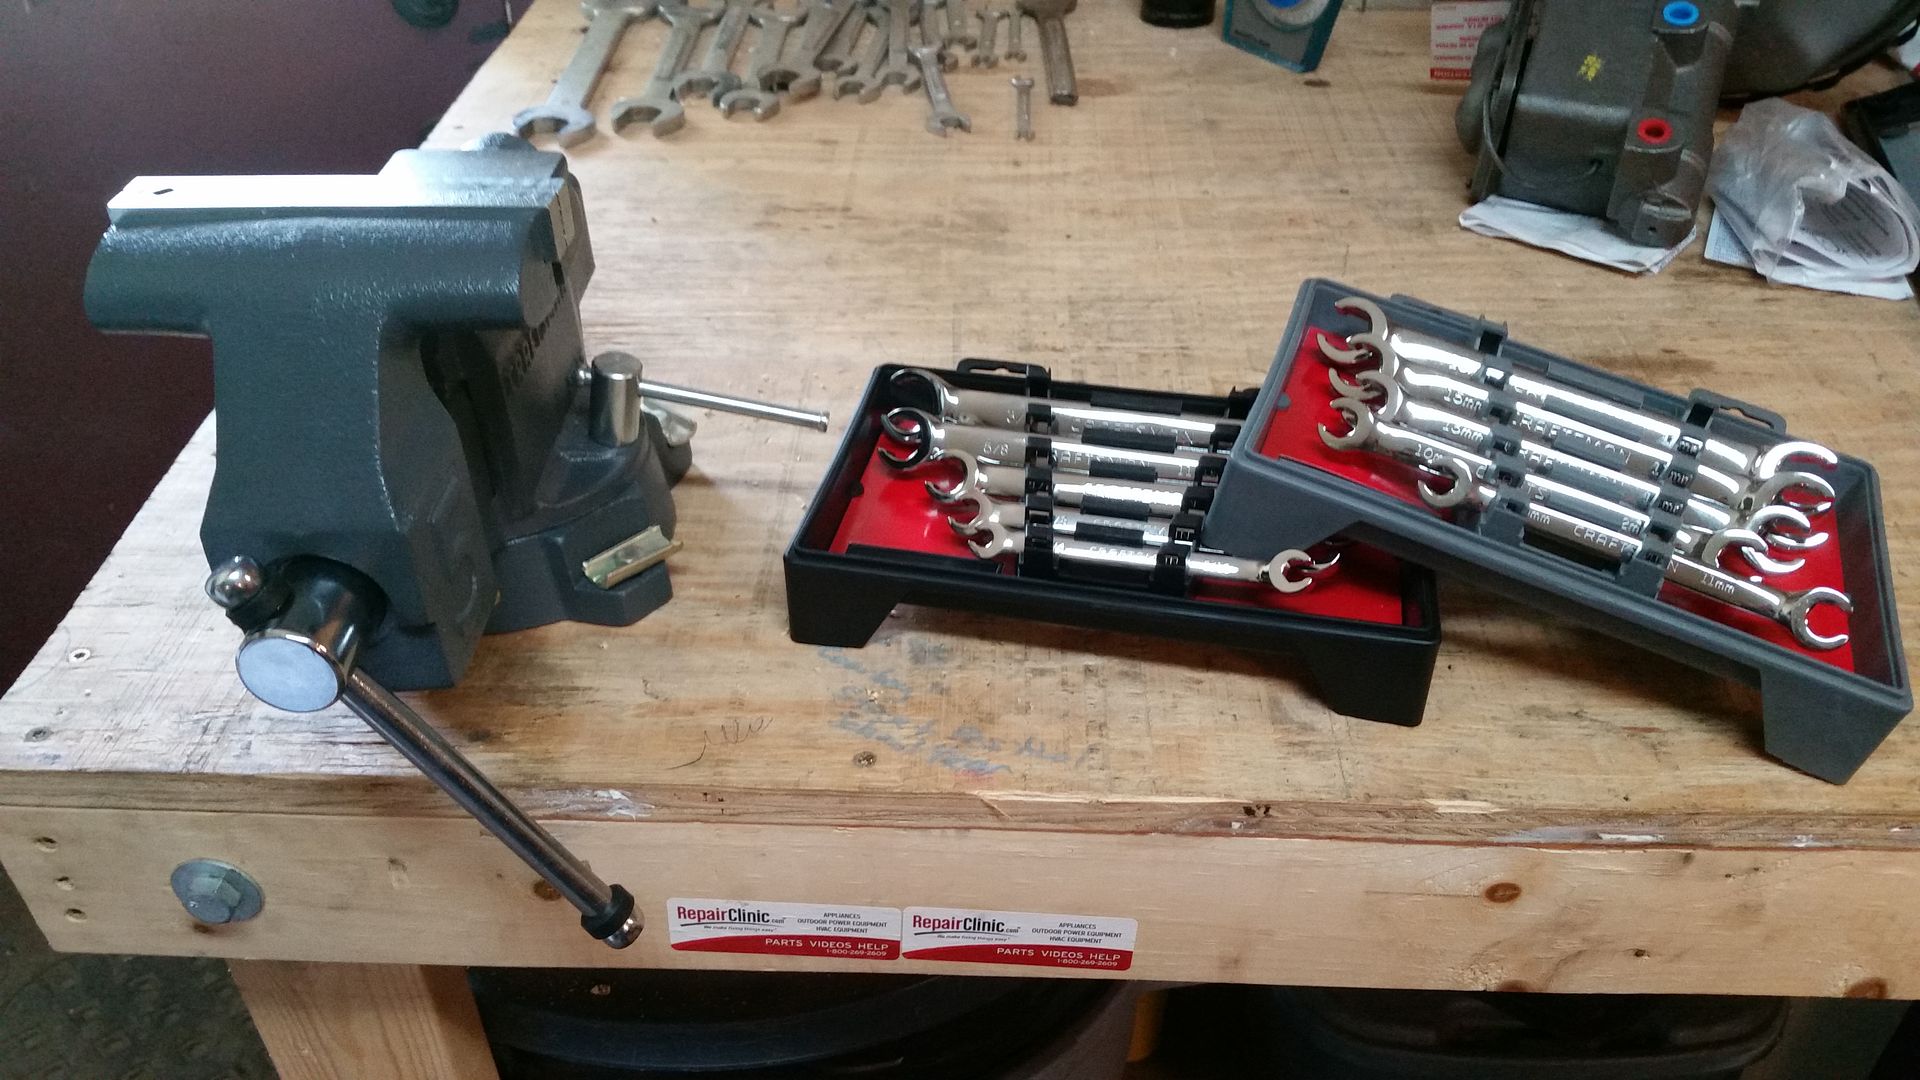
I'm not sure if this would have been possible without a bench vise. A set of flare wrenches are helpful as well. Anyone considering doing this project - use this as an excuse to buy new tools!
OK, about the note from Step 1. This master cylinder came with crap-tastic™ plastic plugs used for bench bleeding. Here's what A1 CARDONE has to say about them:
This is the first time I've ever performed a bench bleed. I thought "cool, lets give this a whirl". I set everything up as per the directions and started pumping away. After a couple hundred pumps, I found the piston travel was extremely short (as it should be) yet bubbles were still present. I believe these 'better' plugs were not sealing thus allowing air to pull into the master cylinder when the piston traveled back to its resting position. Since I pumped the crap out it, I decided to install it since 'surely I'm good'. With everything installed, I started to bleed the brakes. I wanted all the air out, all the old fluid out, and all of the new DOT 4 running through the system. Rear Right, sweet. Rear Left, sweet. Front Right - first bleed, sweet. Second bleed - we have no pedal... Lets try the Front Left - nothing.
So, this is where I'm at. The rear will bleed great. The front will only bleed for one pedal throw and it's done. We tried to suck the air out with a Mityvac but didn't have much luck. After rolling around in brake fluid for an hour or two, I decided to call it a day around 3:30 yesterday afternoon. When my father-in-law left at around 7:00, he hopped in the truck and noted we had pressure on the pedal again. Our best guess is that there is air somewhere in the system. I think it's still in the master cylinder. Can anyone advise?
I'm going to pick up some brake line and fittings to bench bleed this properly. I don't really want to take it off again but I don't feel confident enough that all air is evacuated. I will note that the reservoir closest to the firewall was depleting quickly and showing fluid movement when the pedal was pressed down yet the reservoir closest to the front of the vehicle seemed stagnant.
Help!!!
The install went very well, which I imagine soaking everything in Liquid Wrench for the past week helped. Unfortunately, I didn't get many pictures as I didn't want to cover my phone in brake fluid. In short, here's what I did:
1. Bench bleed the master cylinder. *See notes below
2. GENTLY remove the lines from the old master cylinder. You don't want to break these. I removed one at a time and inserted a plug that came with the new master cylinder into the brake line hole in the old master cylinder to stop the flow of fluid.
3. Remove the vacuum hose to the brake booster.
4. Inside the vehicle, remove the rod that's hooked to the brake pedal and the 4 bolts holding the booster on.
5. Remove the entire fixture from the vehicle.
6. Remove the bracket from the old brake booster and install on the new brake booster. I used blue Loctite to prevent these bolts from backing out.
7. Install the brake booster in the vehicle. It helps to start the nuts on the bolts inside the vehicle, attach the rod to the brake pedal, then tighten down the 4 nuts.
8. Attach the master cylinder to the brake booster.
9. Remove the bench bleed plugs/lines one at a time and reattach the brake lines.
10. Bleed the brakes starting at the furthest point and working forward. In the case of our vehicles, you'd bleed RR, RL, FR, FL.
Bracket on old brake booster:


Installed in vehicle:


You'll notice in the above pictures that I have plenty of room with the dual diaphragm booster and master cylinder installed. You'll also notice that it looks much better compared to a rusted up beast!
Before:
I'm not sure if this would have been possible without a bench vise. A set of flare wrenches are helpful as well. Anyone considering doing this project - use this as an excuse to buy new tools!

OK, about the note from Step 1. This master cylinder came with crap-tastic™ plastic plugs used for bench bleeding. Here's what A1 CARDONE has to say about them:
They literally bold "We found a better way." on their website. The problem is, their auto correct mistook 'cheaper' with 'better'. Keep in mind, these plugs are plastic.http://www.cardone.com/tech-help/brakes/how-it-works-and-best-practices/master-cylinder-bench-bleeding-procedure wrote:
In the past, CARDONE supplied a bleeder kit that consisted of plugs with holes. Tubes pressed on to the holes in order to bench bleed the master cylinder. Although this kit was successful when used properly, it was not the best process. One of our goals in Technical Services is to improve every process.
We found a better way.
The new bleeder kit comes with solid plugs to bench bleed the replacement unit.
This is the first time I've ever performed a bench bleed. I thought "cool, lets give this a whirl". I set everything up as per the directions and started pumping away. After a couple hundred pumps, I found the piston travel was extremely short (as it should be) yet bubbles were still present. I believe these 'better' plugs were not sealing thus allowing air to pull into the master cylinder when the piston traveled back to its resting position. Since I pumped the crap out it, I decided to install it since 'surely I'm good'. With everything installed, I started to bleed the brakes. I wanted all the air out, all the old fluid out, and all of the new DOT 4 running through the system. Rear Right, sweet. Rear Left, sweet. Front Right - first bleed, sweet. Second bleed - we have no pedal... Lets try the Front Left - nothing.
So, this is where I'm at. The rear will bleed great. The front will only bleed for one pedal throw and it's done. We tried to suck the air out with a Mityvac but didn't have much luck. After rolling around in brake fluid for an hour or two, I decided to call it a day around 3:30 yesterday afternoon. When my father-in-law left at around 7:00, he hopped in the truck and noted we had pressure on the pedal again. Our best guess is that there is air somewhere in the system. I think it's still in the master cylinder. Can anyone advise?
I'm going to pick up some brake line and fittings to bench bleed this properly. I don't really want to take it off again but I don't feel confident enough that all air is evacuated. I will note that the reservoir closest to the firewall was depleting quickly and showing fluid movement when the pedal was pressed down yet the reservoir closest to the front of the vehicle seemed stagnant.
Help!!!
Last edited by ChrisHager on Tue Jun 03, 2014 7:27 am, edited 1 time in total.
ChrisHager's 79 J-10 Build Thread: http://fsjnetwork.com/forum/viewtopic.php?f=12&t=3585