Page 1 of 2
Taillight Conversion from 1157 to 3157 bulb with Photos
Posted: Sat Apr 16, 2016 8:47 pm
by 243
I drove the Jeep M-Th this past week since the weather has been great, just before daylight on Thursday a guy pulled up next to me at a stoplight and told me I had a brake light out. This afternoon I took a look and what I found was the drivers side was really dim and the passenger side was really bright, both filaments in the 1157 were burning hot. I traced wires, checked voltages, grounds, cut out old Scotchlocks used for trailer wiring in the past and patched the wires. I checked the the wiring at the steering column and was getting 12 volts and finally pulled the taillight housings. I was getting 12 volts to the back so I ran direct grounds to the housings and eventually determined that the taillight circuit was backfeeding the brakelight circuit due to the 1157 socket losing ground to the housing on the passenger side.
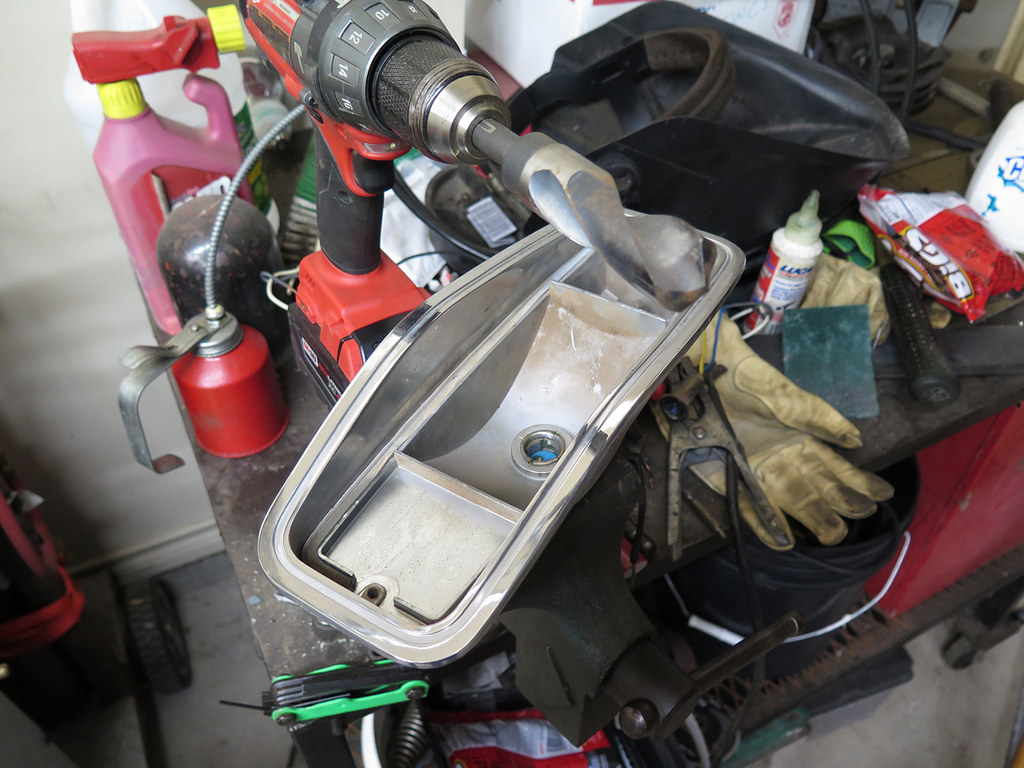
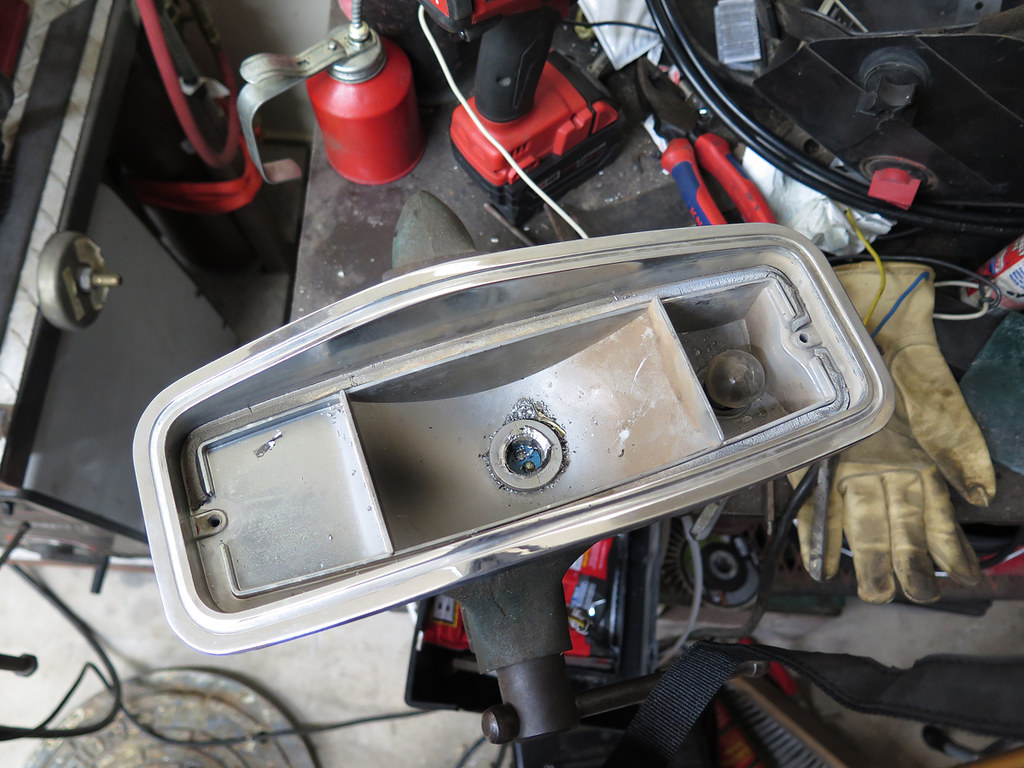
Since the 1157 socket was steel, I spot welded a washer to the back side of socket as an attachment point for a direct ground and that is when the day took a turn for the worse. I partially melted the wires and even though they needed a patch I made it worse. When I cut and pulled the wires from the socket I realized the spring that holds the contacts to the bottom of the 1157 would not compress. I pulled the spring and found a weld booger on the inside of the socked and I could not file it down or get to it with any tool I had in the shop. I finally grabbed a large drill bit and was able to grind out the booger but that was just enough to keep the bulb from locking in place.
The socket appeared to be assembled by inserting it from the rear and rolling a flange on the inside to hold the socket in the housing. I never considered grabbing the tail of the socket and twisting it in the housing and that might have corrected the problem. But the design still sucks picking up ground through the pot metal housing to the bolts holding the housing to the body.
I was disgusted and went inside to eat dinner and cool off.
I was sitting there staring at the TV and asked myself, what would Foose do in this situation...create, improvise?
Surely not dick around with 1157 sockets!
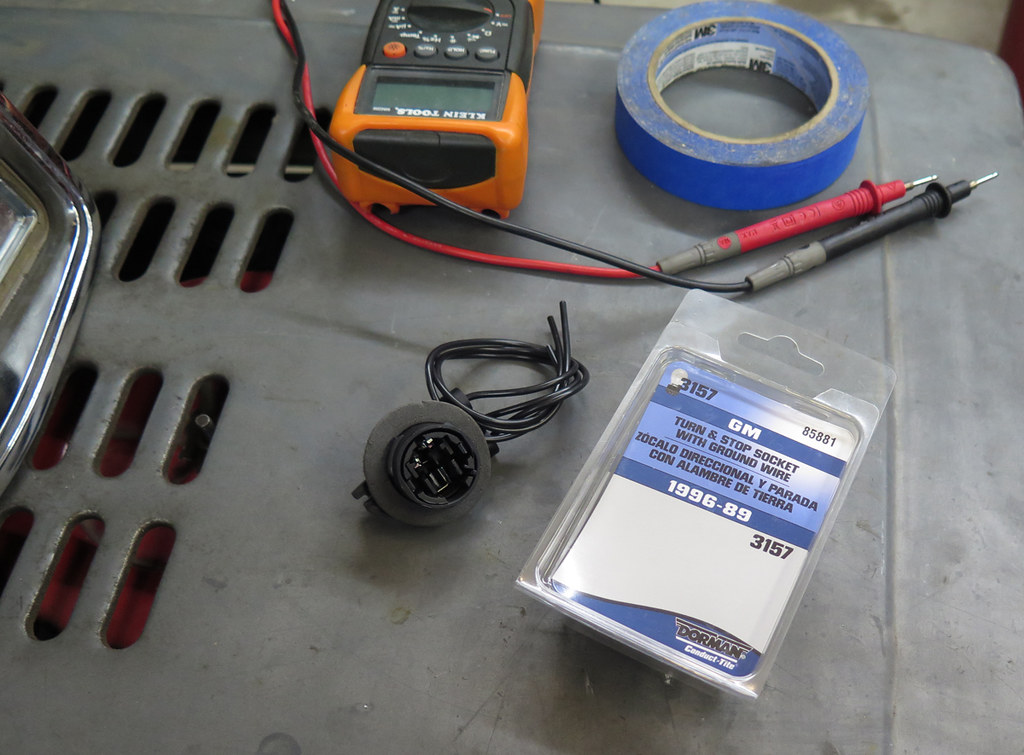
I started thinking about the 3157 bulbs and how easy they are to change and they are wired for ground, but the sockets I found on Google images didn't look like they would work without some real hack-fab creativity and a lot of JB Weld. I decided I had nothing to lose and I went back to the shop and clamped the tail of the 1157 socket in the vise, grabbed a 1" bit and cut the flange holding the socket to the housing.
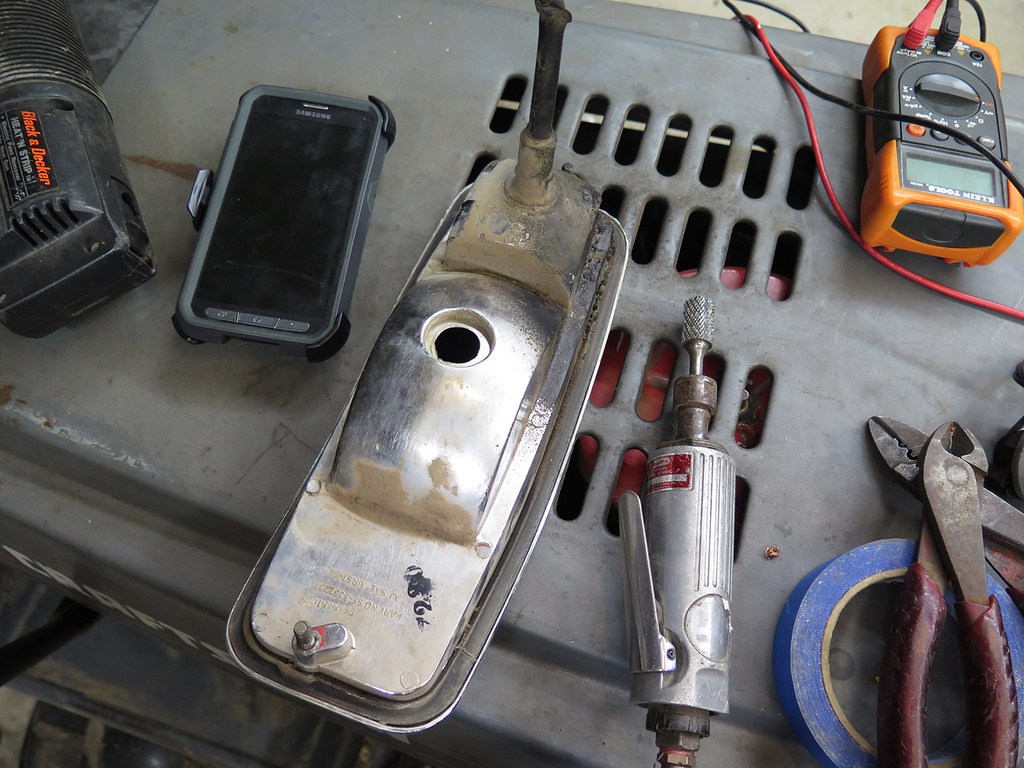
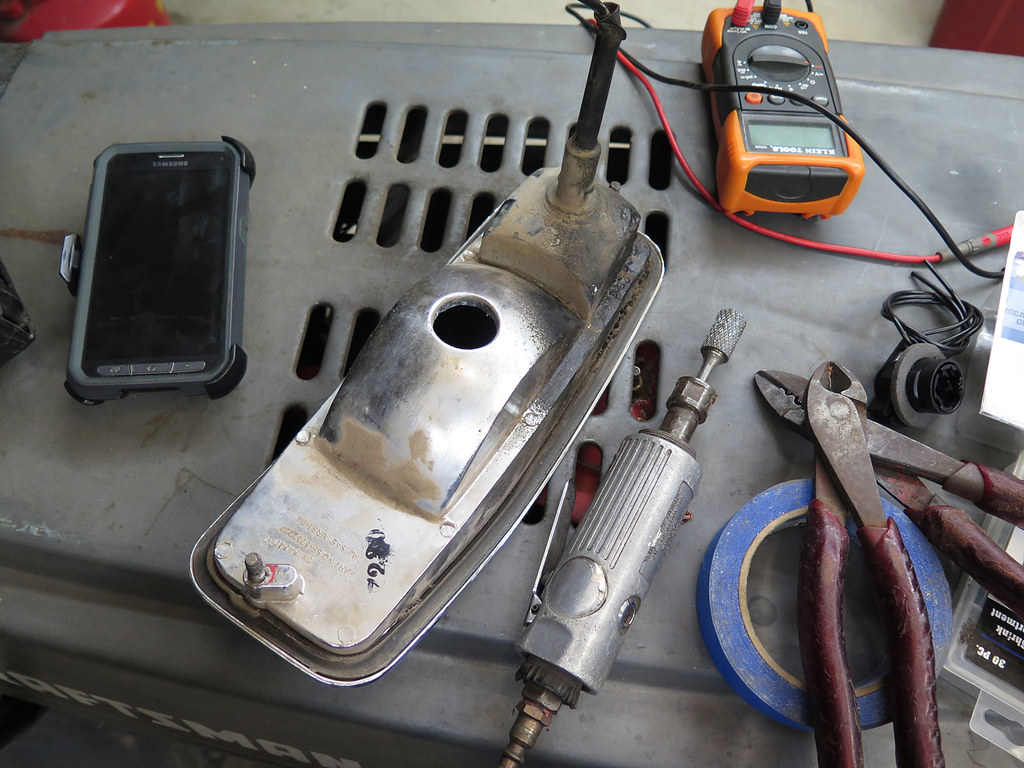
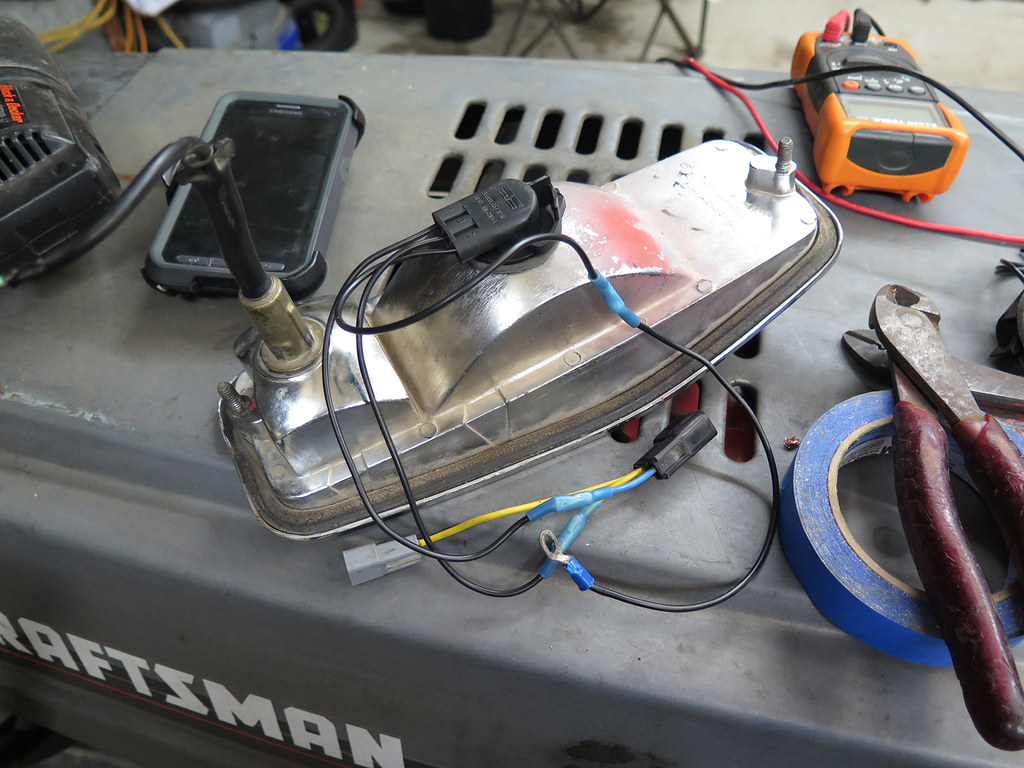
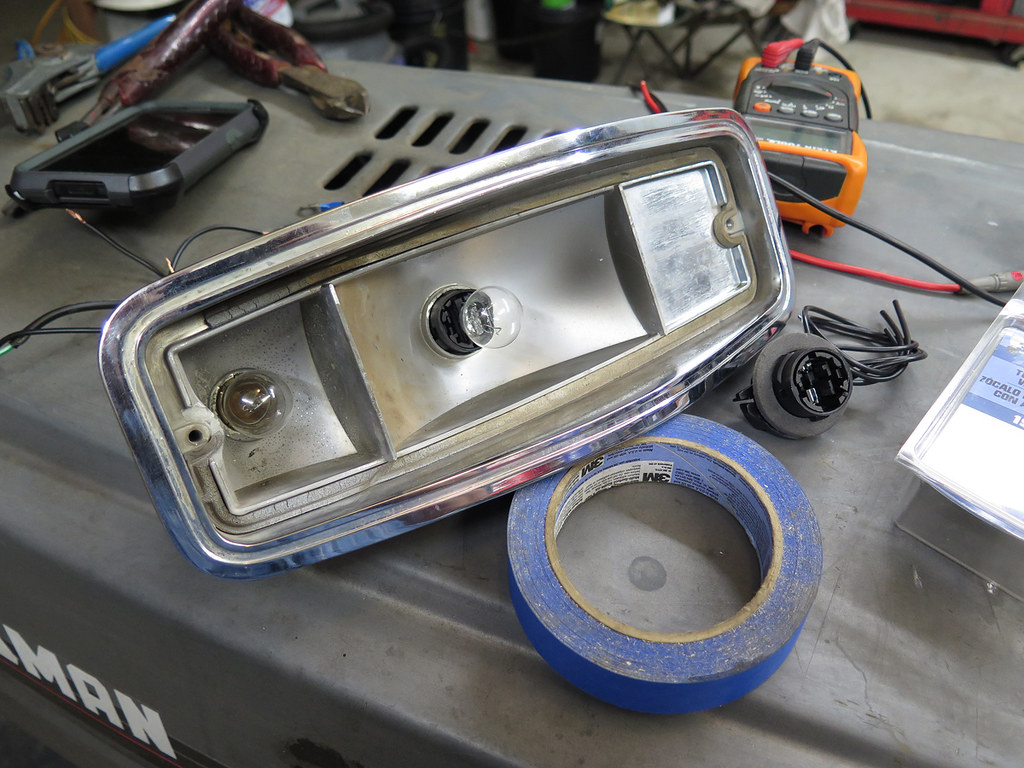
After I removed the socket, I used a carbide burr in a die grinder and cleaned up the flashing, I did not enlarge the metal that projects from the front of bulb side of the housing.
I grabbed the housing and headed off to O'Reilly's and this is when the day became incredibly better after screwing up royally.
I found a GM 3157 socket that was a *tight* press fit in the housing, I knew I could make it work so I grabbed a pack of bulbs and two sockets and headed home.
The conversion worked great!
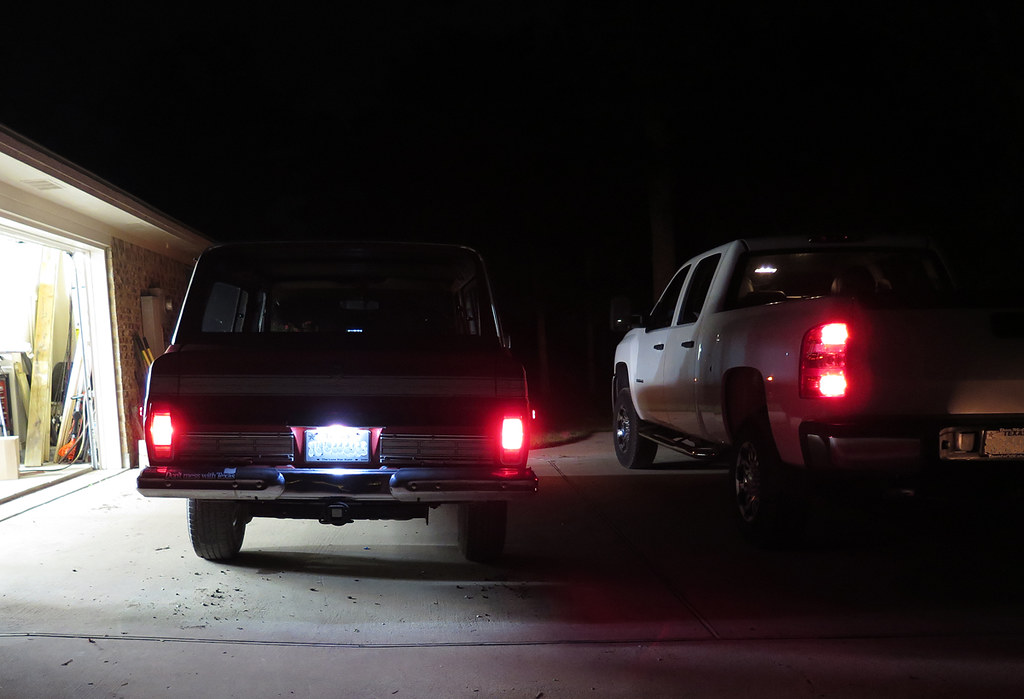
Here is a shot with the taillights on and since it's so hard to quantify brightness I turned the taillights on in my Chevy. The second shot is with the brakelights on in the Jeep.
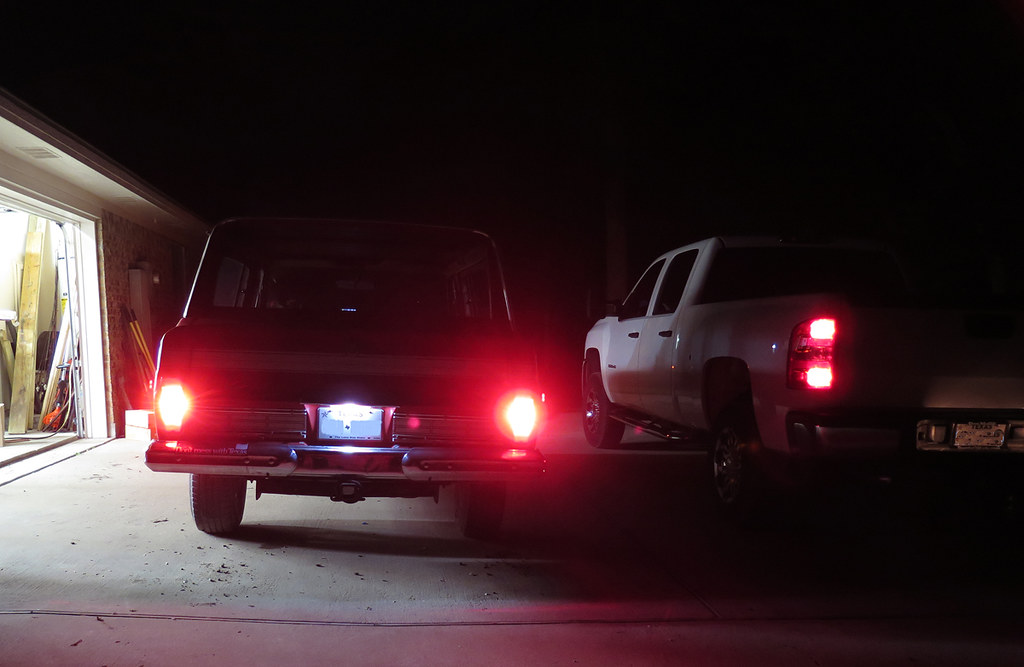
Hope this helps.
.
Re: Taillight Conversion from 1157 to 3157 bulb with Photos
Posted: Sun Apr 17, 2016 12:46 am
by FSJ Guy
Nice writeup!
Re: Taillight Conversion from 1157 to 3157 bulb with Photos
Posted: Sun Apr 17, 2016 2:03 am
by MadMax78
Awesome! I have been wondering what we could do to have better brake lights. Thanks for the right up.
Sent from my iPhone using Tapatalk
Re: Taillight Conversion from 1157 to 3157 bulb with Photos
Posted: Sun Apr 17, 2016 6:00 am
by rocklaurence
So, did you use any epoxy to hold it in place. Aren't they a Twist-lock connector? I like what you did and I am having simular issues with my J10 tail light.
Re: Taillight Conversion from 1157 to 3157 bulb with Photos
Posted: Sun Apr 17, 2016 6:01 am
by rocklaurence
Sorry double post
Re: Taillight Conversion from 1157 to 3157 bulb with Photos
Posted: Sun Apr 17, 2016 6:51 am
by 243
I did not use epoxy, it's a press fit and tight.
Re: Taillight Conversion from 1157 to 3157 bulb with Photos
Posted: Sun Apr 17, 2016 7:56 am
by SemperFIGuy
Any idea what years this will work for, very nice write up, thanks.
Sent from my SM-T230NU using Tapatalk
Re: Taillight Conversion from 1157 to 3157 bulb with Photos
Posted: Sun Apr 17, 2016 1:28 pm
by Tatsadasayago
Thanks for sharing. That's a great idea since most of our bulb sockets are worn out or corroded.
Added to my To-Do list.
Re: Taillight Conversion from 1157 to 3157 bulb with Photos
Posted: Sun Apr 17, 2016 5:49 pm
by 67GMC
From the specs for both 1157 and 3157, the candle power and power consumption are the same (just the bases are different). I think you're just getting better contact with the socket and that's making it appear brighter.
Re: Taillight Conversion from 1157 to 3157 bulb with Photos
Posted: Sun Apr 17, 2016 7:37 pm
by 68glad
Thanks for taking the time to writeup.

Re: Taillight Conversion from 1157 to 3157 bulb with Photos
Posted: Sun Apr 17, 2016 11:34 pm
by Nikkormat
Awesome! I was looking at swapping to Grand Wagoneer tail lights or LED bulbs for better visibility in bad weather. But this is way more slick!
Re: Taillight Conversion from 1157 to 3157 bulb with Photos
Posted: Sun Apr 17, 2016 11:35 pm
by Nikkormat
Now I've got to ask, how did you do the LED lisence plate bulb?
Re: Taillight Conversion from 1157 to 3157 bulb with Photos
Posted: Mon Apr 18, 2016 4:04 am
by 243
I used this part from O'Reilly and added a bracket to make it fit in the opening. If I recall, the bulb burned out on the original part and I either broke it or the bulb was not replaceable.

67GMC wrote:From the specs for both 1157 and 3157, the candle power and power consumption are the same (just the bases are different). I think you're just getting better contact with the socket and that's making it appear brighter.
I agree.
Re: Taillight Conversion from 1157 to 3157 bulb with Photos
Posted: Mon May 02, 2016 1:52 pm
by madkarl
Think this would work for the front turn signals as well? I want to try it on my 66.
Sent from my iPhone using Tapatalk
Re: Taillight Conversion from 1157 to 3157 bulb with Photos
Posted: Mon May 02, 2016 5:48 pm
by 243
There are similar sockets for 3156 bulbs, it may be possible to use the socket I bought at OReilly for the 1156.

Re: Taillight Conversion from 1157 to 3157 bulb with Photos
Posted: Mon May 02, 2016 8:56 pm
by FSJ Guy
I have not been impressed with those "can"/"tower" style LED conversion lights. They're bright when you stare at them in your garage, but once in full sunlight you can hardly tell that your tail lights are on.
Re: Taillight Conversion from 1157 to 3157 bulb with Photos
Posted: Tue May 03, 2016 8:36 pm
by 243
I didn't install LED's, that picture is to illustrate the 3156 and 3157 contacts.
Re: Taillight Conversion from 1157 to 3157 bulb with Photos
Posted: Wed Feb 28, 2018 9:24 pm
by ferrum
I'm having issues with my driver side tail light. I'm thinking issue is probably similar to yours. Mine happens more often in the winter time. I'm planning on doing what you have done to resolve my issue once weather warms up. I just have one question, how is it holding up?
Re: Taillight Conversion from 1157 to 3157 bulb with Photos
Posted: Sun May 16, 2021 4:28 pm
by CadChris
I found this thread looking to do the exact opposite for my Caddy that uses a 3057 and wanting to see if there were any sockets to convert to 1157.
However, here's what I'd like to contribute. There is no need to do this conversion as it would also throw-off the geometry of the filiments that were precisely designed for the OEM buckets and optics.
To get the best highest output 1157, it is well known by the lighting engineer experts on the Candlepowerforums to use a genuine Honda 3457 bulb that uses the same base as the 1157. Only buy a genuine "HONDA 34906-SL0-A01", that has the silver nickle plated base and NOT the brass base bulb relabeled by other mfgs like Sylvania, ect. It has been said that some HONDA dealers were passing off these cheaper bulbs for the factor HONDA/Stanley bulbs.
The genuine HONDA bulb will say STANLEY on it.
You can do an internet search to read many threads about this bulb including the expert opinion in many threads of Daniel Stern Lighting who is a automotive lighting consultant or go over the Candlepowerforums to see many threads about this Honda bulb.
The HONDA bulb is a specialty bulb made by STANLEY Electric of Japan for Honda and I guess it has a lot of engineering behind it and precision wound filaments with a faster-rise-time, brighter, and Krypton gas filled to lessen darkening on the glass capsule, and also has a longer life.
For example;
1157 = 32/3cp (Candlepower)
2357 = 40/3cp
3496 = 43/3cp Genuine HONDA 34906-SL0-A01
You can buy this Honda bulb on-line at Honda dealers, e-bay, Amazon from about $4-$9 per bulb depending on what deal you find.....
As mentioned by another poster, the 1157 and 3157 both have the same output. Only a 3457 wedge bulb has a higher output at 40/3cp.
The experts lighting engineers on the Candlepower forums' automotive section always advocate doing a voltage drop at each socket to be sure you're getting a full 14V+/- to each socket, and to clean each socket in addition even running a 10awg ground from the battery to the grouding point in the rear of the car where the rear-lights are grounded. They also advocate using spray-can chrome (not shiny mirror chrome) but diffuse shinny finish in the rear buckets or send them out to get vapor deposited aluminum refinishing. You can find a tech article on Daniel Stern Lighting on doing a voltage-drop.
I had read once that Daniel Stern a.k.a "SLANTSIXDAN" had mentioned on a forum to use flat-white ceiling paint that has the correct chemistry / reflective properties for refinishing the reflectors. Even the guys on THE HAMB / Jalopy Journal did a write-up on reflector bucket refinishing using flat white spray-paint with photos vs. mirror aluminum tape, chrome finish, or silver chrome-like spray paint..... What is needed is a diffuse reflective surface, NOT a mirror surface which will create "hot-spots" mirroring from the filament.
The best way to evaluate this upgrade is to back-up against a white wall at about 10' +/- to judge the projection pattern on the wall and brightness when comparing bulbs.
Hope this helps, and post up pics if you decide to do this Honda bulb upgrade.
The only LED bulb that has a slim chance of working is the Sylvania ZEVO 1157Red bulb, but your reflectors are very wide and the ZEVO's have a narrow beam-source.
Re: Taillight Conversion from 1157 to 3157 bulb with Photos
Posted: Sun May 16, 2021 4:37 pm
by CadChris
I found this thread looking to do the exact opposite for my Caddy that uses a 3057 and wanting to see if there were any sockets to convert to 1157.
However, here's what I'd like to contribute. There is no need to do this conversion as it would also throw-off the geometry of the filiments that were precisely designed for the OEM buckets and optics.
To get the best highest output 1157, it is well known by the lighting engineer experts on the Candlepowerforums to use a genuine Honda 3457 bulb that uses the same base as the 1157. Only buy a genuine "HONDA 34906-SL0-A01", that has the silver nickle plated base and NOT the brass base bulb relabeled by other mfgs like Sylvania, ect. It has been said that some HONDA dealers were passing off these cheaper bulbs for the factor HONDA/Stanley bulbs.
The genuine HONDA bulb will say STANLEY on it.
You can do an internet search to read many threads about this bulb including the expert opinion in many threads of Daniel Stern Lighting who is a automotive lighting consultant or go over the Candlepowerforums to see many threads about this Honda bulb.
The HONDA bulb is a specialty bulb made by STANLEY Electric of Japan for Honda and I guess it has a lot of engineering behind it and precision wound filaments with a faster-rise-time, brighter, and Krypton gas filled to lessen darkening on the glass capsule, and also has a longer life.
For example;
1157 = 32/3cp (Candlepower)
2357 = 40/3cp
3496 = 43/3cp Genuine HONDA 34906-SL0-A01
You can buy this Honda bulb on-line at Honda dealers, e-bay, Amazon from about $4-$9 per bulb depending on what deal you find.....
As mentioned by another poster, the 1157 and 3157 both have the same output. Only a 3457 wedge bulb has a higher output at 40/3cp.
The experts lighting engineers on the Candlepower forums' automotive section always advocate doing a voltage drop at each socket to be sure you're getting a full 14V+/- to each socket, and to clean each socket in addition even running a 10awg ground from the battery to the grounding point in the rear of the car where the rear-lights are grounded. They also advocate using spray-can chrome (not shiny mirror chrome) but diffuse shinny finish in the rear buckets or send them out to get vapor deposited aluminum refinishing. You can find a tech article on Daniel Stern Lighting on doing a voltage-drop.
I had read once that Daniel Stern a.k.a "SLANTSIXDAN" had mentioned on a forum to use flat-white ceiling paint that has the correct chemistry / reflective properties for refinishing the reflectors. Even the guys on THE HAMB / Jalopy Journal did a write-up on reflector bucket refinishing using flat white spray-paint with photos vs. mirror aluminum tape, chrome finish, or silver chrome-like spray paint..... What is needed is a diffuse reflective surface, NOT a mirror surface which will create "hot-spots" mirroring from the filament.
The best way to evaluate this upgrade is to back-up against a white wall at about 10' +/- to judge the projection pattern on the wall and brightness when comparing bulbs.
Hope this helps, and post up pics if you decide to do this Honda bulb upgrade.
The only LED bulb that has a slim chance of working is the Sylvania ZEVO 1157Red bulb. These reflectors are very wide and elongated so the Sylvania LED ZEVO's project a narrow beam and the LED will need positioned top-to-bottom (vertically) facing the parabolic reflector, and not side-to-side. There is a STICKY on the Candlepowerforum on how to judge an LED bulb retrofit at viewing from all angles 20' behind the vehicle vs. an incandescent bulb......