Howdy y'all!
Well again time slips by. Until a few weeks ago anyway. Progress continues...last I left off we just finished the Lizard Skin inside. That came out better than I thought. The tin can sound is just about gone. I'll put a layer of foam on the roof, that and carpet should keep the interior pretty quiet.
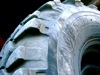
Next up is Raptor lining the under carriage. I decided to go with tinted Raptor liner. The first application didn't look right. The color was too dark and it turned out the paint color was off. So after a bit of back and forth with the paint shop, I found the color I was looking for. However, what this means is I had to rough up the Raptor liner so we can shoot another coat. I spent almost two weeks, two or three hours a day sanding. At first I used Scotchbrite pads but that was taking way too long and I was burning through a six pack quick. I needed another plan. Since us Texans like to BBQ and keep the grill clean, I had some BBQ grill pads and thought these would work better. And they did. They are far rougher and tough enough to last longer. I went through 6 pads for the entire underside of the Jeep including the wheel wells. Here's the final results.

You can see why it took so long, there's a lot of surface to sand.

The color in the pictures looks a lot darker than it is.


Putting final touches on. BTW, definitely use a respirator with this stuff. Here we are doing touch up so shooting just small amounts.

This is a little closer to the actual color.

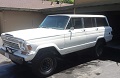
With this done, we dropped the body on the frame. Hopefully for the last time.
Next up was to paint the firewall. I don't have any good picts but the next set you'll see the color.
Now that the firewall is done, the remaining body parts were installed to check alignment and for some final body work. We kept the hood off for now as we are going to experiment with Raptor lining the under side. So far we've had good luck with it.
To answer CU4WHLN's question, While we were putting the body panels back on, I was working on the front of the engine. First off, I had to remove the vacuum pump on the lower drivers side to make room for steering linkage.
Second off, since L83 motors do not have power steering pumps, I had to source one. There are a number of shops building p/s pump accessory mounts and in the end I went with an ICT setup since I could keep the stock a/c compressor in stock position. It did move the alternator up higher but close to the same location. No changes to the water pump needed.

Here's a close up. The aluminum brackets are from ICT. The p/s pump I used is from a Corvette. If you need part numbers, email me or get them off the ICT website.
Now, one thing you'll need to know, I'm going to install a Vintage Air setup. I had most of the holes on the passenger side firewall welded up. I will be installing a battery box and moving the battery to that location. I plan on installing an air box in the stock battery location. The p/s pump pulley, which isn't installed yet, will hit the stock battery mount bracket. It doesn't interfere much and you could modify to make room, but there will be clearance issues.

The final body work in progress.


Before...

After...

Got the tailgate hung with rebuilt hinges with stainless steel pins and brass bushings. (BJ's kit and I highly recommend it. Tailgate operated smooth!)
However, once we had it back on the body, you could see where the middle of the tailgate was pushed in so more work needed.


If you're wondering about the paint color. It's a Dodge blue but was customized to have a little bit of gray. The roof will be an off white and windows blacked out. The fender flares will be blue as well but, depending on how the hood turns out with the Raptor liner, the flares and lower body line will be sprayed body colored Raptor liner.